

Launch!! The Incomplete Ultimate Weapon!

Perhaps feeling the pressure from Good Smile Company's mini combining and transforming figure, Bandai has also released a model kit in their Shokugan Modeling Project (SMP) line to commemorate the 37th anniversary of Hideaki Anno's debut work, the OVA "Aim for the Top!". Let's unbox it and get building!

▼The box uses a thicker grade of cardboard. The back showcases the figure's signature feature: a transformation that requires no parts-swapping. However, in the bottom right corner, you'll notice the sparse selection of included hand parts. Bandai has packed all the other hands and crucial accessories for recreating famous anime scenes into the separately sold GunBuster Option Parts Set. Ah, classic Bandai, just as we expected~

▼Opening the box, the first thing that catches your eye is the inclusion of pre-painted parts on the runners. This is mainly concentrated on the head for color-accurate detail, and the inner rib cage for the chest-buster gimmick also features a silver paint application (if only they had included a Degeneracy Reactor, that would have been perfect).

▼The orange-yellow sections of the outer armor are also painted. The dark blue parts have a smooth, reflective molded finish, and the two textures complement each other well without a noticeable difference in quality.

▼The inner frame's mechanical details are molded in a color with a metallic sheen, giving it a high-quality texture that deserves praise.

▼Alright, let's follow the manual and assemble Buster Machine 1 and Buster Machine 2!

▼Piloted by Noriko Takaya, Buster Machine 1 has a solid, hefty feel to it.

▼Stickers are only used for color correction on the tail fin and a few other yellow areas. However, there's a slight color difference when compared to the yellow molded parts.

▼The tail fin secures the two thrusters on the back, making the structure very tight and preventing any wobbling.

▼Next up is Buster Machine 2, piloted by "Onee-sama" Kazumi Amano.

▼It comes with retractable landing gear.

▼There are also small wheels on both sides that can be deployed.

▼Note the position of the two rear thrusters. This is important, remember it—it'll be on the test later.

▼Turning to the underbelly, the prominent red lines here are color-correcting stickers.

▼And now, for the main event: Combination!!

(For best results, please play the soundtrack while reading.)
▼I'll form the head! Following the manual, first, open the nose of Buster Machine 1 to reveal GunBuster's smaller head.

▼The locking tab inside can be retracted.

▼The fuselage cover flips up, and the arms can be folded upwards accordingly.

▼Then, fold it sequentially to compress its volume.

▼Flip the entire folded section, along with the waist, upwards to tuck it perfectly into the chest cavity.

▼The large armor piece that was originally facing forward is flipped 180 degrees to the back, where it can be secured by connecting to the circular peg hole shown in the previous image.

▼Unfold the four petal-like armor plates on the arms, which allows you to swap the fists with the thrusters. The pre-molded holes inside are, of course, for attaching the spikes for the Double Buster Collider attack!~

▼The awesome head is also transformed at this stage.

▼Compared to the Good Smile Company version, which is limited by its smaller scale, this Bandai kit has more room to shine in terms of detail reproduction.

▼Next up, let's bring on Buster Machine 2.

▼Attention! Here's the key part! The previously mentioned thrusters are designed to slide left and right, allowing them to be brought together in the middle. The small peg hole also serves a locking function.
▼With the upper half folded, let's move on to the legs.

▼Lift the four armor panels and pull the entire lower leg down to reveal the thigh. Compared to the overly slender proportions of the Soul of Chogokin version, the SMP's silhouette is more balanced. There's also a locking tab to secure the thigh and prevent it from sliding down.

▼Moving to the feet, the original nosecone needs to be shifted backward.

▼Next, flip out the front part of the foot and rotate the entire foot assembly to face the ground.

▼Finally, fold the nosecone underneath and clip it to the heel. The lower body transformation is now complete.

▼Adjustments complete, ready for docking.

▼I understand... Noriko, let's combine! (That sounds a little weird...)
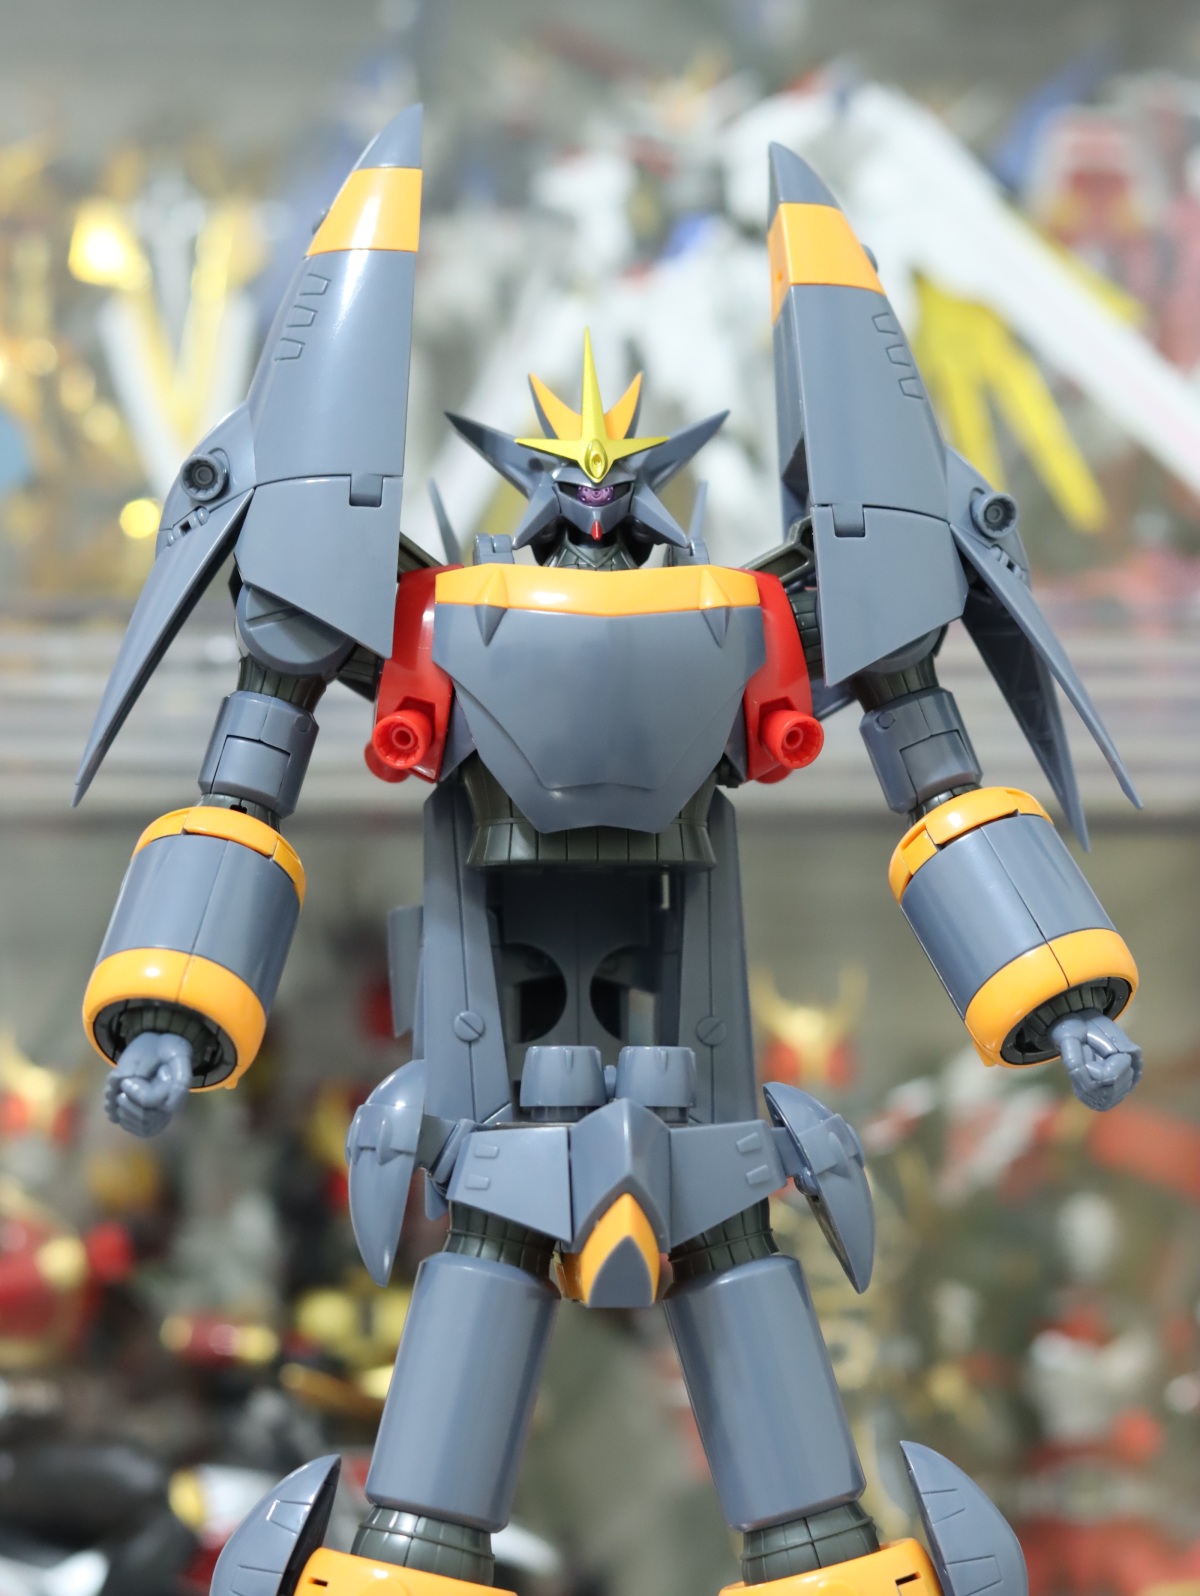
▼Coach Ohta's 240-meter-tall, superluminal giant machine weapon! In this shokugan scale, it stands at an impressive height of about 23 cm. Compared to an RG Gundam, its overall volume is closer to larger kits like the MG Unicorn.

▼This SMP GunBuster doesn't feature the excessive modern redesign elements seen in previous versions like the one by Toshihisa Miyauchi (AD). Instead, it sticks to a faithful, classic route, perfectly capturing the essence of an 80s robot.

▼Removing the chest armor reveals the nicely painted inner rib details. However, the numerous peg holes are quite an eyesore. It's a mystery why the locking tabs weren't designed on the sides instead.

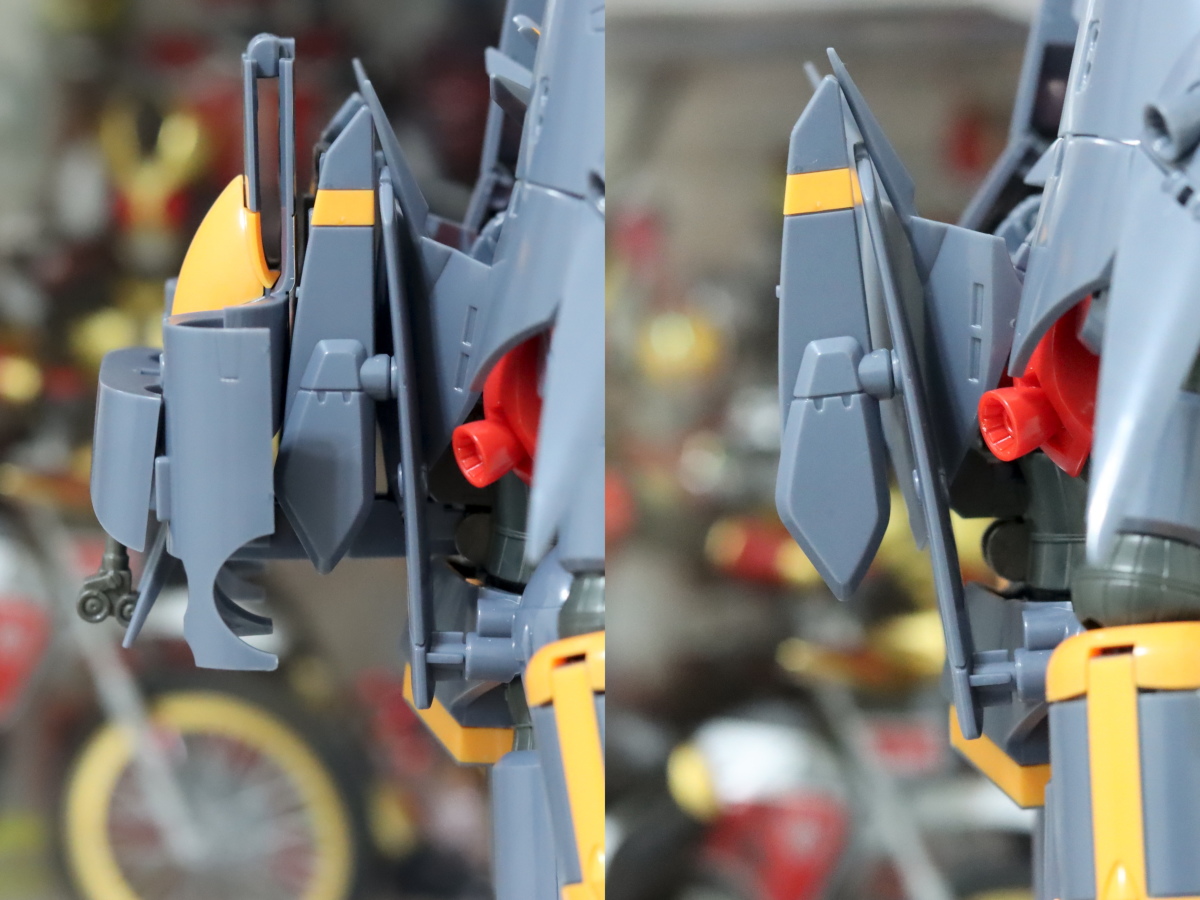
▼Turning to the back, although it's advertised as a transformation experience with no swapping or leftover parts, the actual execution simply involves cramming all the unused fuselage parts onto the back, creating a very cumbersome backpack (and you have to pay for the option parts set to get a smaller backpack, I'm gonna faint).

▼However, you can actually just unclip the C-clip connecting it to the back to remove the backpack, resulting in a much cleaner and sleeker appearance.

▼Here's a side-by-side comparison (before/after). The backpack's thickness is significantly reduced.
▼The other part that needs swapping is the hands.

▼Let's do another comparison (before/after). The small fists, designed for transformation storage, need to be swapped out for larger, more proportionally correct ones.
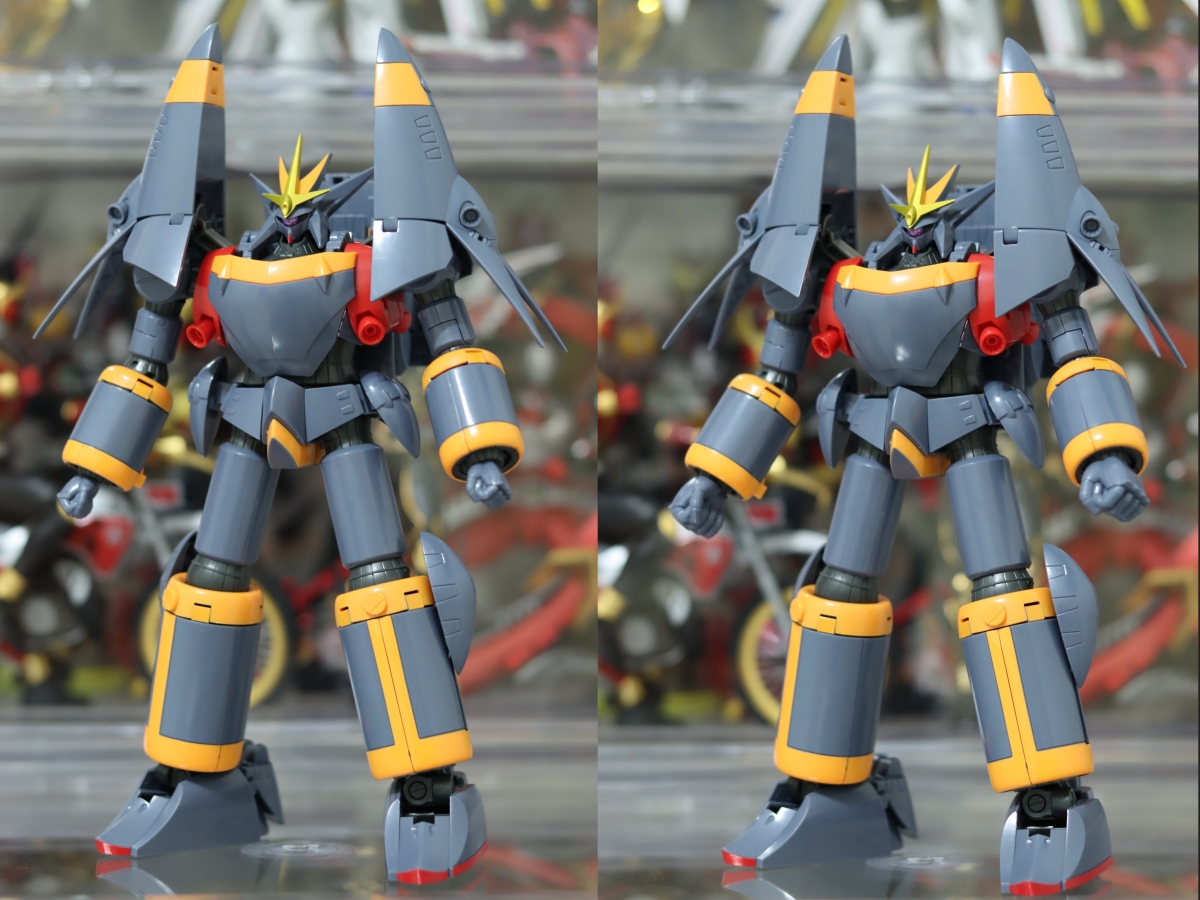
▼The arm has a double-jointed elbow, and a clearance panel on the upper arm allows it to bend beyond 90 degrees.

▼However, the hollow gap exposed when bent is a bit of a letdown.

▼In contrast, the legs perform much better in terms of both appearance and articulation.

▼Aside from the slightly distracting seam lines on the joints, there's really not much else to criticize.

▼It just doesn't come with a display stand (of course it does! In the option parts set), which makes balancing it for poses quite tiring.

▼The ankle joints also allow for an excellent range of motion, enabling the feet to stay flat on the ground.

▼As for the classic "GAINAX Pose" with arms crossed, the necessary replacement parts are, you guessed it, in the option parts set.

▼To briefly summarize this SMP GunBuster: the transformation and play experience are top-notch. However, gutting the release of so many accessories and stuffing them into a P-Bandai exclusive option parts set—at a price that could almost buy another main unit—is a tough pill to swallow. Honestly, for a similar budget, you might as well consider picking up the recently re-released Aoshima version, which includes the Degeneracy Reactor. You could have the Bandai one for its transformation and the Aoshima one to display with all its accessories and inner mechanics. A double dose of enjoyment—why not?
