
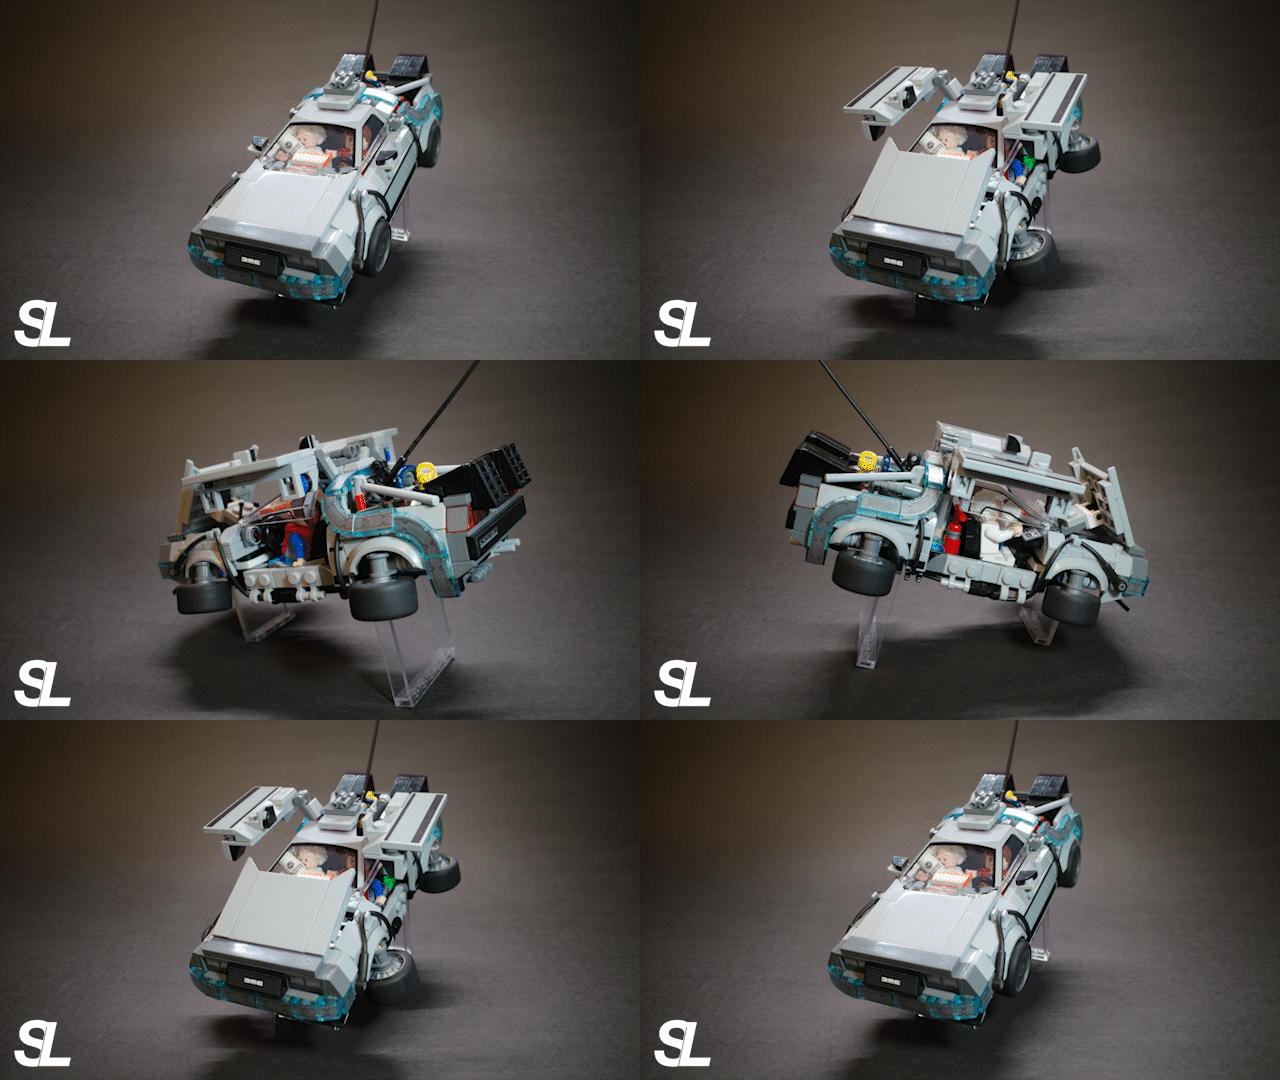

Fig. 1. The Time Machine in hover mode
00. Incredible Value 8-Stud Car
LEGO 77256 "Back to the Future Time Machine" can truly be called a product full of sincerity. The affordable price of the Speed Champions 8-stud wide car, two brand-new minifigures, plus printed elements like the license plate, time display dashboard, and Mr. Fusion, along with the ability to freely switch between Part 1 and Part 2 configurations, make its value-for-money incredibly high.

Fig. 2. DeLorean with Marty and Doc
The assembly process was straightforward, but after Doc and Marty got into the car, something still felt missing from this DMC-12. Seeing the larger Time Machine set, LEGO 10300, with its various playable features, I began to ponder how to incorporate all the classic characteristics into this 8-stud wide small car without compromising its original design and proportions.
And so, ta-da! This fully functional LEGO 77256 Time Machine DeLorean (Modified) was born! Let's dive into my modification insights from the set's release until now, spanning over a month!
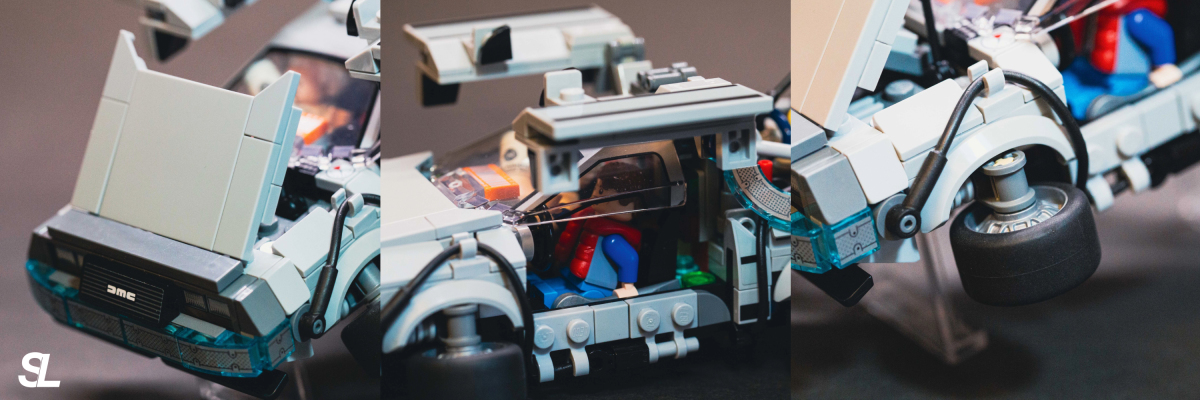
Fig. 3. Recreating three classic features: front-hinged hood, openable gull-wing doors, and a no-disassembly wheel steering mechanism
01. Openable Gull-Wing Doors
The first problem encountered when modifying the doors was that the one-piece windshield element restricted the possibility of opening them. Therefore, a compromise had to be made: keeping the windshield while separating the doors from the windows.
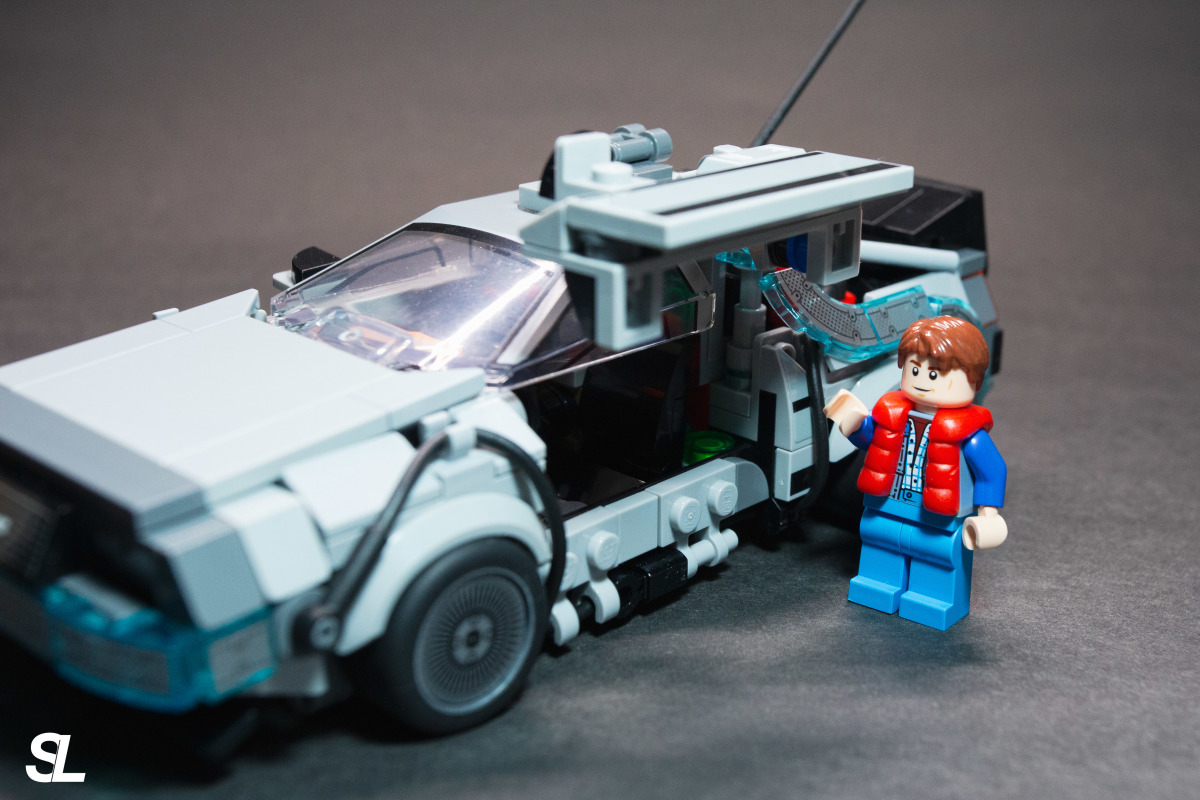
Fig. 4. Marty with the open gull-wing door
Structural Relocation: The windshield element was moved forward by one stud, creating space for the door's support structure behind it, and raised by one Plate to accommodate the upcoming slanted design of the front hood.
Smooth Door Operation: The original connecting elements inside the door were removed and replaced with smooth tiles to refine the contact surfaces, ensuring a fluid feel when opening and closing the doors.
Cable Routing Solution: The original elements that secured the black lines on the car's side were removed along with the doors. Here, clip-on elements were reconfigured along the lower edges of both sides of the chassis, allowing the lines to pass through the clips without impeding door movement.
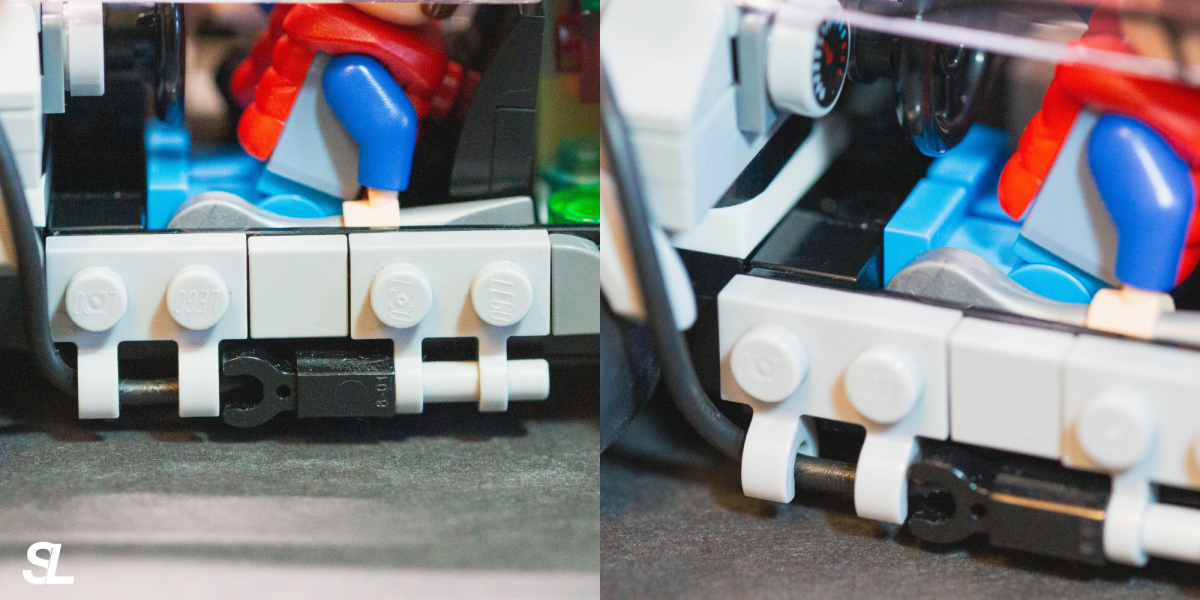
Fig. 5. Chassis side modification
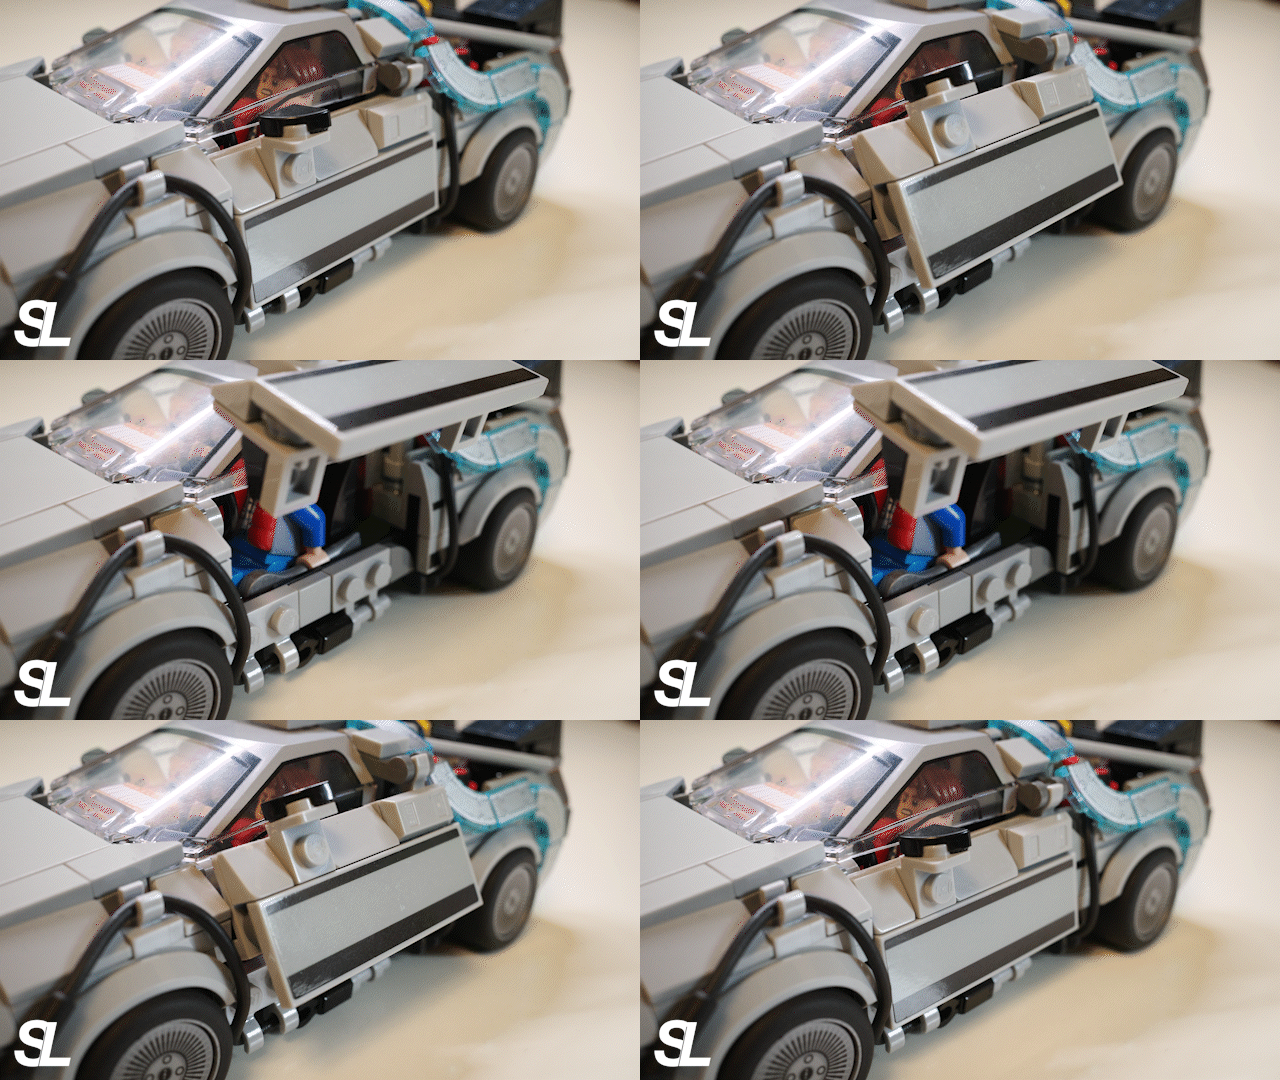
Fig. 6. Gull-wing door opening and closing
02. Non-Removable Wheel Steering Mechanism

Fig. 7. Non-removable wheel steering mechanism
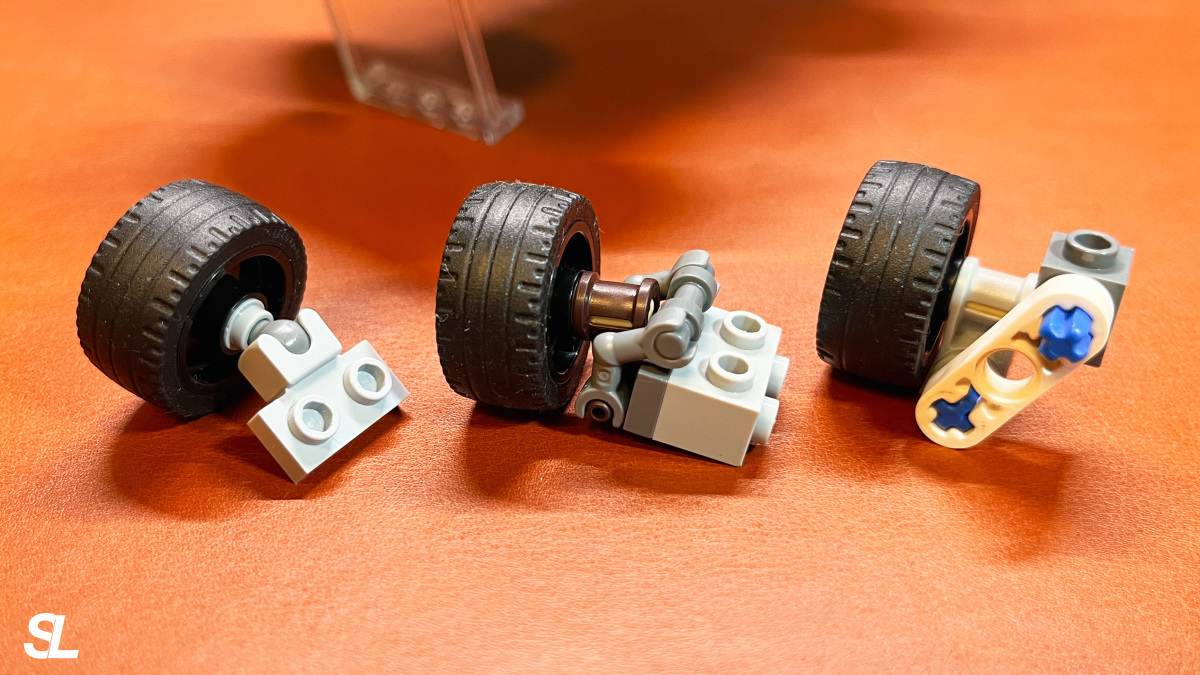
Fig. 8. Three wheel steering mechanism designs attempted sequentially from left to right
The original design requires plugging and unplugging Technic parts to switch to "hover mode," and it's genuinely painful for the fingers when doing so... After testing the first two versions and encountering issues such as "protruding tires," "insufficient part support leading to easy detachment," and "tires unable to remain perpendicular to the ground," I referenced Firefabric's MOC design logic: the rotating mechanism is hidden behind the wheel arch piece, connected to the steering parts on the axle via a Technic beam. Moreover, the wheels can perfectly retract into the wheel arches.
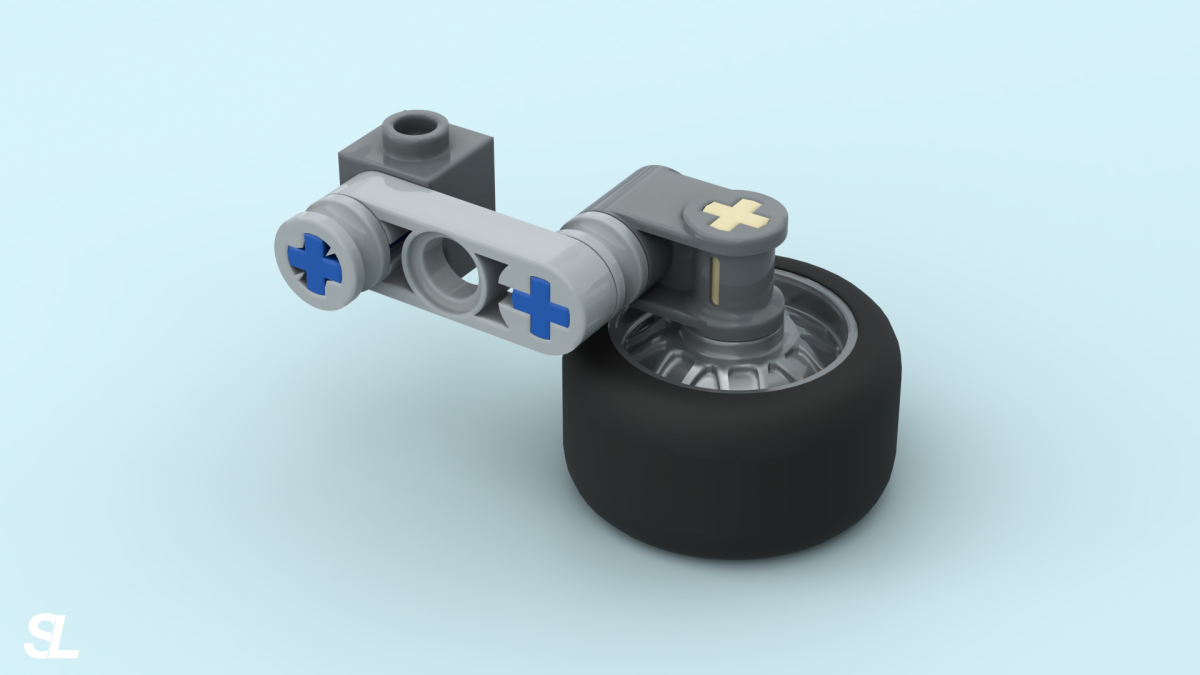
Fig. 9. Firefabric's wheel steering mechanism design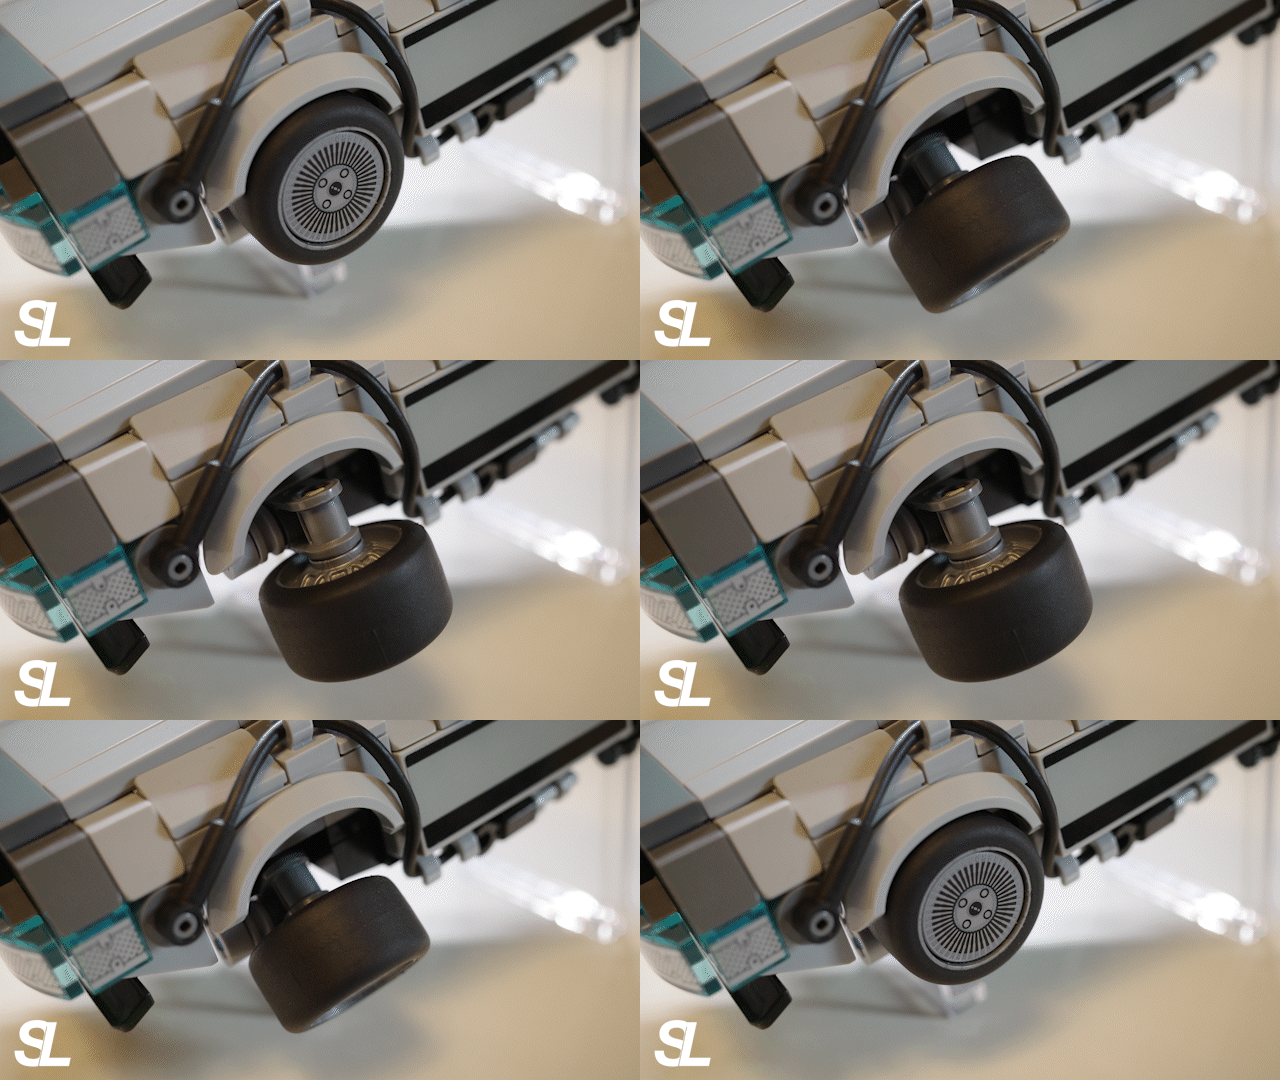
Fig. 10. Wheel steering
03. Slightly Tilted Front Hood
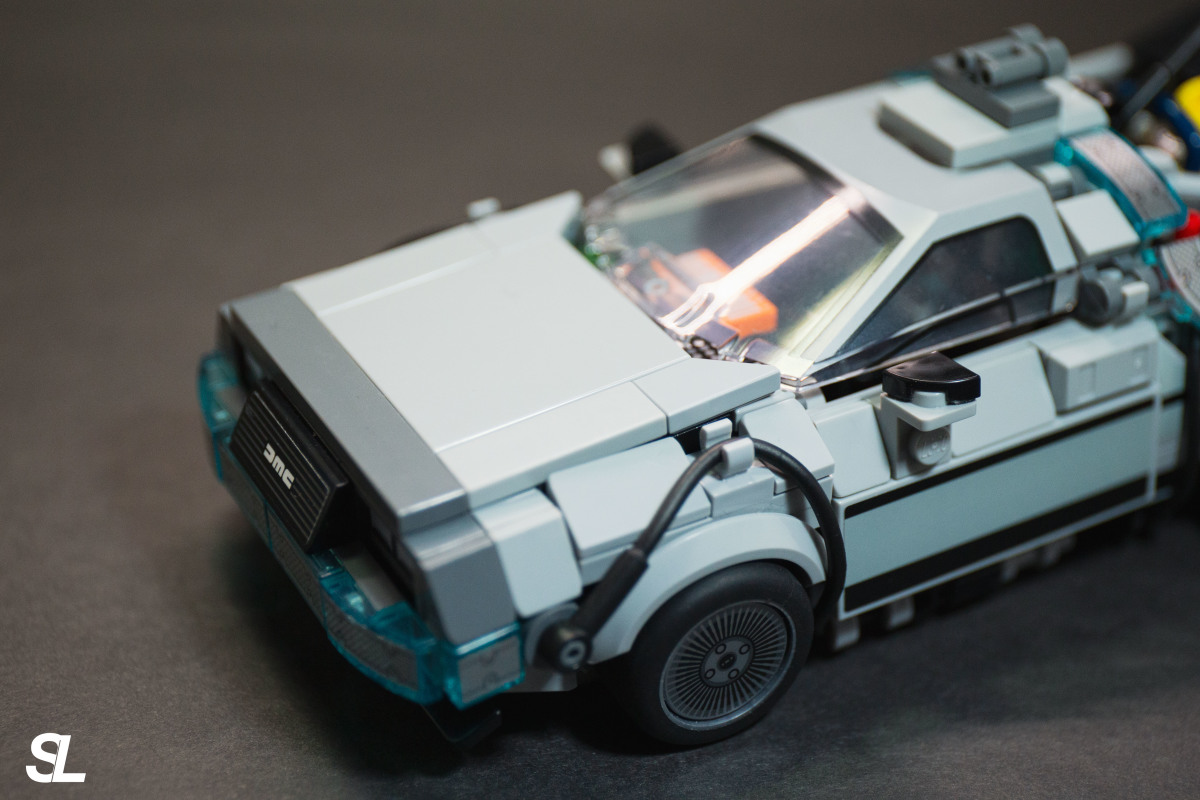
Fig. 11. Front hood tilted and four studs on the front removed
The front of the DeLorean DMC-12 actually has a slightly forward-tilted shape. To restore this feature (and also remove four studs), the internal structure of the front had to be completely rebuilt. Originally, I wanted to create a storage space like in the 10300 set to hold Marty's skateboard. However, after completion, I found that not even a banana could fit inside. (Laughs)
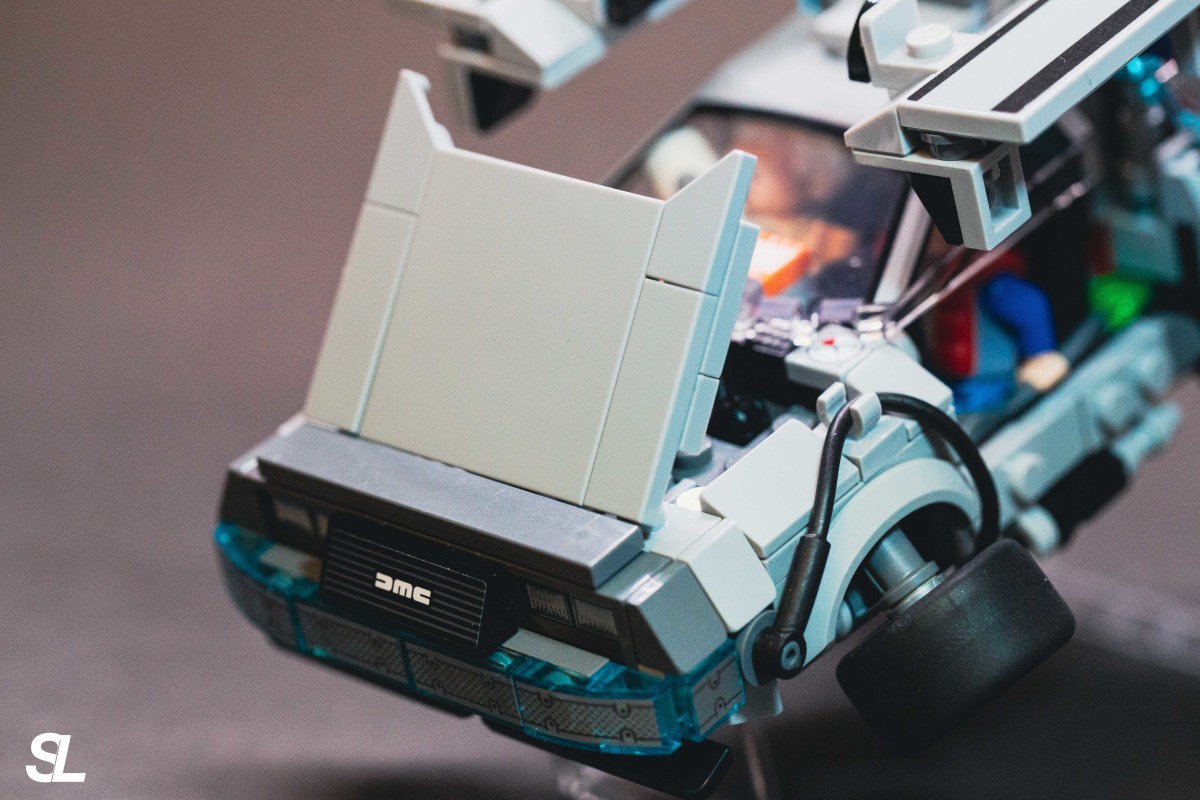
Fig. 12. Front hood open
Hidden Support Rods: Two black rocker arms are concealed within the hood. When the hood opens, they are simultaneously pulled out to act as support rods for the hood. (They look a bit like windshield wipers)

Fig. 13. Position of the two black rocker arms in front of the windshield; fold them towards the center for storage
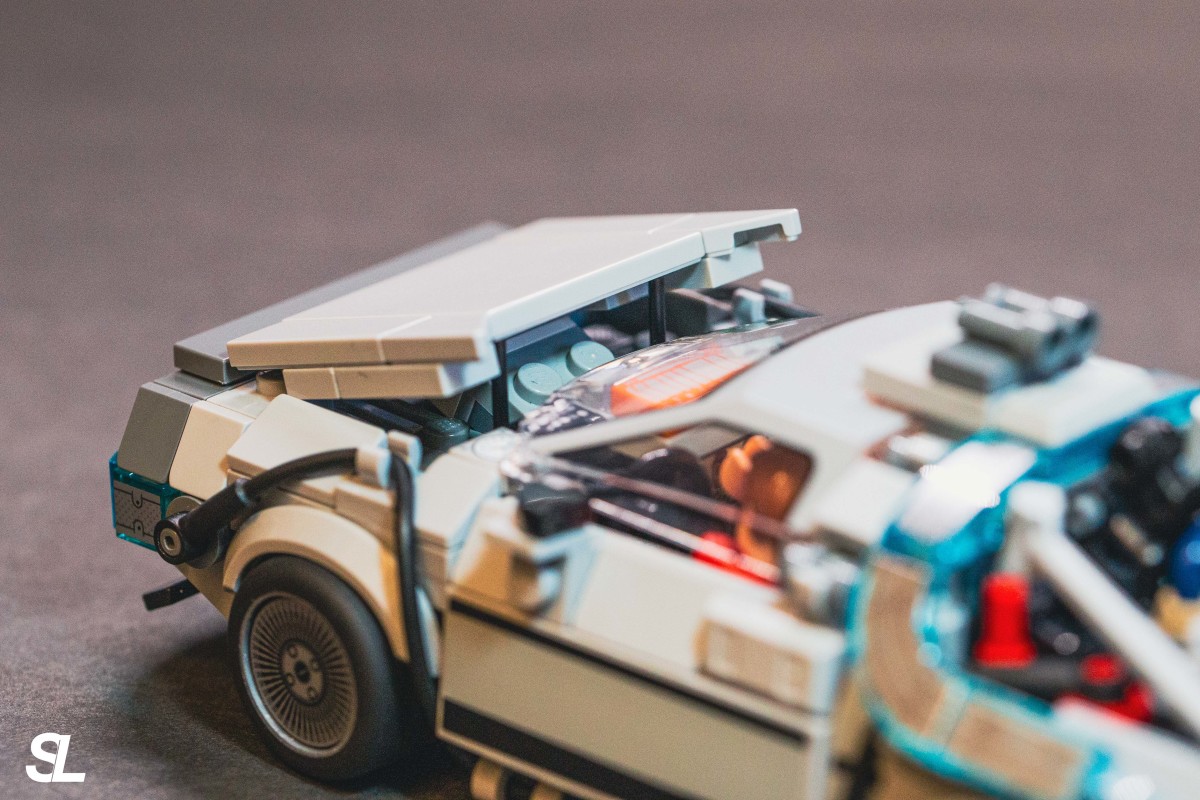
Fig. 14. Front hood support frame

Fig. 15. It would look more accurate if pulled out and moved to the front positions on both sides
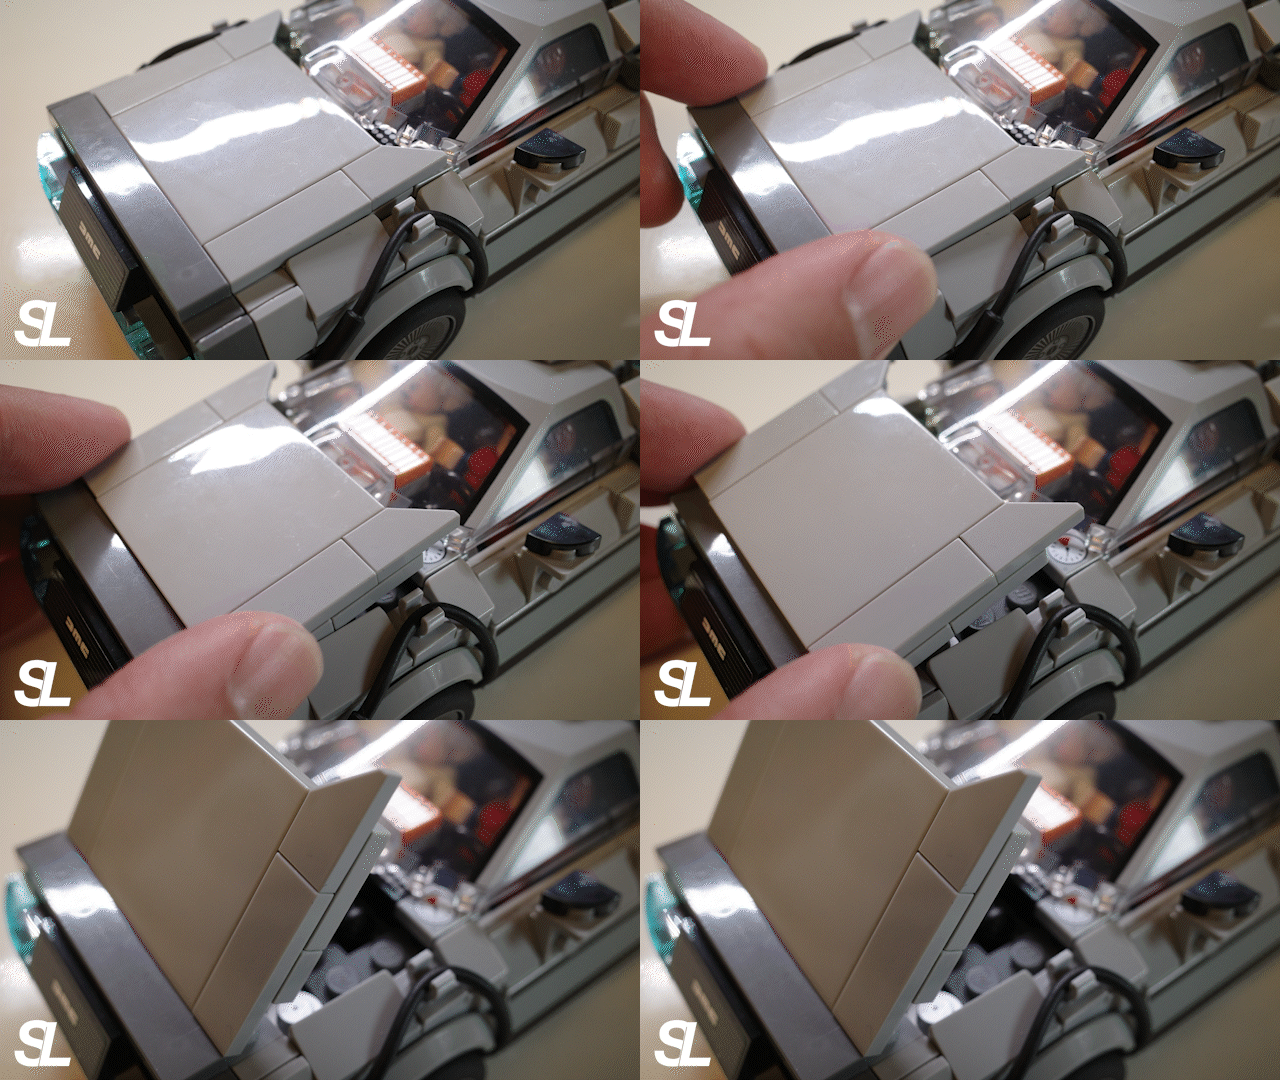
Fig. 16. To open the hood, first release the two front studs, then gently lift upwards.
04. Driver's Seat and Interior Upgrades

Fig. 17. Dashboard printed parts, with space for three 1x1 plates and one 1x2 slope brick.
Because the windshield was previously raised by one plate layer, there is more space in the dashboard area. Here, some printed parts like a speedometer and thermometer have been added to fill in details. (Just put whatever fits!)

Fig. 18. Fire Extinguisher
Then I moved the passenger seat backrest forward and placed a common "fire safety" Easter egg found in LEGO vehicles behind it—a fire extinguisher. (Marty's hoverboard from 71201 should also fit. Right?).
05. Some "Imperfections" After Modification
Slightly Lower Chassis: Due to the steering mechanism and the original front-low, rear-high body design, the chassis slightly scrapes the floor when sliding, making the pushing experience less smooth than the original factory design. 
Fig. 19. Wheel Steering Mechanism Close to the Ground
Window Gap: To accommodate the hood height, the windshield part was raised, resulting in a gap between the window and the car door. (Doc's hair is all messed up!) 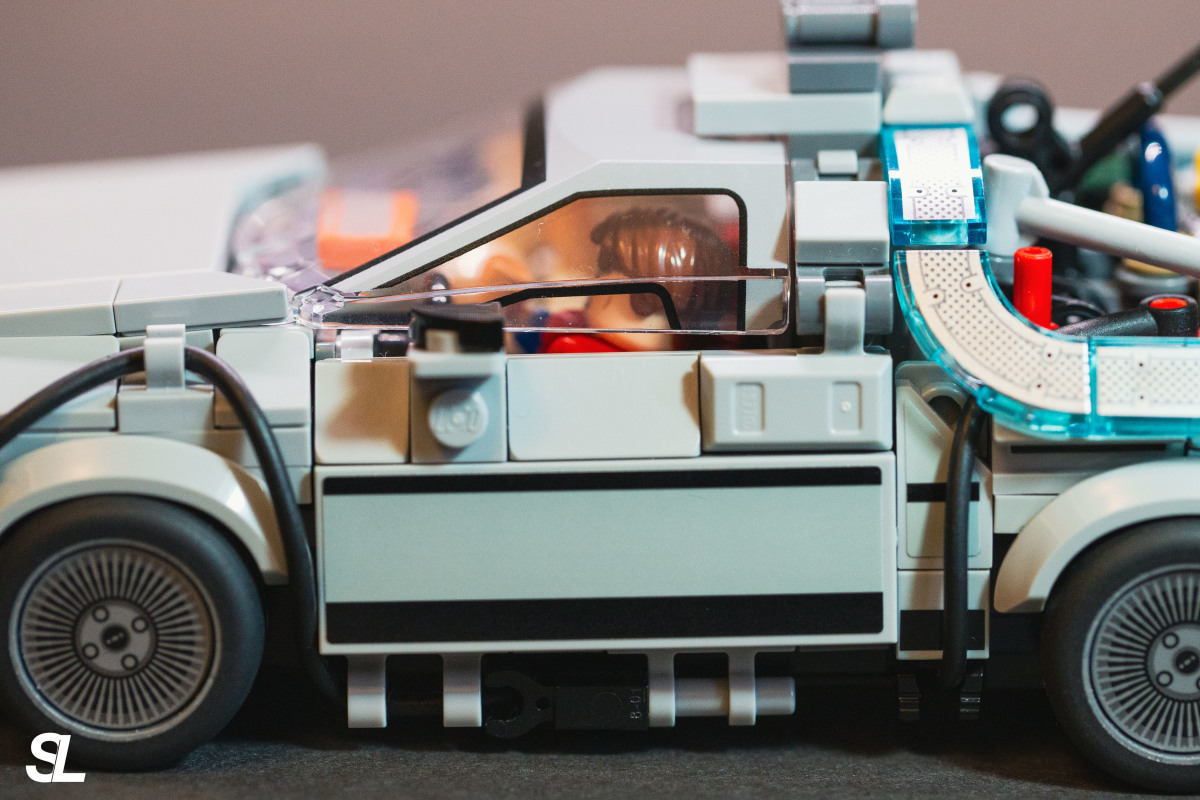
Fig. 20. Window Gap
Shorter Front End: The hood moved forward by one stud, so while the car's overall length remains unchanged, the front end appears slightly shorter visually.
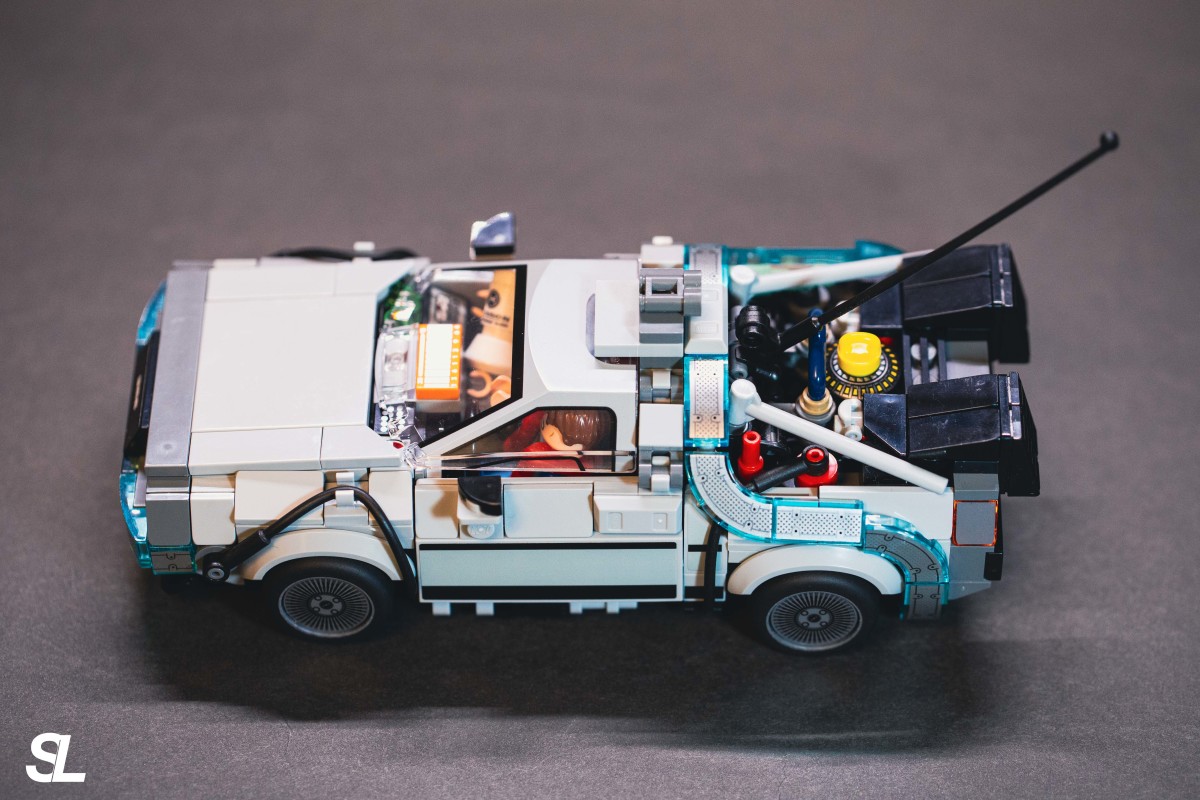
Fig. 21. Overall Vehicle Proportions
Increased Assembly Difficulty: During assembly, to fit the wheel steering mechanism into the car body, it also had to navigate around the unibody chassis. Some parts ended up suspended and had to be built up from below.
Fig. 22. All mechanisms open!! Comparable to a childhood pencil case.
06. Bonus Share: Time Jump 1885! Back to the Future III
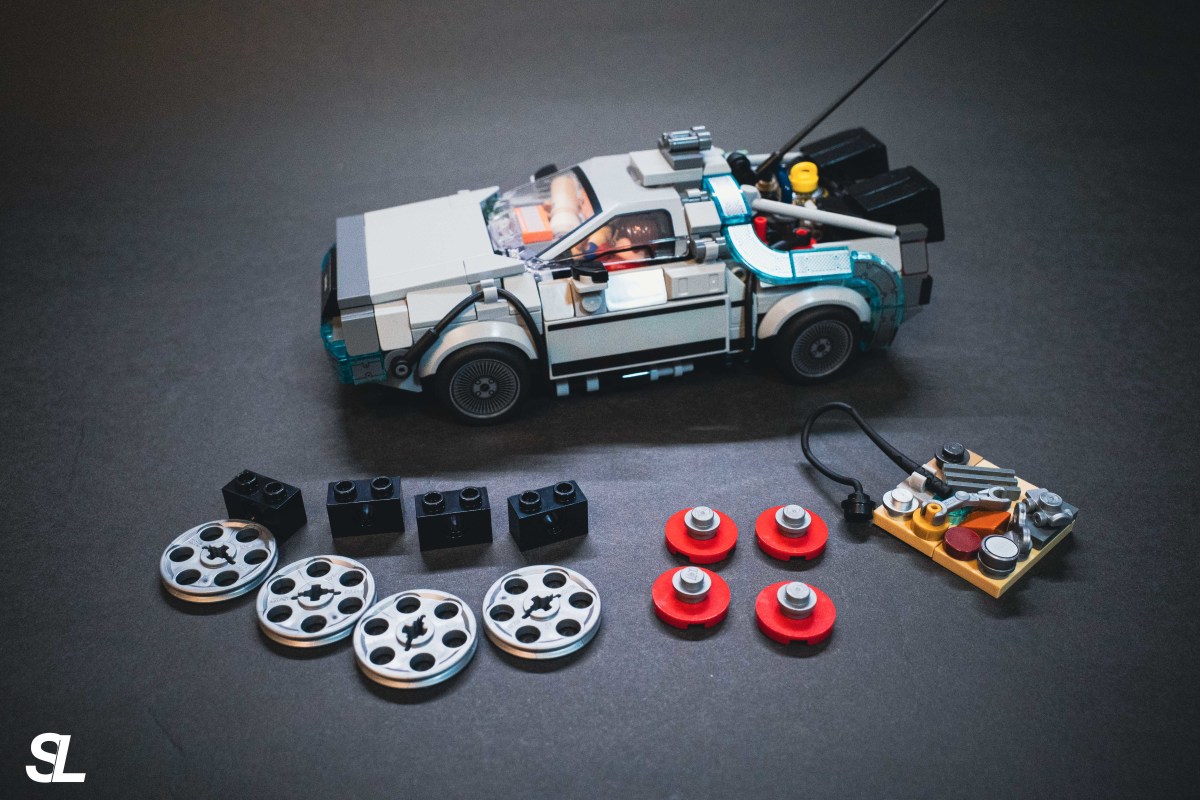
After all the body structure modifications in the previous chapters! We can use some additional parts to decorate the DeLorean into its classic appearance from the third film.
Figure 23. Two types of wheel accessories, and the device on the front hood
In the third film, the DeLorean's front trunk features a complete set of vacuum tube parts, with a black hose connecting to the interior of the cabin. Here, you can remove a black lever inside the front trunk and replace it with a round, hollow plate. This allows the hose to connect into the vehicle's body~
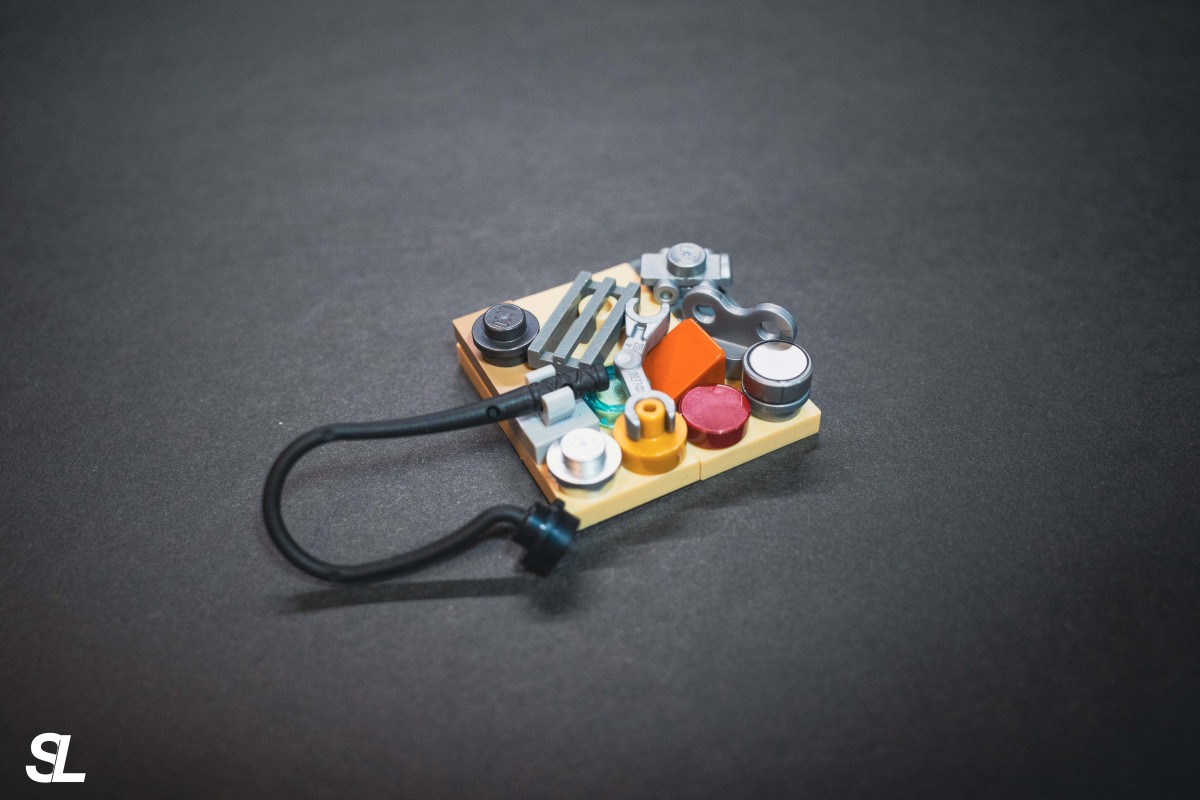
Figure 24. The device on the front hood in the third film

Figure 25. Connecting interior cabin parts
Next, we recreate the red wheel rims from the third film, as well as its appearance on the railway tracks.
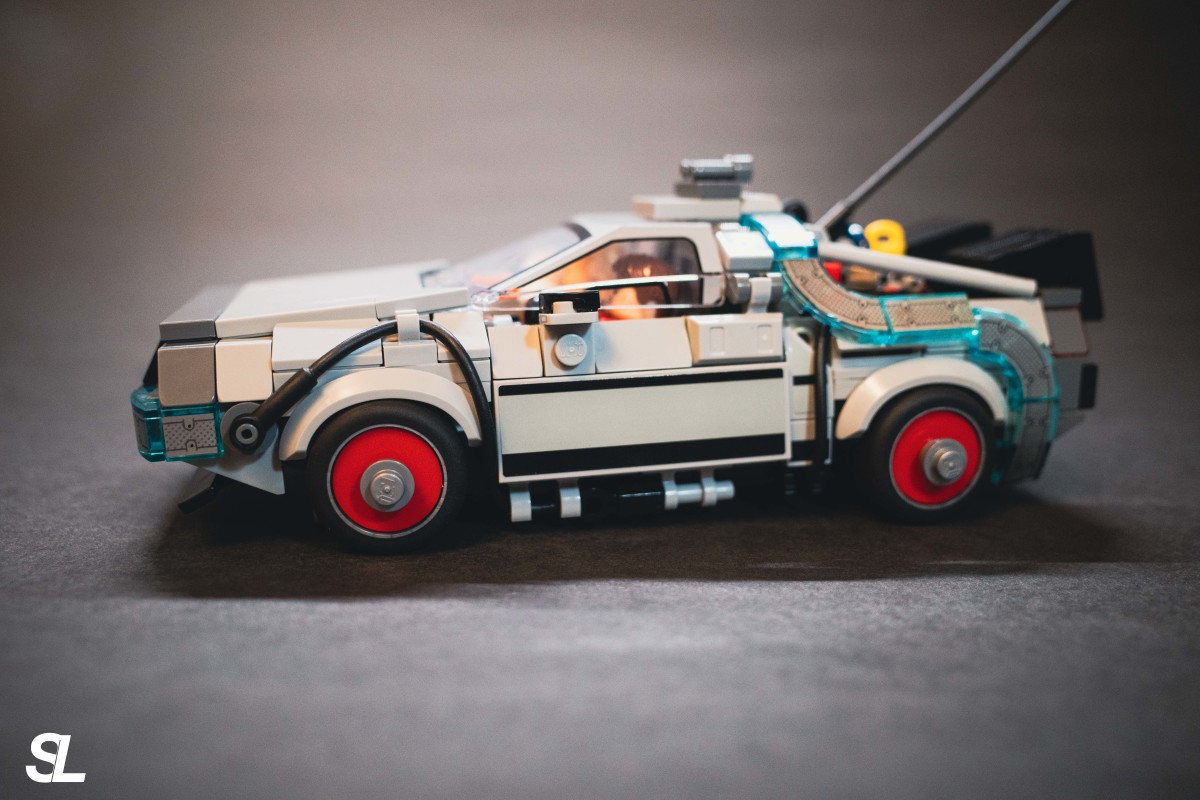
Figure 26. Replacing with red wheel accessories
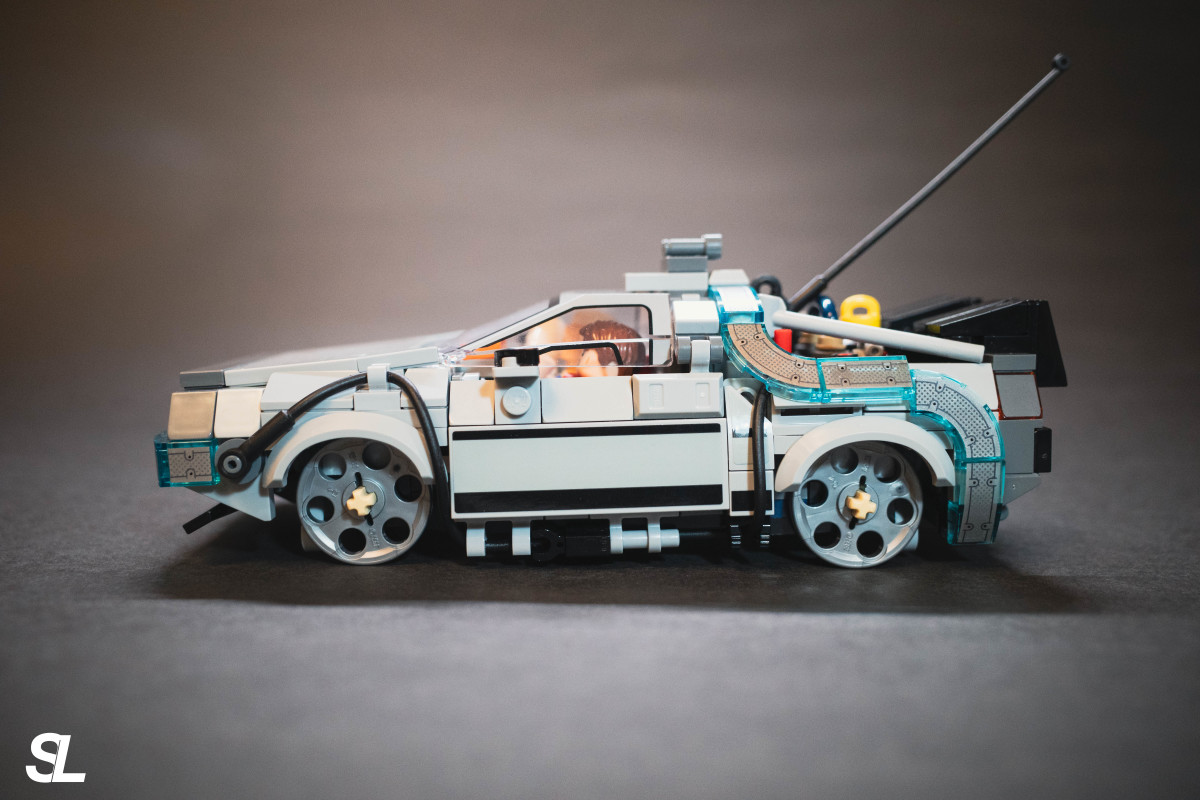
Figure 27. Appearance on the railway tracks
07. Postscript
This is my first time creating a LEGO MOC. I genuinely feel that this Back to the Future Time Machine DeLorean has brought me as much joy as any other large black box set!
If you have other modification methods, feel free to share them with me via private message~ my thread. Thank you for reading this far~ I hope you enjoy this version of 77256!

Figure 28. Back to the Future