
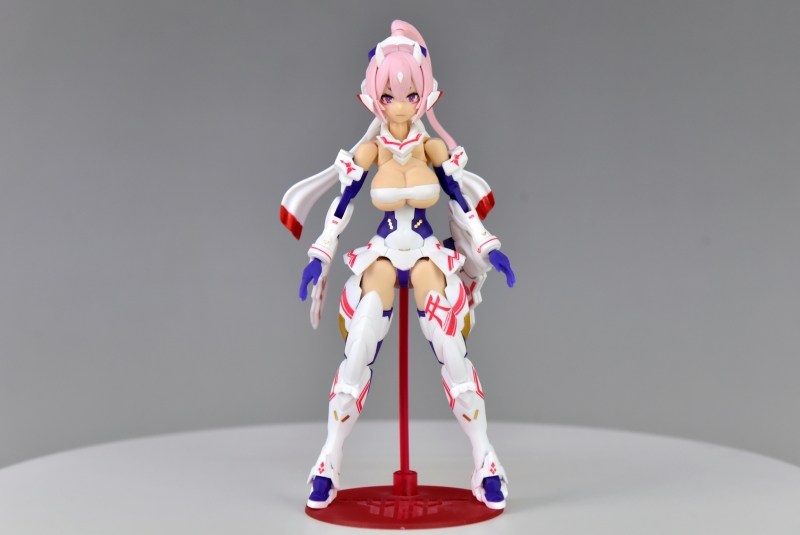


After sharing my V-Thor last time, a fellow forum member messaged me asking about building Megami Device kits. They specifically asked if a simple straight build with just panel lining and some touch-up painting would result in a high-quality finished model.
The Asra Nine-Tails I'm sharing this time was created with just a straight build, some detail painting, and a final matte top coat. Personally, I feel that for a straight build, it's highly recommended to apply the included waterslide decals. While the process is a true "decal hell," it significantly enhances the overall completeness for an unpainted build. For panel lining, I used a Gundam mechanical pencil for the entire process. After completion, I was torn between a matte or gloss top coat, but ultimately chose the matte finish.
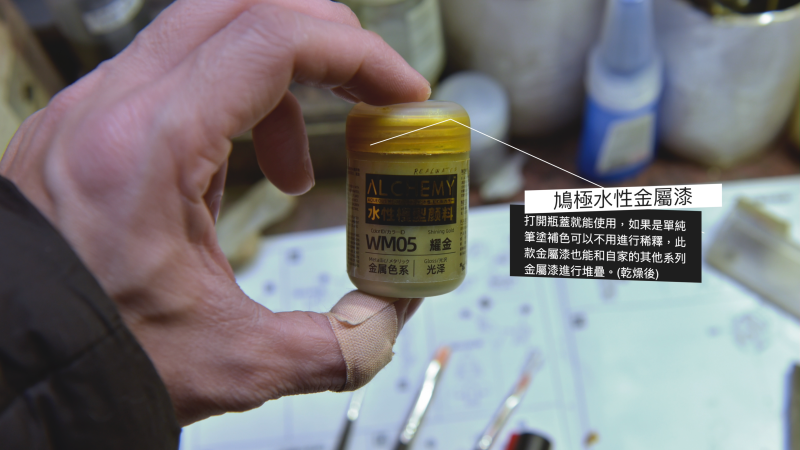
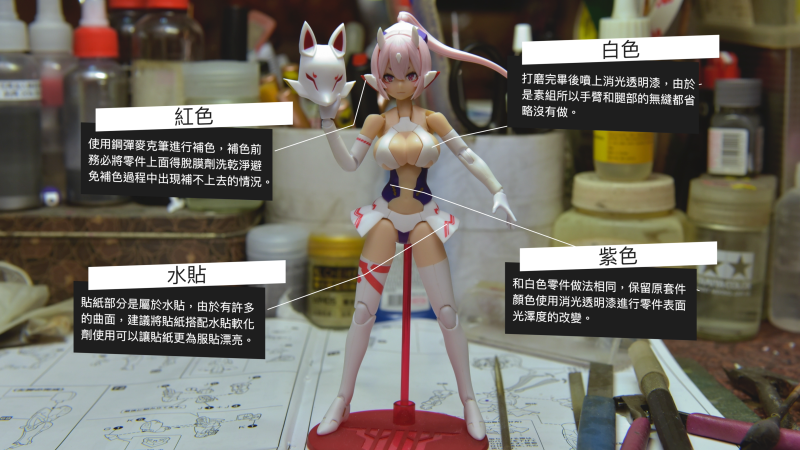
The only significant color correction I did for this build was on the frame parts and a few small red sections. This was because the original kit's gold is that infamous "poop gold" color, which I just couldn't accept. However, I didn't want to fire up the air compressor and spray gun, so I used JUKY's water-based paint for hand-brushing. The color turned out quite beautifully, and the effect is great. It can be used straight from the bottle without thinning, has strong adhesion, and you can layer it with other water-based paints from the same brand. As for the red parts, I simply used a Gundam Marker for the touch-ups.
This Megami Device Asra Nine-Tails offers many different play and display options beyond what's shown in the manual. You can even combine the main body and armor to form a flight unit mode, which she can even ride on. In short, the playability is immense. Although I didn't photograph it in the studio this time, I've included images from the color manual for everyone's reference. Oh, and by the way, many of the decals are applied to curved surfaces. I highly recommend using a decal softener; it will make your life much easier.
Below is a super-simple build process and explanation for fellow straight-builders and Megami Device fans.
▼【KOTOBUKIYA】Megami Device Asra Nine-Tails - Simple Build + Detail Painting
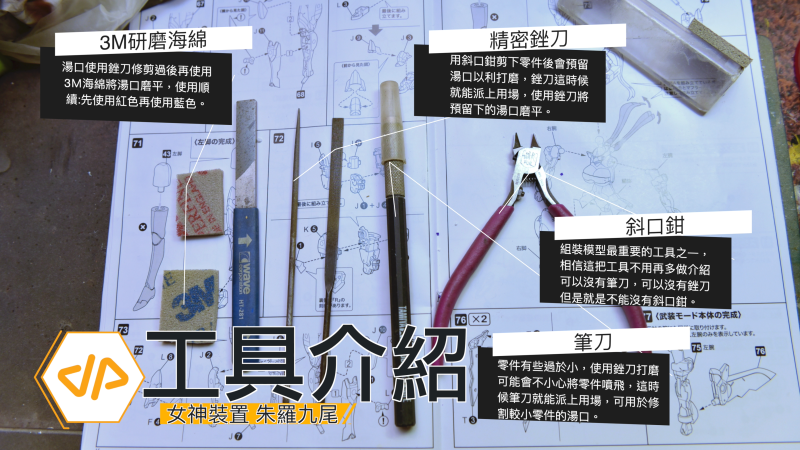
▼ The tools used this time were very simple, just as shown in the photo—the most basic model-building tools: side cutters, a hobby knife, files, and sandpaper for sanding down nub marks.
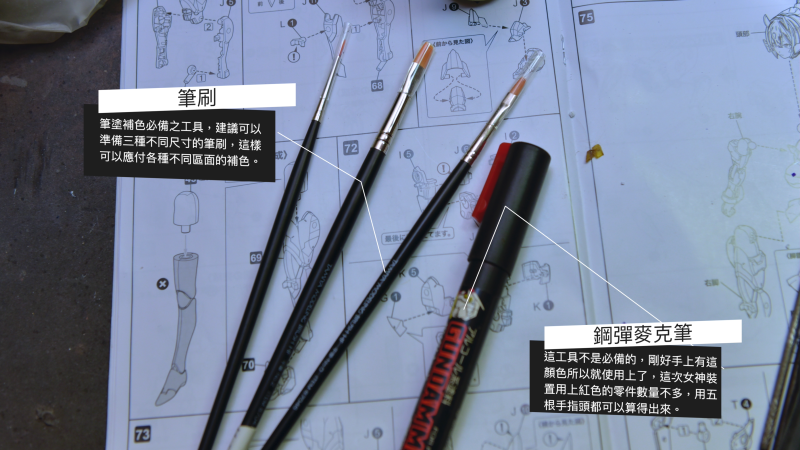
▼ Since I was hand-brushing, brushes were essential. I prepared three different sizes for the job. For the red parts, I used a Gundam Marker. There were very few parts that needed red—probably fewer than five.
▼ Gold was likely the only color used extensively in this build. I hand-brushed the gold sections with JUKY's water-based metallic paint. The final hand-brushed effect of this metallic gold is quite impressive. Besides its strong adhesion and quick drying time, the most important thing is that it's nearly odorless. I used a cross-hatching method for brushing. Since the paint dries quickly, I could apply the second coat shortly after the first. About three coats were enough for complete coverage.
▼ For me, the straight-build process is very simple, especially when using familiar tools. As long as I don't have to use an airbrush, I find it very relaxing. The main body in the picture is completely unpainted; I simply cleaned up the nub marks, sanded them, and then applied a matte top coat. I even skipped seam line removal. I strongly recommend applying the decals, as they greatly enhance the overall finished look.

▼ This part deserves a special close-up. When assembling a Megami Device, after putting this piece together, I always take a few extra moments to inspect it carefully. I especially check if the nub marks have been trimmed cleanly and look for any sanding scratches. For a straight build, I can tolerate issues on any other part, but if this specific piece has flaws, I can't be satisfied. I have to inspect it for at least three minutes to feel at ease.

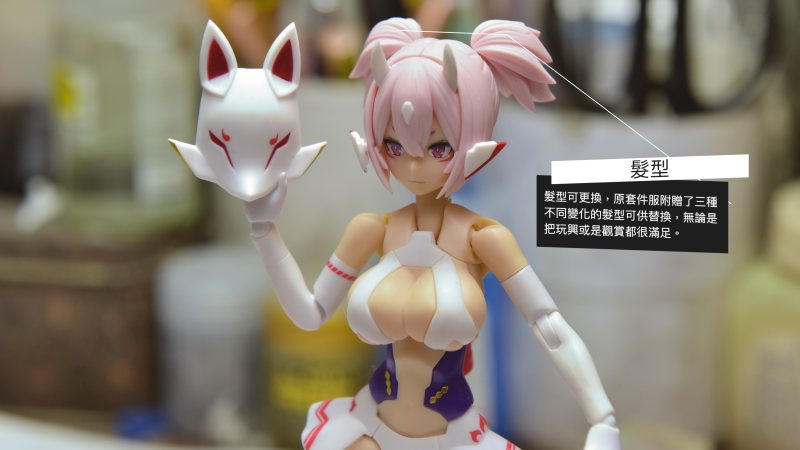
▼ The playability of Megami Device is very special; you can mix and match for a wide variety of combinations. You can have fun for a long time with just the hairstyles alone.


▼ To assemble the Armed Mode, you must swap out several parts. So, remember to prepare a small container specifically for storing all the interchangeable parts for your Megami Device.
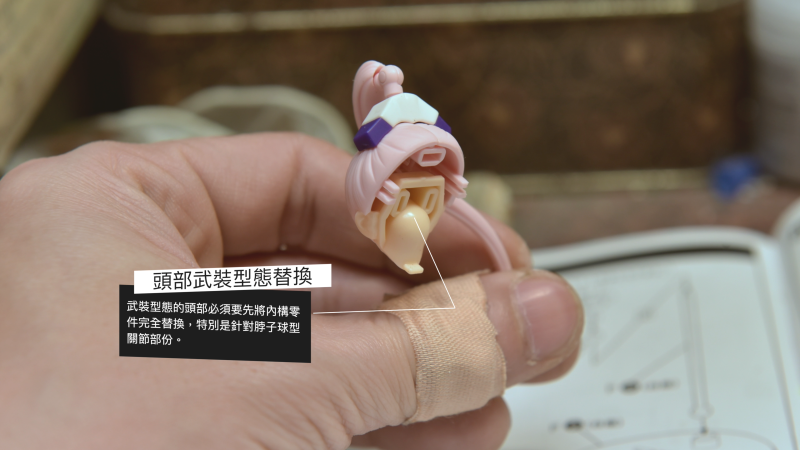
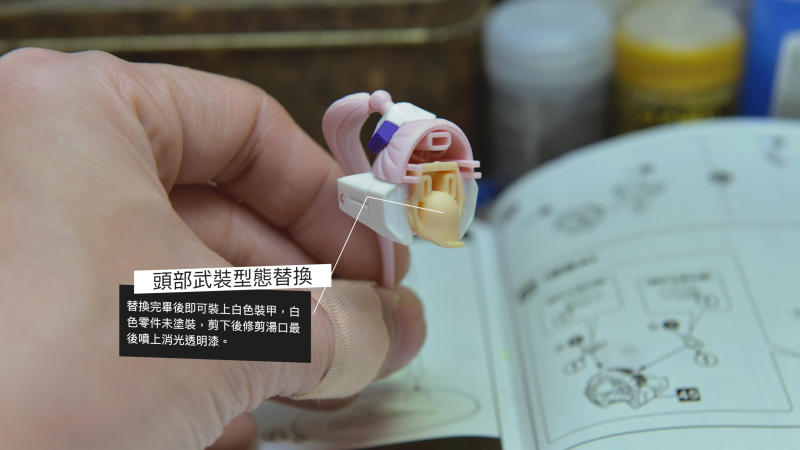
▼ The white armor on the back of the head also requires a part swap before it can be attached.

▼ That's right, that part is back again. For the Armed Mode, the chest piece must also be swapped out to attach the scarf. Additionally, the neck is another part that needs to be replaced.
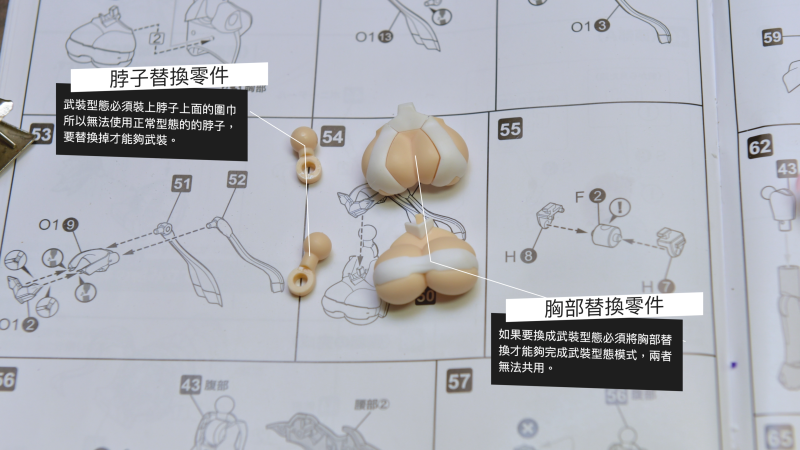
▼ The difference between having the chest and not having it is huge, but the main point isn't the chest itself, but the replacement chest part. If you don't swap it, you can't attach the scarf. The key is the scarf's connection peg on the upper chest; you must use the replacement part to clip the scarf onto the neck.


▼ After swapping the chest and neck parts, you can attach the scarf.


▼ The body parts for the Armed Mode also need to be swapped. Besides replacing the abdomen with white armor, the internal connector joint must also be changed.
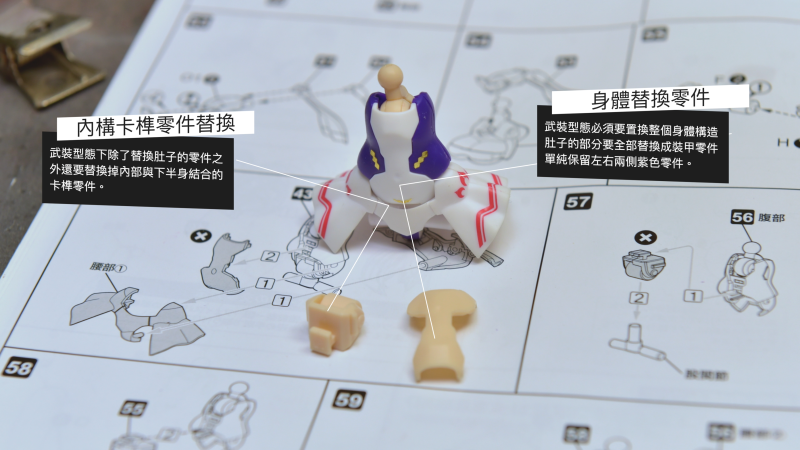

▼ Keep these two parts safe; they are needed for the Unarmed Mode.

▼ Remove both arms and both legs directly. Remember to store them safely as well.

▼ The parts needed for the Armed Mode are now mostly assembled. Oops... I missed the focus again, my apologies.


▼ I didn't use the included decals for the face; I just used the pre-printed part straight from the kit. All the gold lettering and markings you see below are the included waterslide decals. I have to say, that gold is incredibly shiny once applied; it even caused some color blowout in the photos XD.


▼ Attach the two legs and two arms for the Armed Mode, and the assembly is complete.

▼ This Asra Nine-Tails is truly versatile in its playability. You can have a blast with the hairstyles, facial expressions, and poses. Using the included waterslide decals can greatly enhance the completeness of a straight build, making it very pleasing to the eye, but you'll have to go through "decal hell." Applying all the decals on this Asra Nine-Tails took me nearly two hours. For the curved surfaces, I recommend using a decal softener to overcome the challenge; otherwise, it will be a very painful process.


▼ The original kit's "poop gold." This was also a detail-painting hell. I feel an airbrush would have saved a lot of time XD.

▼ A sea of "decal hell," filled with detailed markings. With just these few parts, you can complete one of its modes.


▼ The mode below is assembled using the parts shown above.


▼ With the two armor pieces below, you can create yet another mode.


▼ I'm not a big fan of the final mode. I just can't accept sticking swords on her head XD.


▼ In addition to the three modes mentioned above, the Asra Nine-Tails can be configured for even more play options. Combining the main body and armor to form a flight unit is also possible.


▼ The nine-tailed fox mask and ninja mode are also essential elements.


▼ There are two hairstyles. I wonder which one you all prefer?


That concludes this simple build showcase. This kit is off the charts in both its display presence and cool factor. I do have one complaint, though: that chest piece falls off way too easily!! It comes apart on me constantly, which is super annoying. I still have a box of the AUV Susanowo waiting to be built. I hope the assembly experience will be different for that one. Next up are the studio photos, I hope you all enjoy them.
▼ Kotobukiya Megami Device Asra Nine-Tails


Also published on my Blog
See more model kits and toys here
Model Kit History Outline also updated