
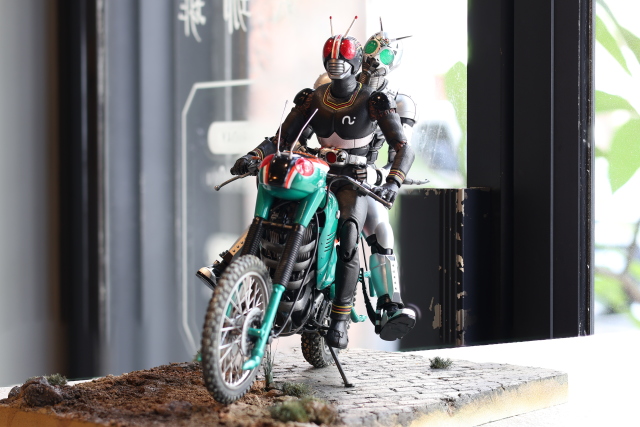
Among men, Lu Bu; among horses, Red Hare.
Among Kamen Rider motorcycles, the Battle Hopper is the most spirited!
Due to changes in Japanese regulations, it's truly difficult to see stunt-like motorcycle battles in shows now.
Now, one might say it's mostly CGI battles.
The protagonist of this build, the Battle Hopper, is an assembly motorcycle model produced by Fujimi. Official images are attached.
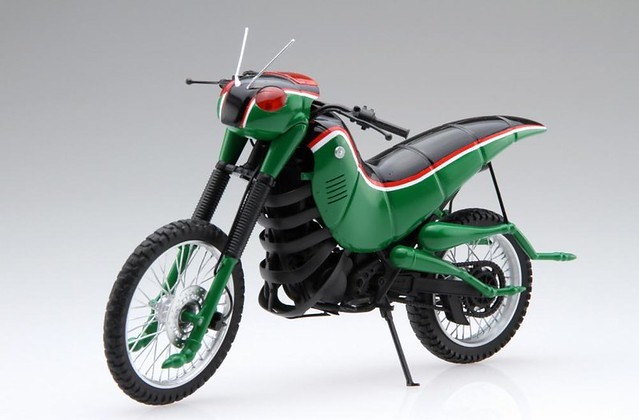
General workflow:
- 1. Fantasize about a mountain of parts automatically assembling.
- 2. Start building.
- 3. Complete.
Above are the images.


(Serious part below)
Wheel Rim Production:

The original parts were chrome-plated. I purchased hydrogen peroxide cleaner at X-Bei and soaked them directly!
This resulted in the wheel rims with the chrome completely removed, as shown in the image above.
I'm not sure if it's due to the chrome removal, but the parts needed to be clamped like this for quite some time to achieve a perfect fit when gluing.
Exhaust Pipe Production:


The romance of a two-stroke engine demands seamless treatment.
Rear shock absorber, swingarm, chain, etc.:
It only occurred to me during the build that these seemingly sci-fi Rider motorcycles are actually modified real vehicles.
The details are full of realism, bringing back memories of my university days, riding a second-hand KTR and constantly repairing it.
Commemorative photo of the internal structure before the extreme exterior modification:

Since the engine is small CC, it doesn't feel like there's anything particularly noteworthy.
However, the unique charm of these old two-stroke vehicles is truly best experienced through a model.
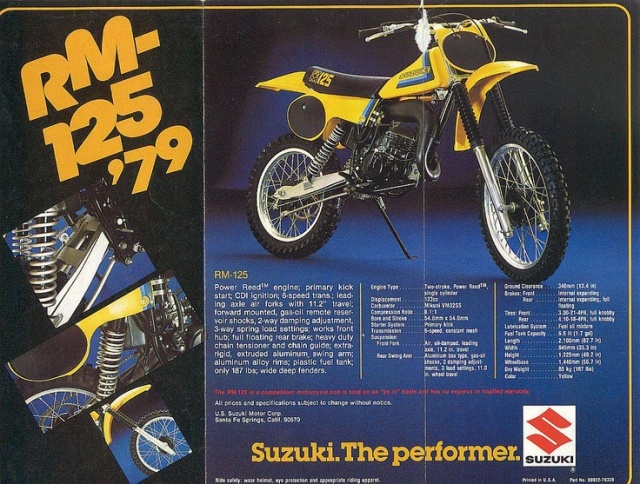
On a side note, the original vehicle for the Battle Hopper was a SUZUKI RM125.
Looking at old photos, to portray the Rider's ride, modifications went beyond just the exterior.
Fairing Production:

This kit actually requires quite a bit of modification; the mold lines on the locust head are sharper than the details themselves.


The original antenna was extremely thin; if it fell to the ground, it would be impossible to find.
I actually dropped it, and I don't even have a photo...
I dabbed a bit of super-strong adhesive on the antenna tip to add a touch of roundness.
I was very moved after applying the decals.


Key focus of this build: Body shell
The molding process truly felt like I was building an insect.
Basically, it's a left-and-right half assembly. Before seamless treatment, it's necessary to check the connection points with the frame. Appropriate trimming is needed to ensure a perfect fit.
The thickness will increase after painting, so there's no need to worry about stability.
Primer >> Silver paint >> Gloss black (upper part and joint areas)
>> Emerald green fine spray (a slight gradient is needed where it meets the black areas)
>> Apply decals (extremely difficult to apply, high chance of failure)
Handlebars, dashboard:

After applying the decals, I used UV resin to add a bit of detail.
Finally, I added a base (to practice diorama scenes).

I used the available Kamen Rider No. 1 as a model.


Using high-density styrofoam, I carved some floor tiles.
I used coffee grounds and roadside pebbles to simulate dry soil.
There were actually many more steps afterward that I didn't execute perfectly.
I'll share my experience again if I get a chance to refine my skills.

The final product!!
Postscript:
When you build seriously, you want to document it!
Taking photos while building also deepens the impression of the process.
But organizing photos and converting them into text is truly a lazy task...
I hope to continue writing articles about my future builds!