身構えている時には、死神は来ないものだ
(When you're prepared, the Grim Reaper doesn't come.)
ハサウェイ···
(Hathaway...)

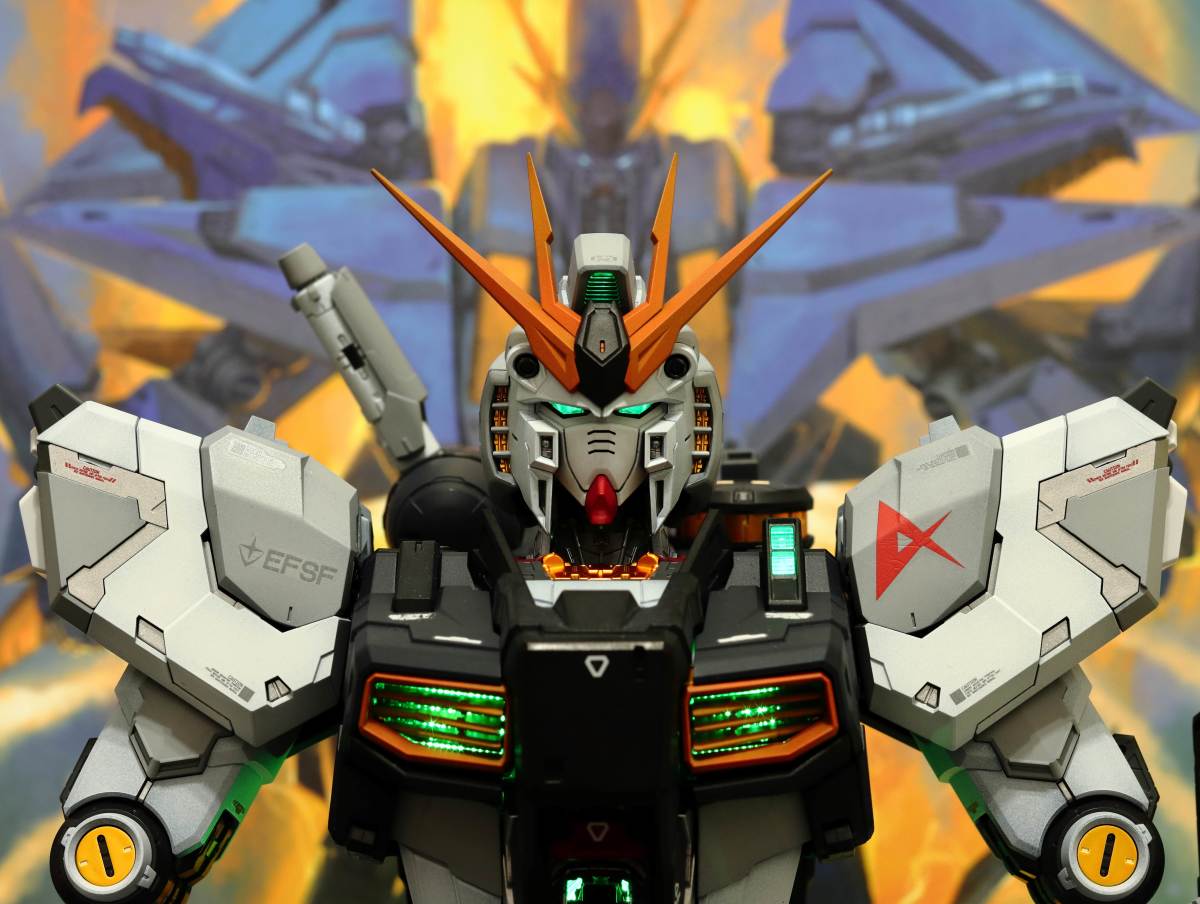
Following our last review of the PGU ν Gundam Frame Edition, after several weeks of dedicated work and waiting until both "Hathaway's Flash" movies were released in Taiwan, the painting and production of the outer armor are finally complete... That's right! As this is a one-man, non-professional, slow-paced operation, the shield, weapons, and other related accessories will be covered in the final part to conclude the series.

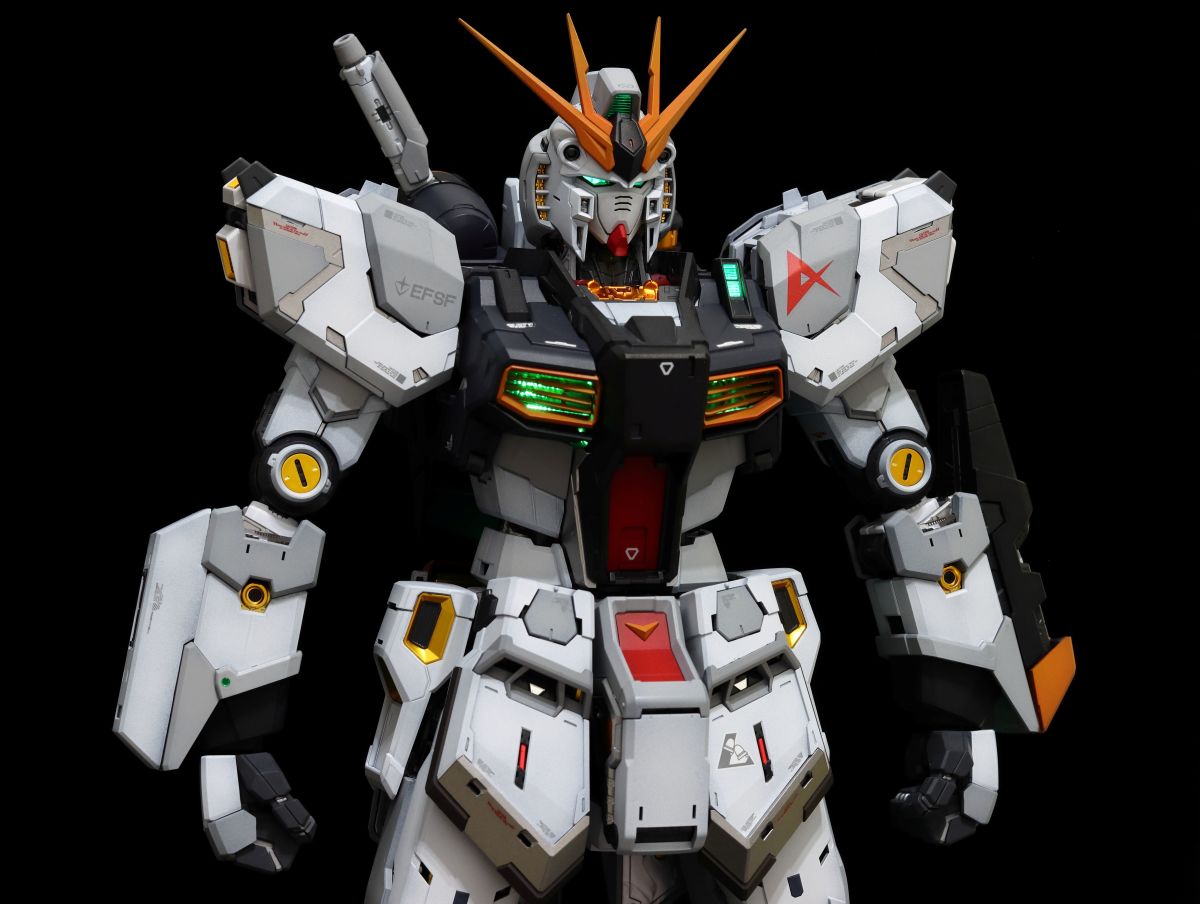
For the outer armor, many different colored runners are used to create color separation. Since the ν Gundam is a large-scale mobile suit, it has many considerably large armor parts. However, this PGU version doesn't feature an excessive amount of panel lines or open-hatch details. Therefore, during the painting process, I practiced leaving a subtle shadow effect on the edges to enhance the overall three-dimensional feel.

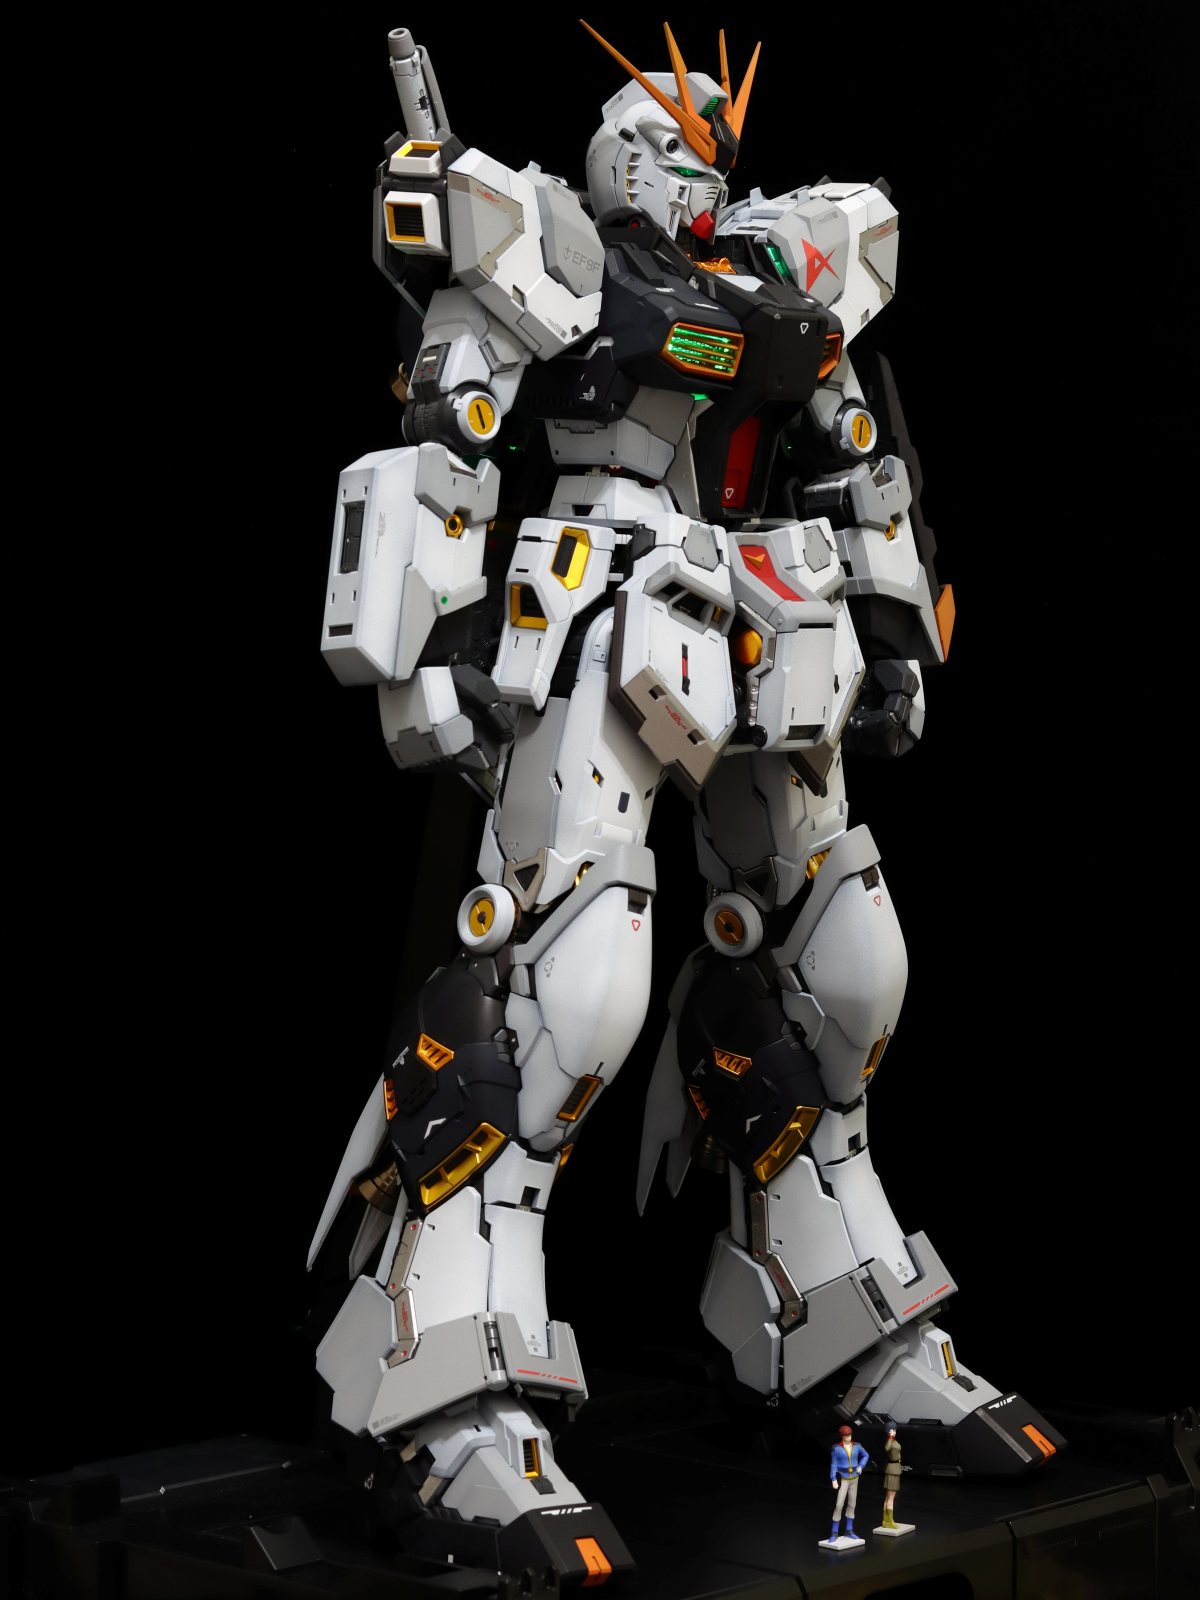
Days of painting, hours of assembly. Watching weeks of hard work being installed piece by piece onto the frame, until the moment this nearly 40cm Gundam stood tall before my eyes—the pure joy of model building definitely makes you forget the painful experiences along the way, like the sore finger joints from pressing the airbrush trigger all day and the various backaches (not really).

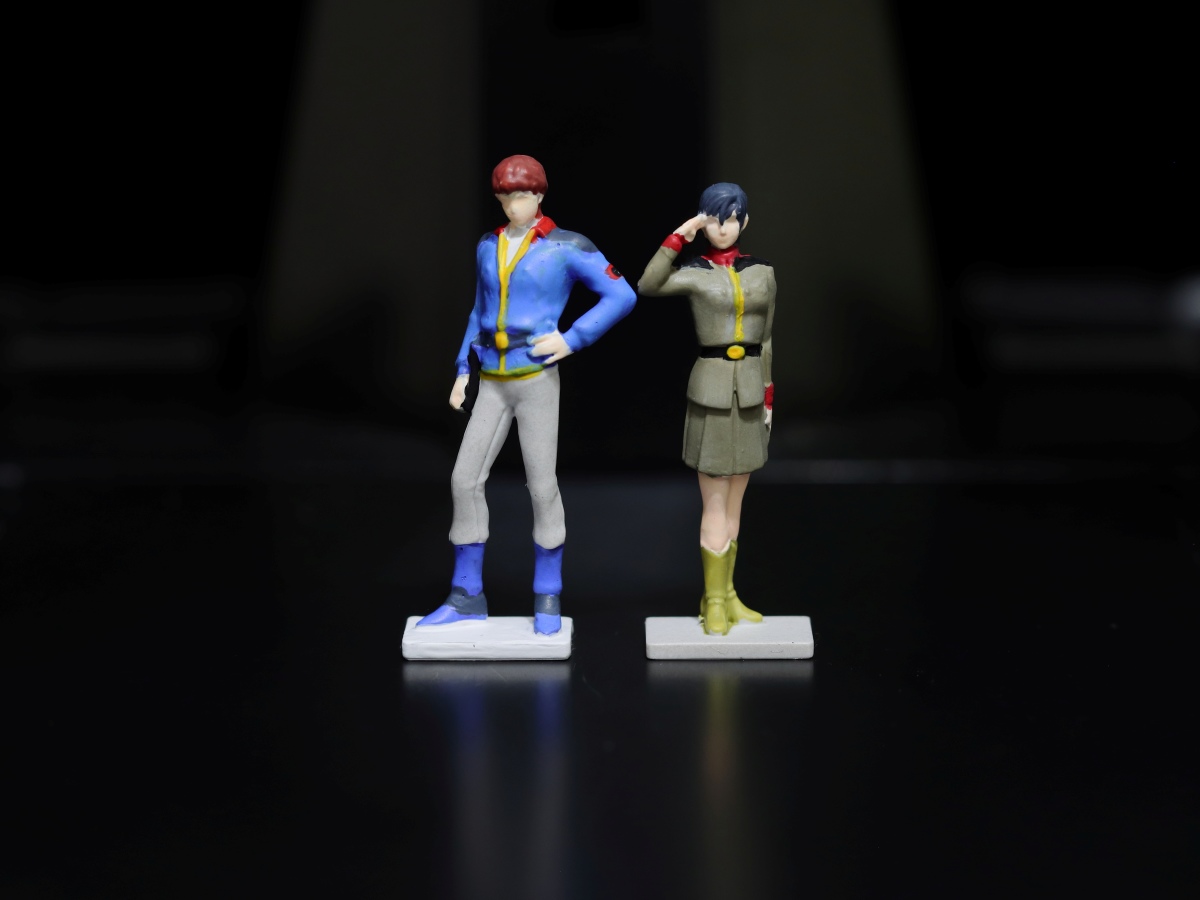
The pilot Amuro and his lover Chan Agi, who was also a developer for the ν Gundam, are given a simple paint job. For some reason, after painting, she kind of looks like Reze (isn't that even better?~)
Let's showcase it from different angles:
The contrast with the tiny figures further emphasizes the spectacular presence the ν Gundam would have if it existed in reality.
The wiring on the back is a bit different from last time; I'll explain in more detail later.

Once again, we have the original Gundam making an appearance for comparison. With the armor on, the ν Gundam appears taller and more robust. The difference in stature is so significant, you could almost call it a Mega Size PGU.

Compared to the more distinctive appearance of the original Gundam, the ν Gundam's design is relatively more restrained. The number of waterslide decals is also not large, making the overall presentation less dazzling than the original's.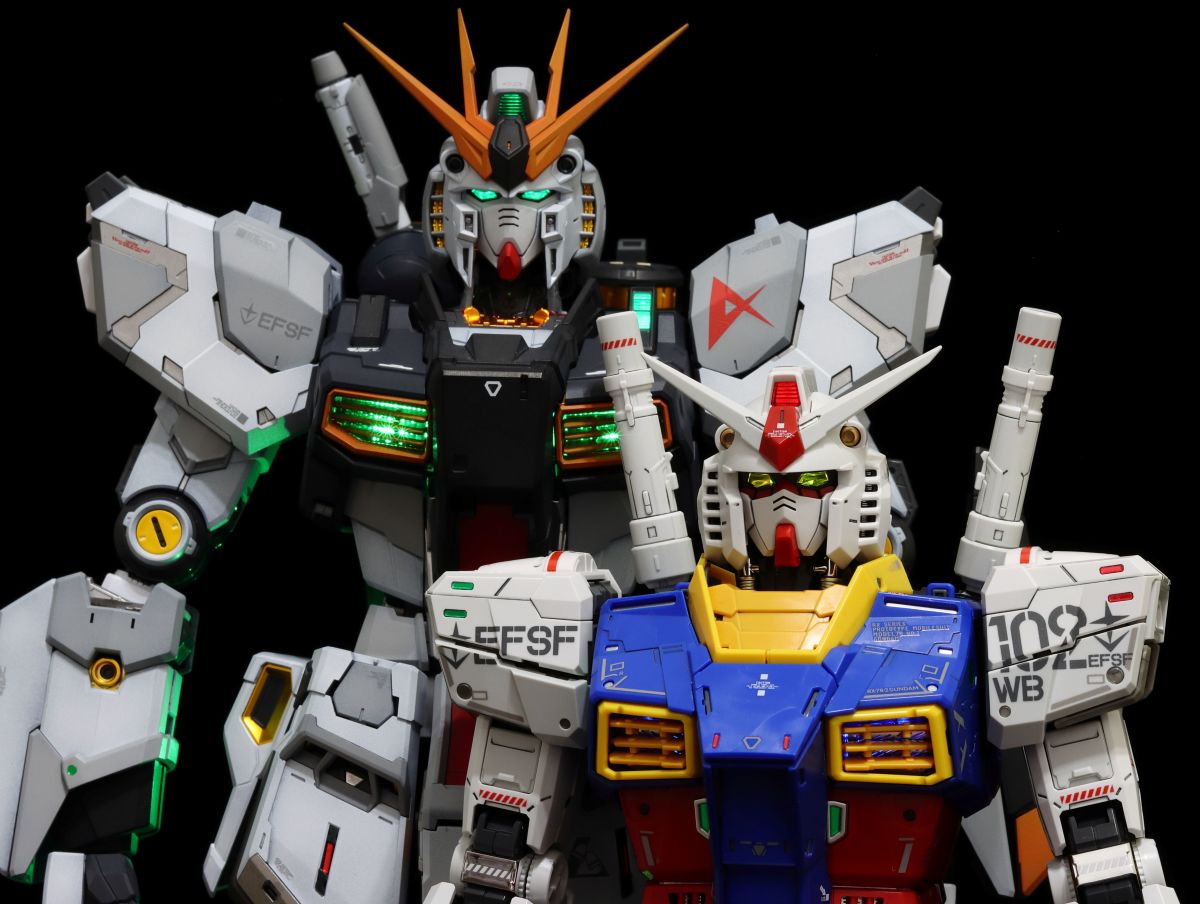
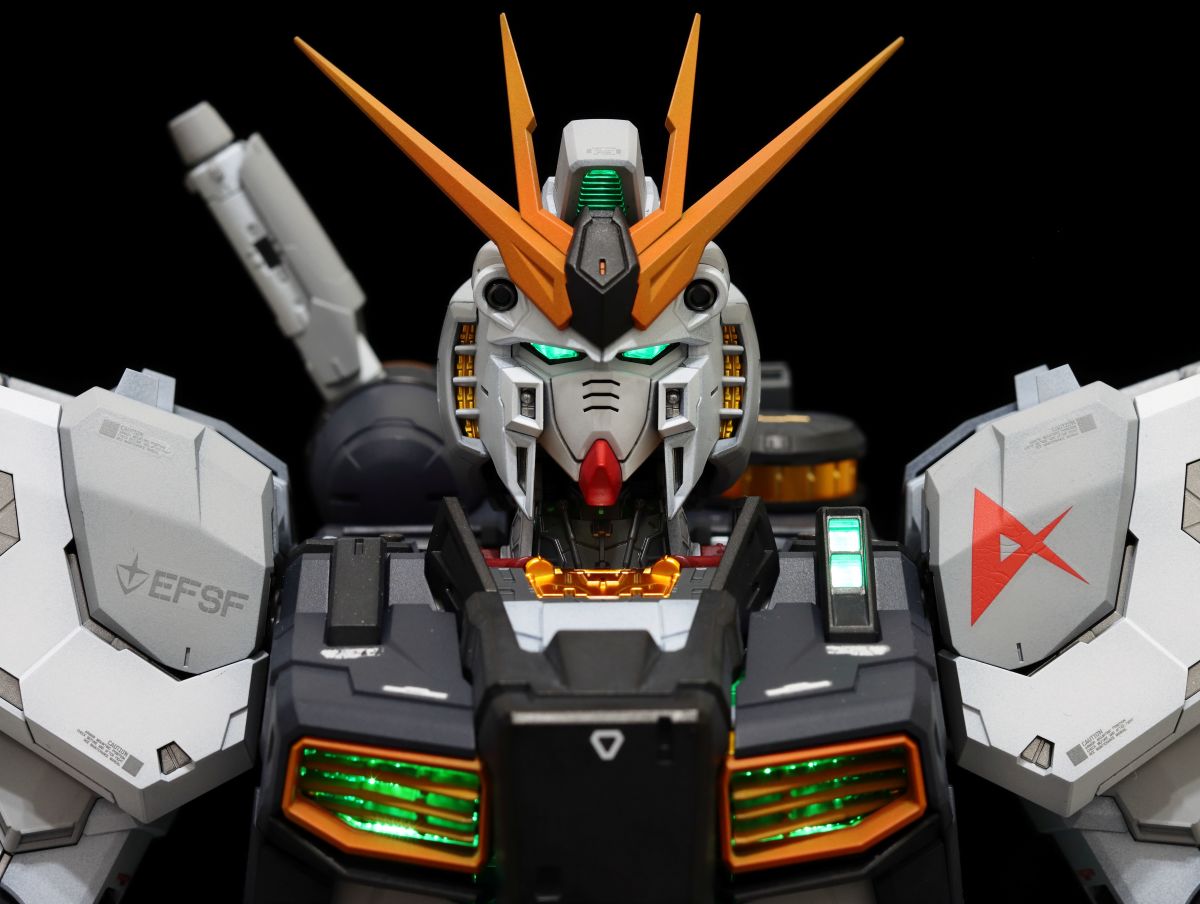
In particular, the face sculpt of this ν Gundam is just unbelievably, cosmically cool. Paired with the light-up unit, the sharp, fierce glint in its eyes is cool beyond limits!
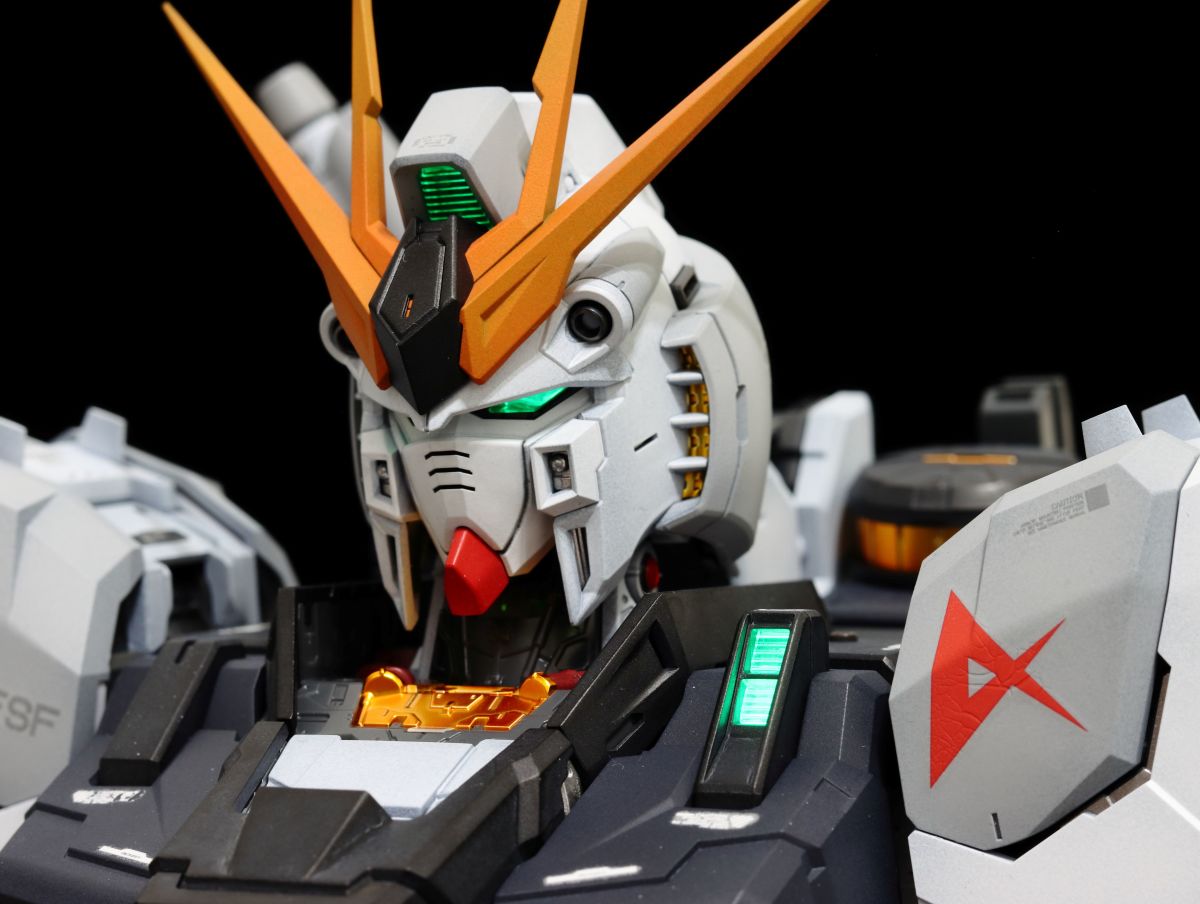
Since we're on the topic of the light unit, let's talk about this upgraded copper wire light set (which is really just a common LED light strip for Christmas trees...). Last time, I only briefly showed the lighting effect. This time, taking the opportunity of disassembling the frame to replace it, I'll give a rough explanation: You can find a plastic plate or recycle materials by using the included XD2 metallic green runner frame. Cut off the flat upper part to use as a mounting panel, and fix the LED beads with something like nano double-sided tape. Finally, stick them in the various light-up positions, then fine-tune and neatly tuck away the wires, and you're all set. It's that simple and direct! Builders who want to save money and aren't afraid of a little trouble might want to give it a try. Of course, if you have the budget, just go for the official light unit for a hassle-free experience.
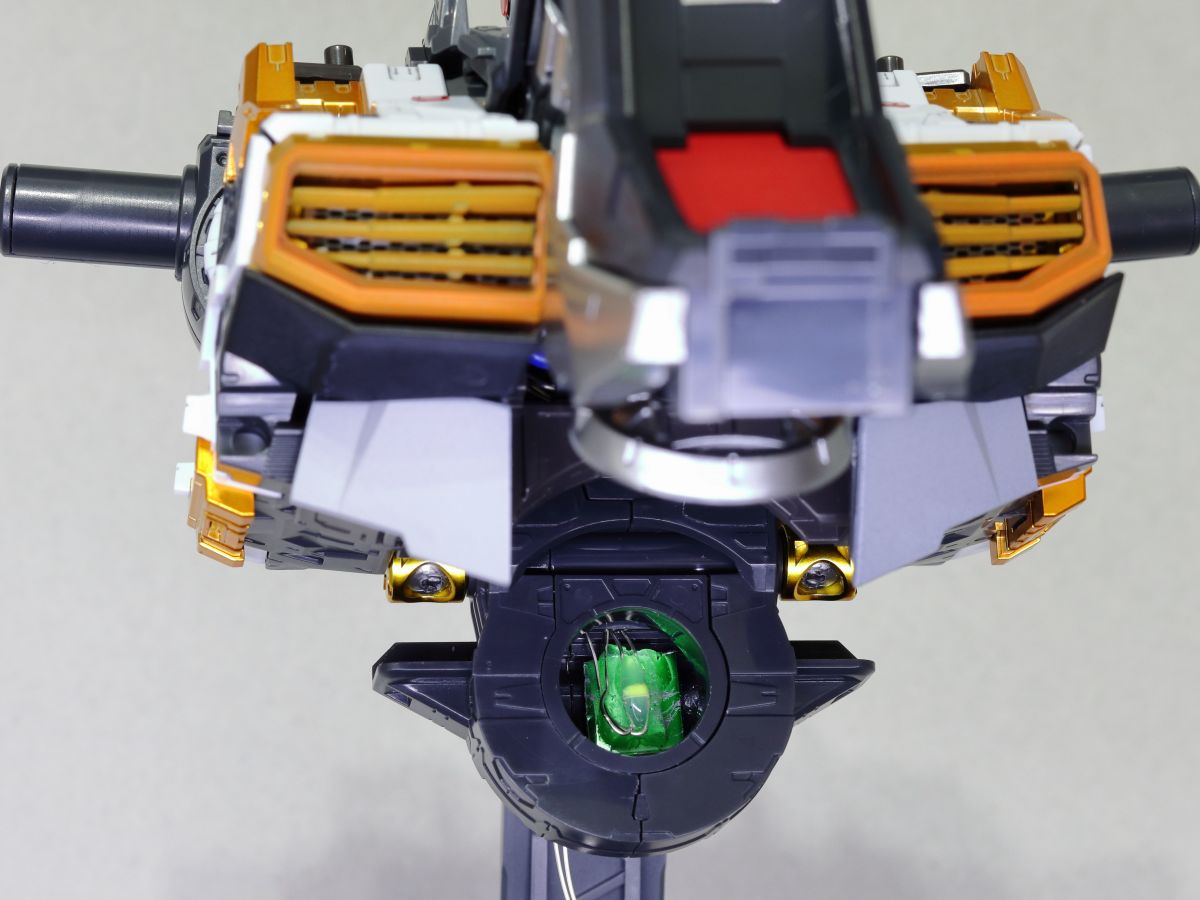
As for whether the wires will be exposed, installing the arch-shaped part XP5-15 will actually conceal the internal wiring, so there's no need to worry at all.
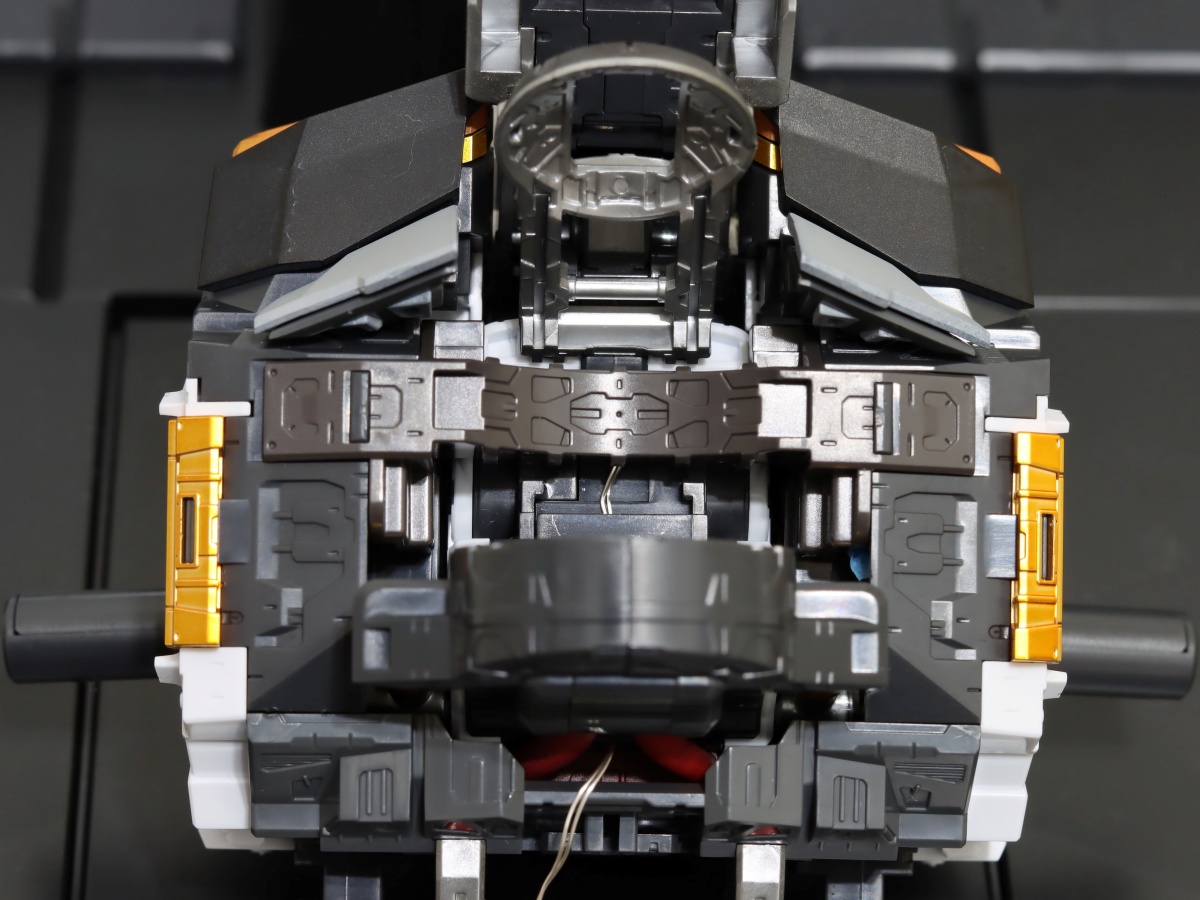
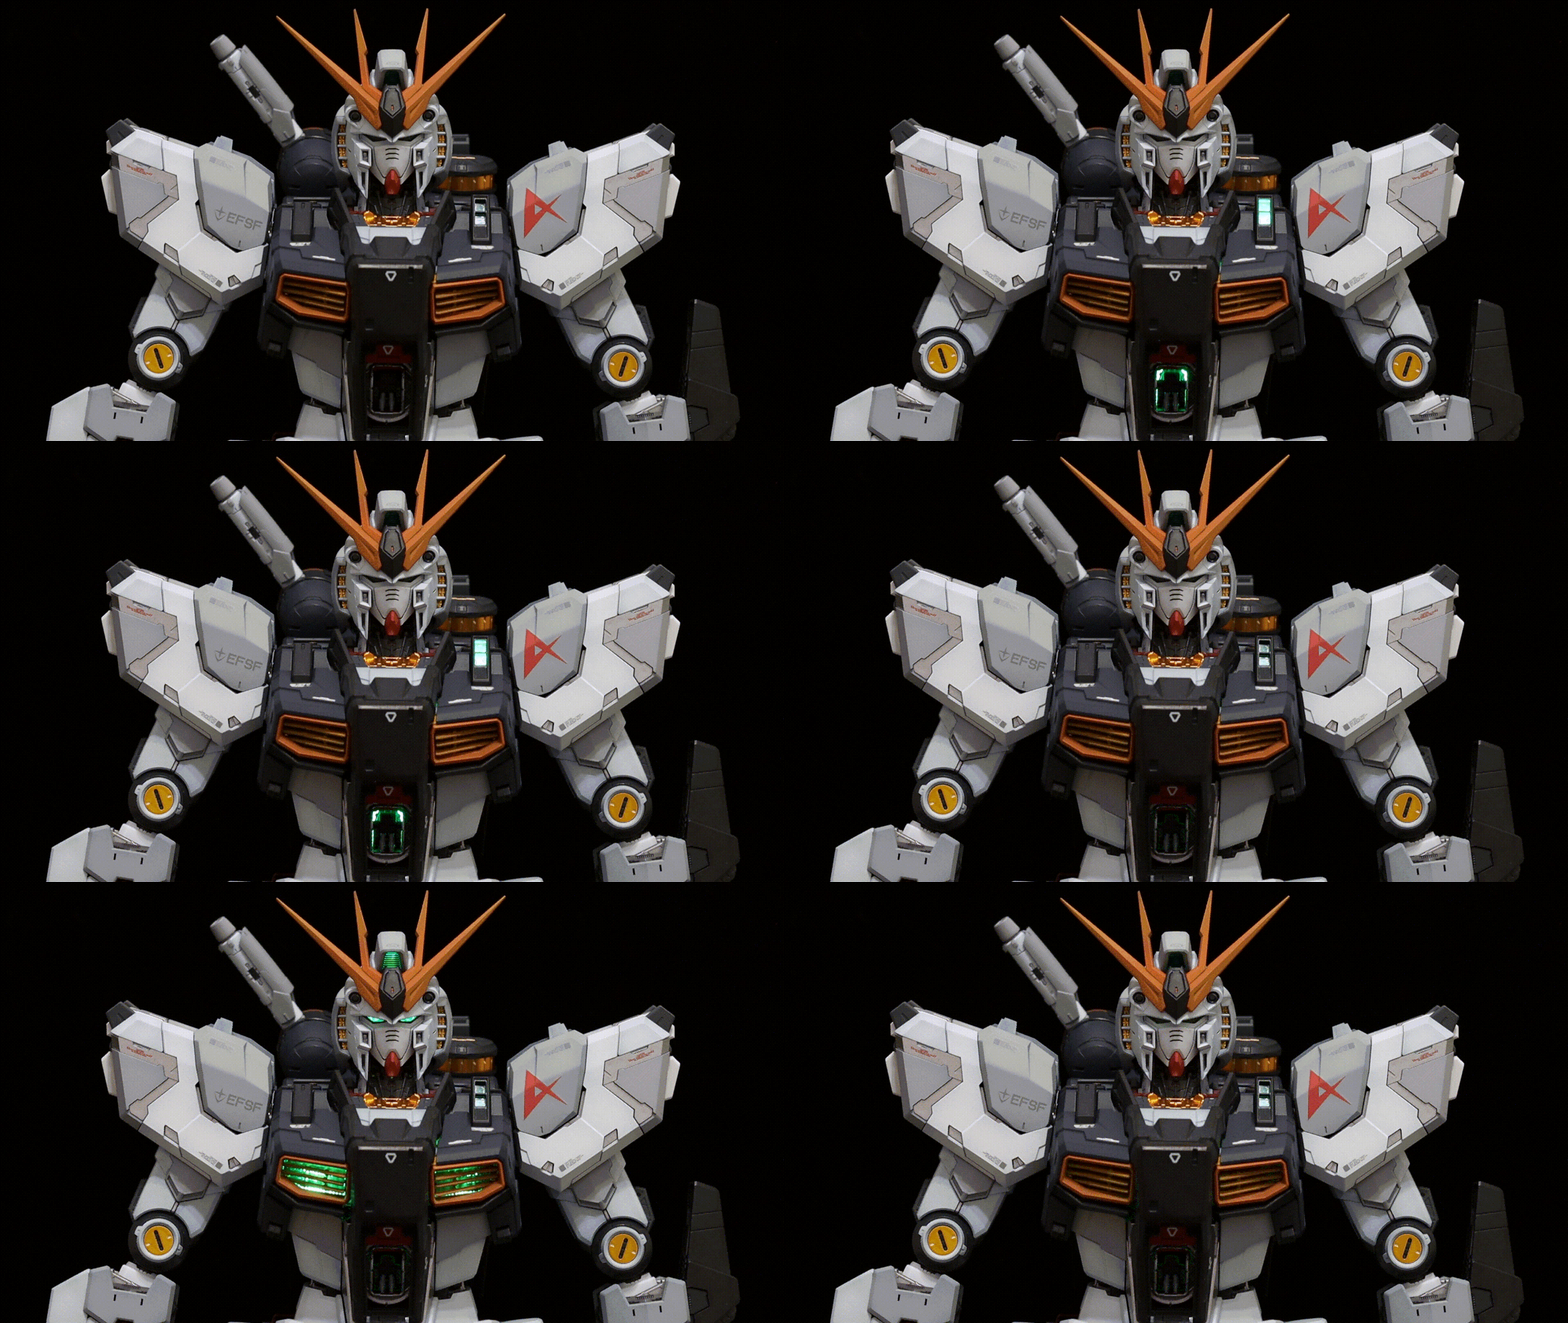
ν Gundam, activate! This time, it's all green lights.
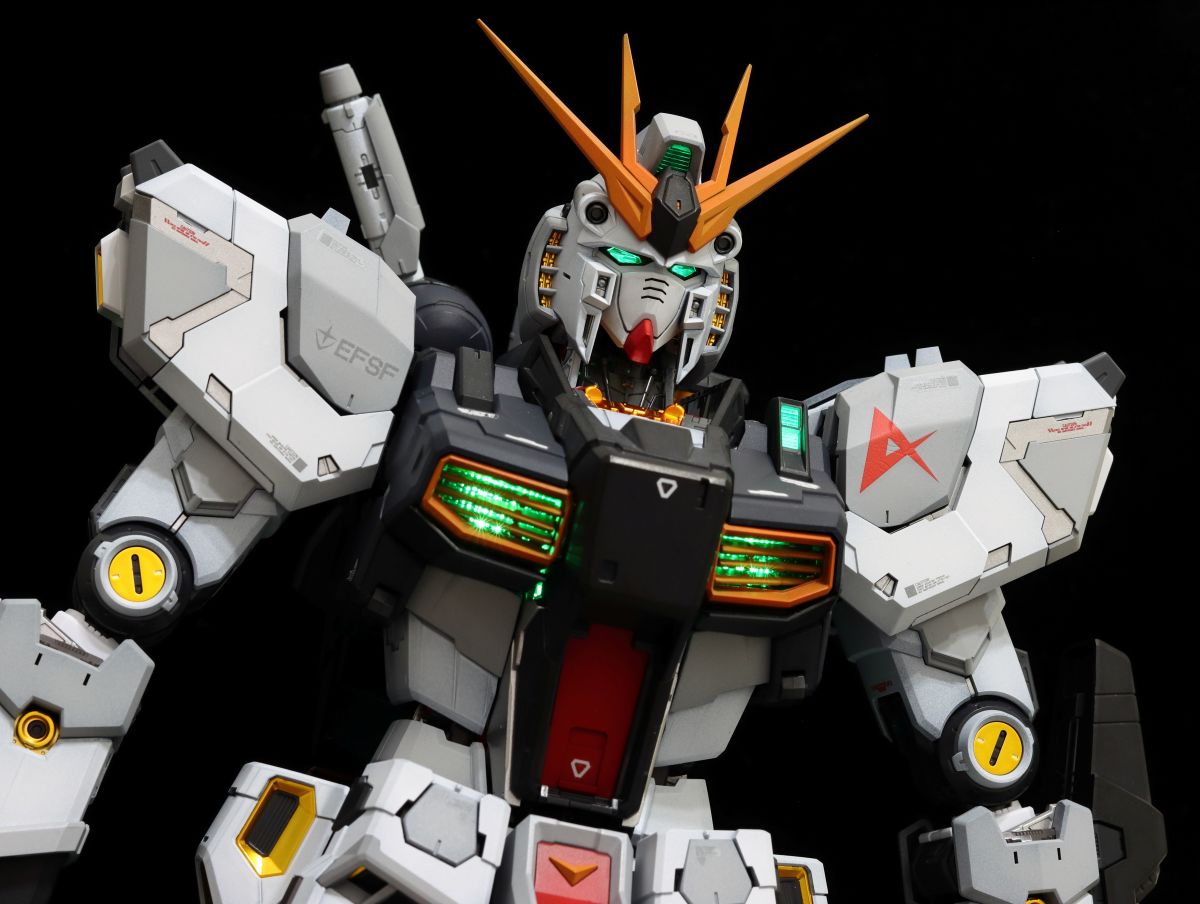
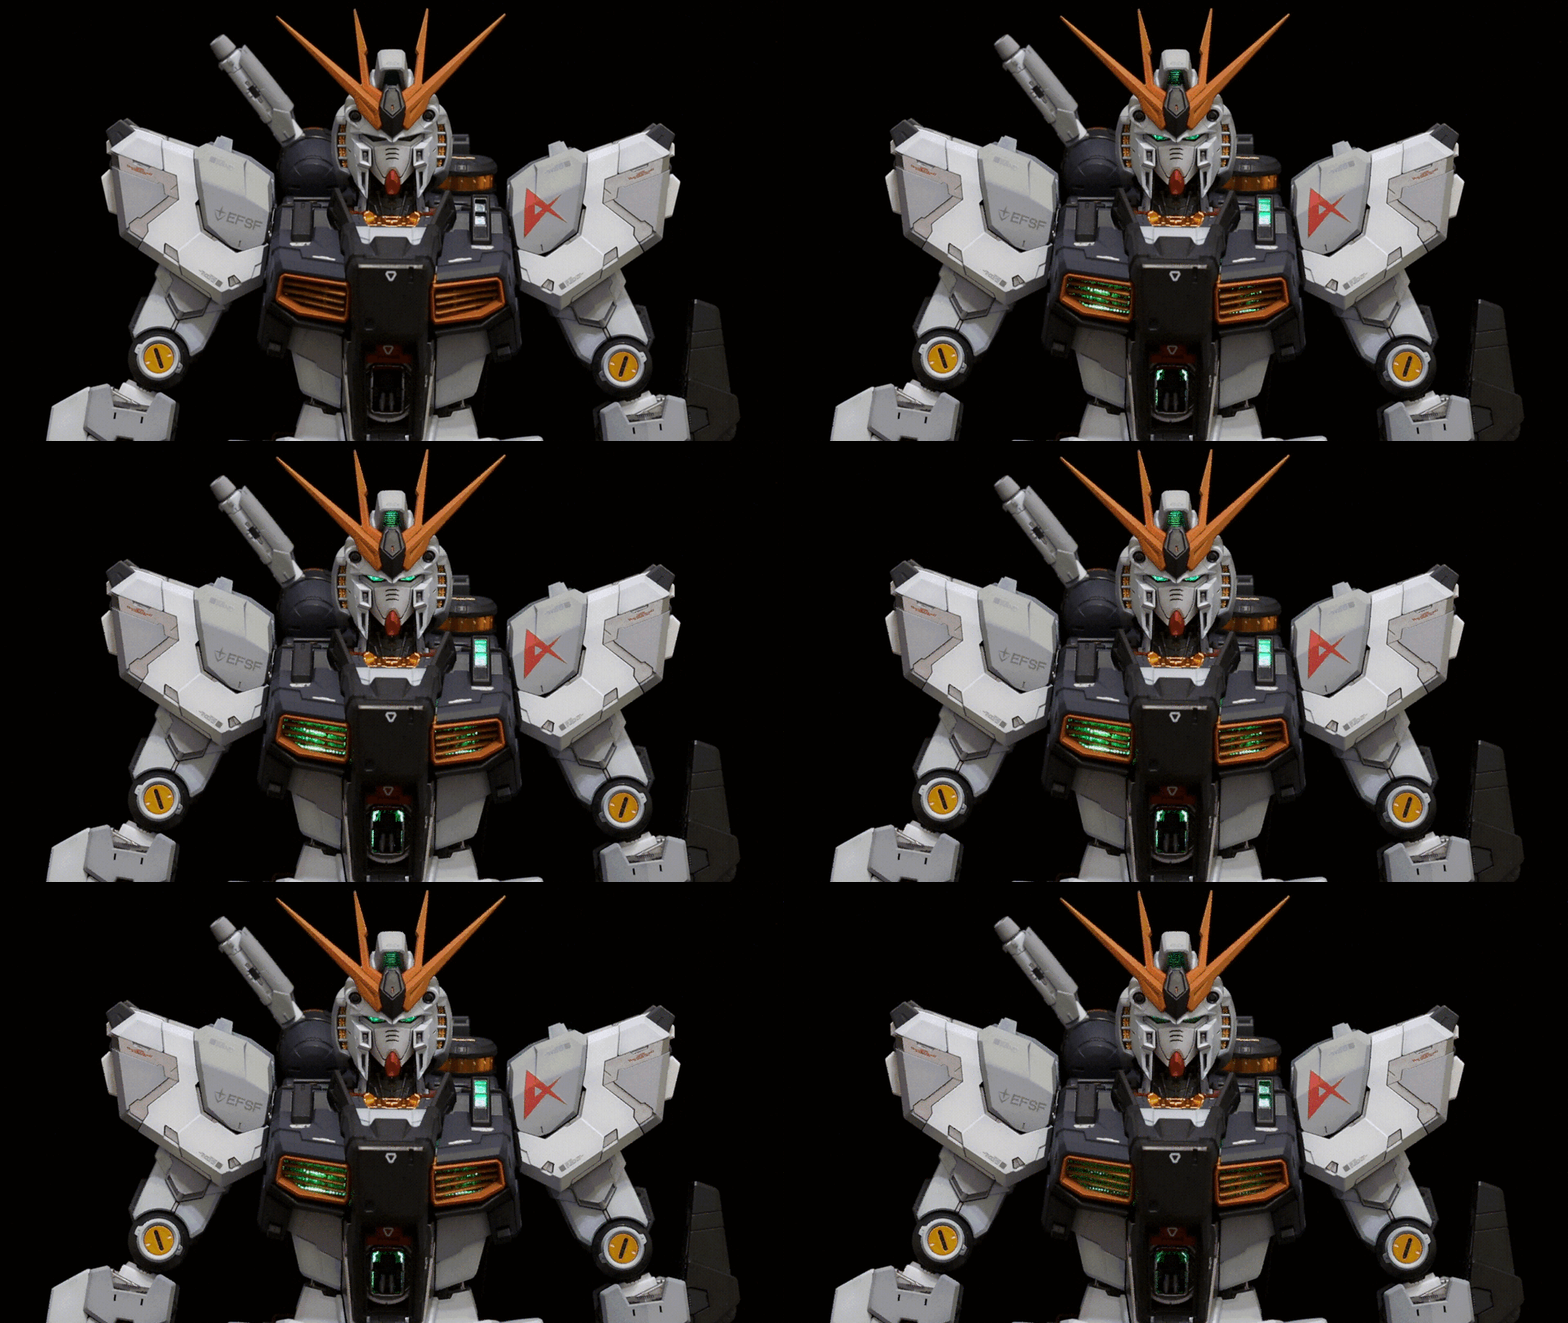
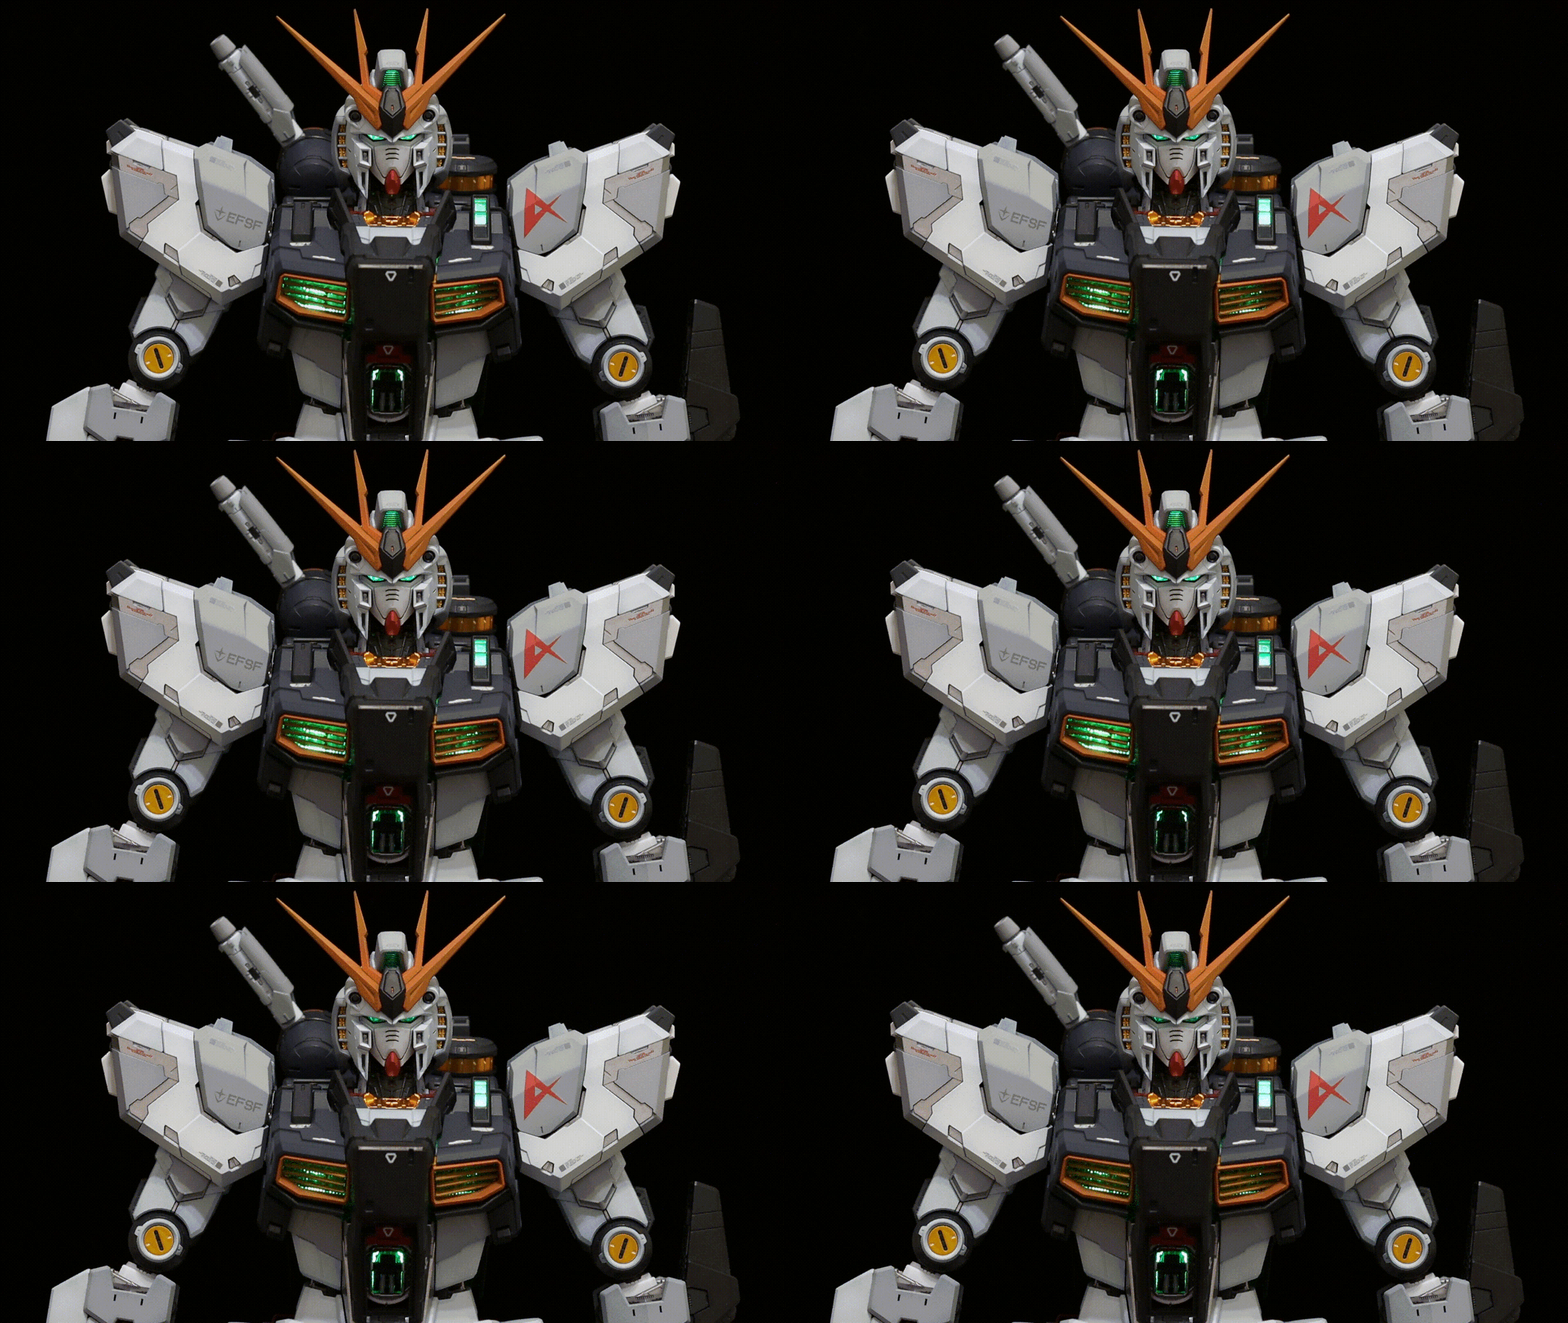
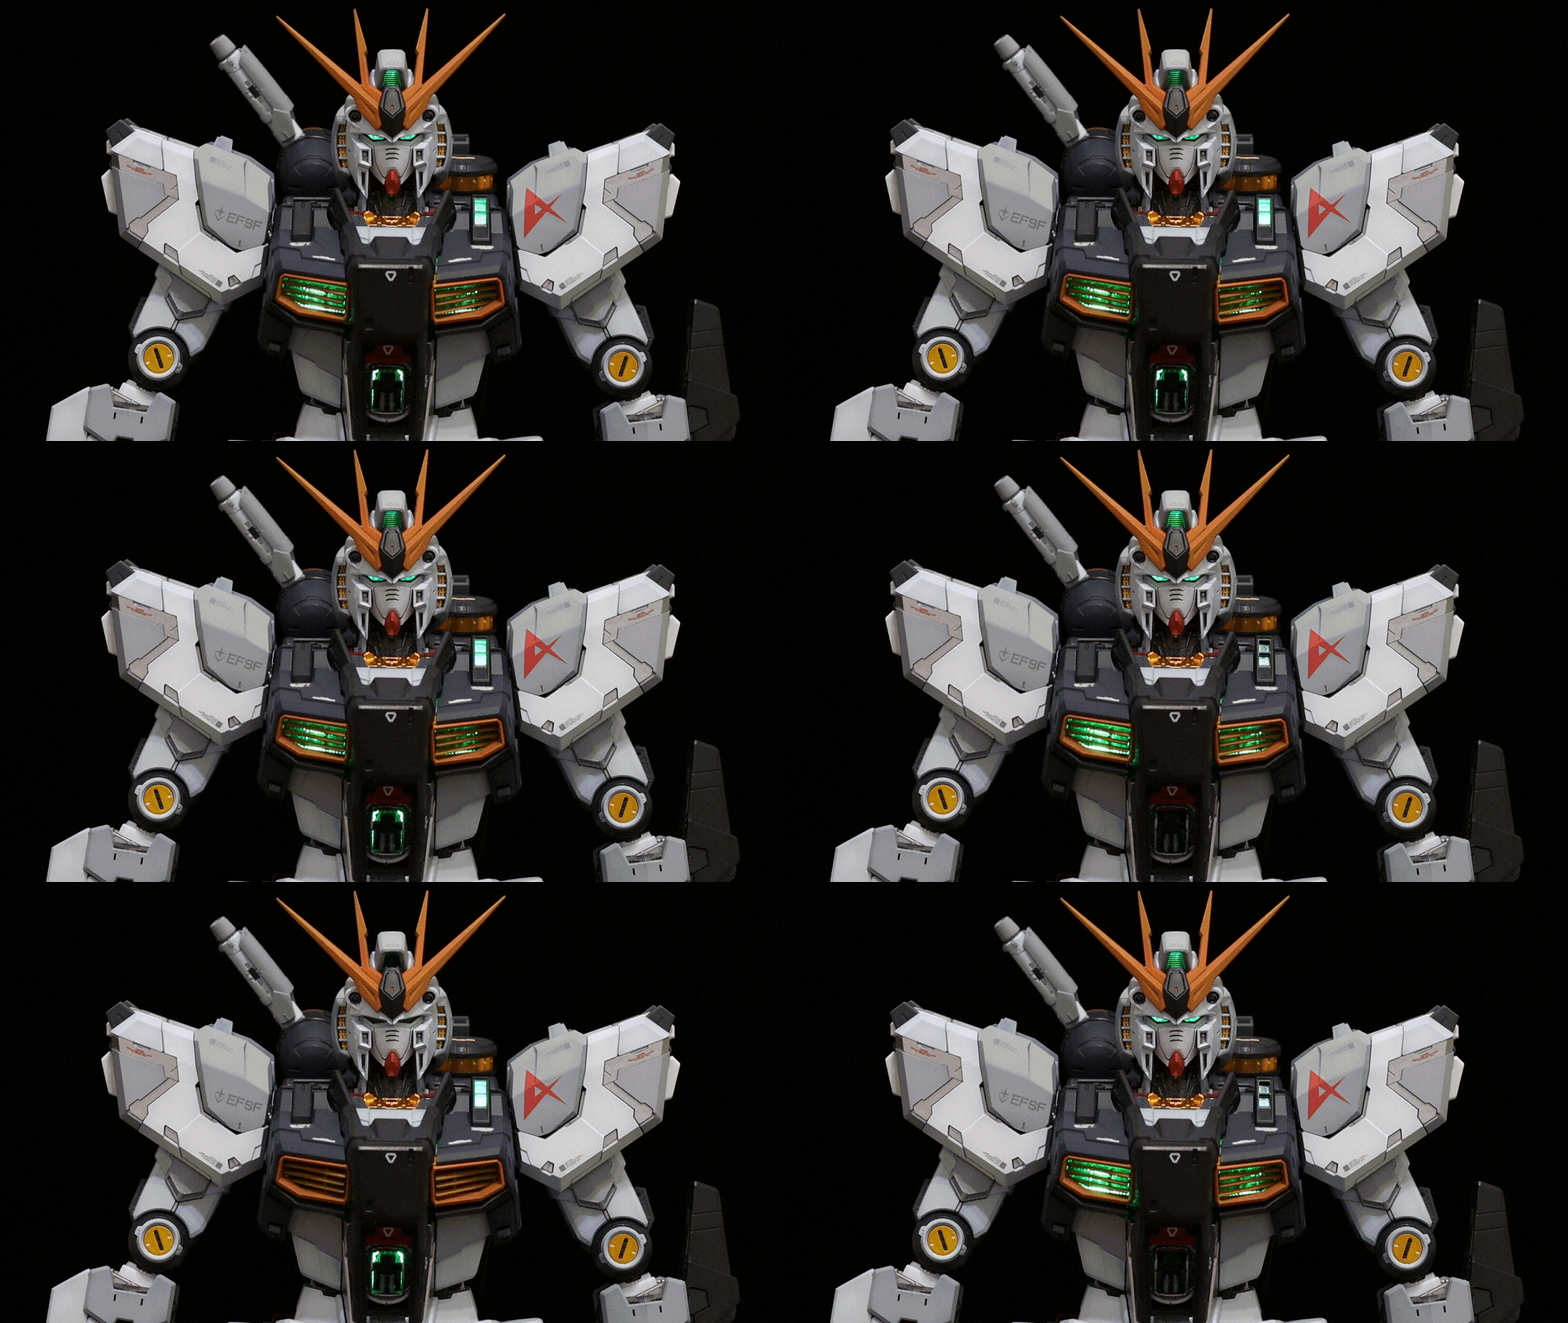
The light strip comes with multiple lighting effects, allowing you to replicate some of the features of the official light unit:
Fading Breathing Effect
Fast Strobe Effect
Alternating Strobe Effect
Malfunction/Glitching Effect
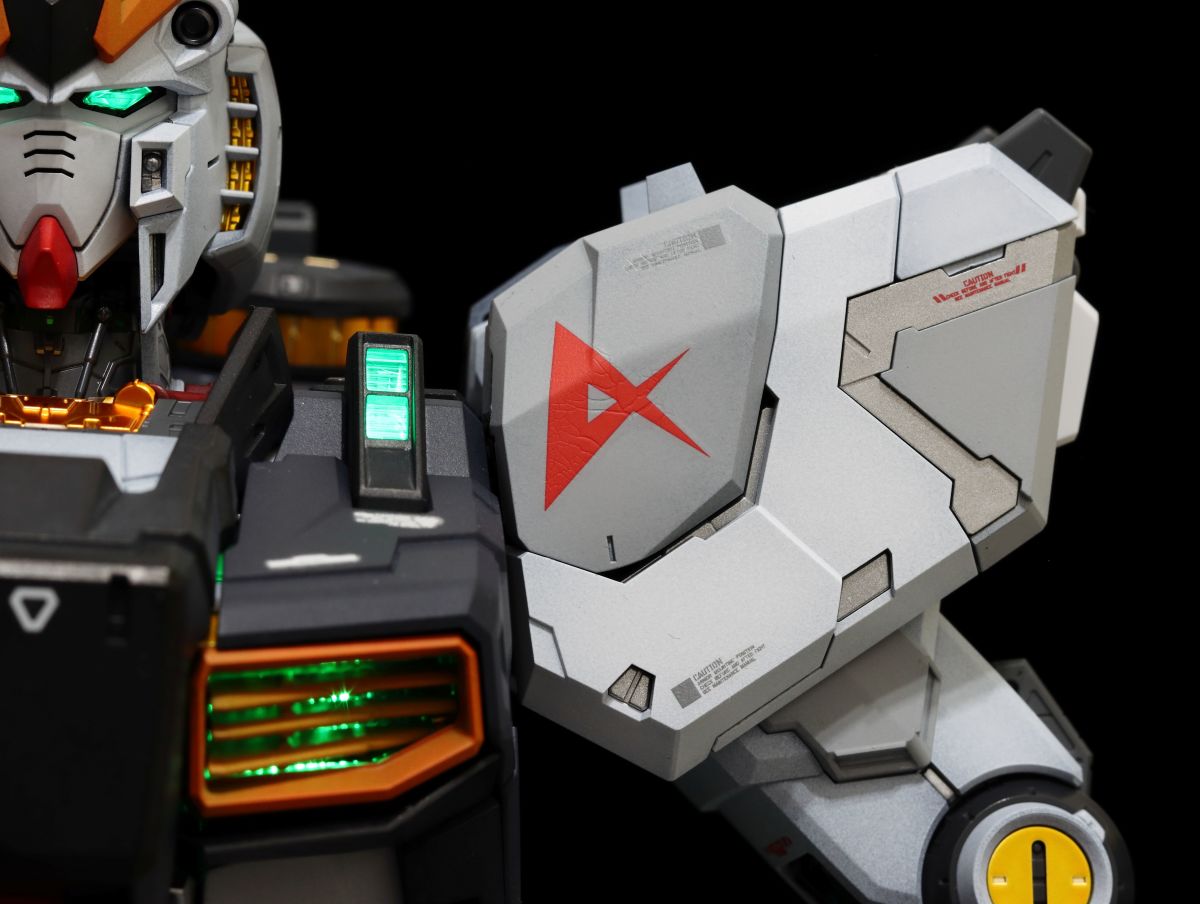
The light for the sensor on the upper left chest is directly conducted, so the glowing effect is incredibly bright.
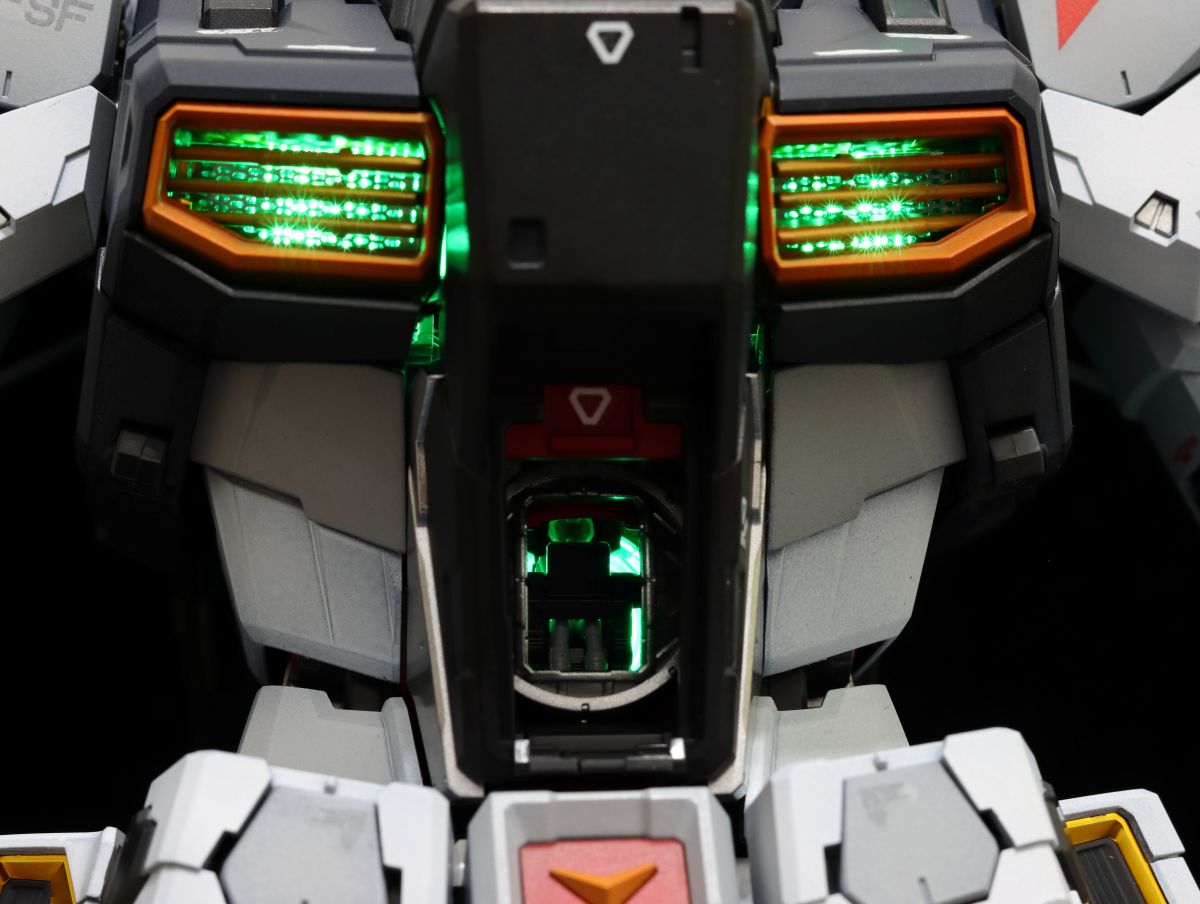
Amuro, surrounded by green light inside the cockpit, looks like the scene where Hathaway appears on the 3G.
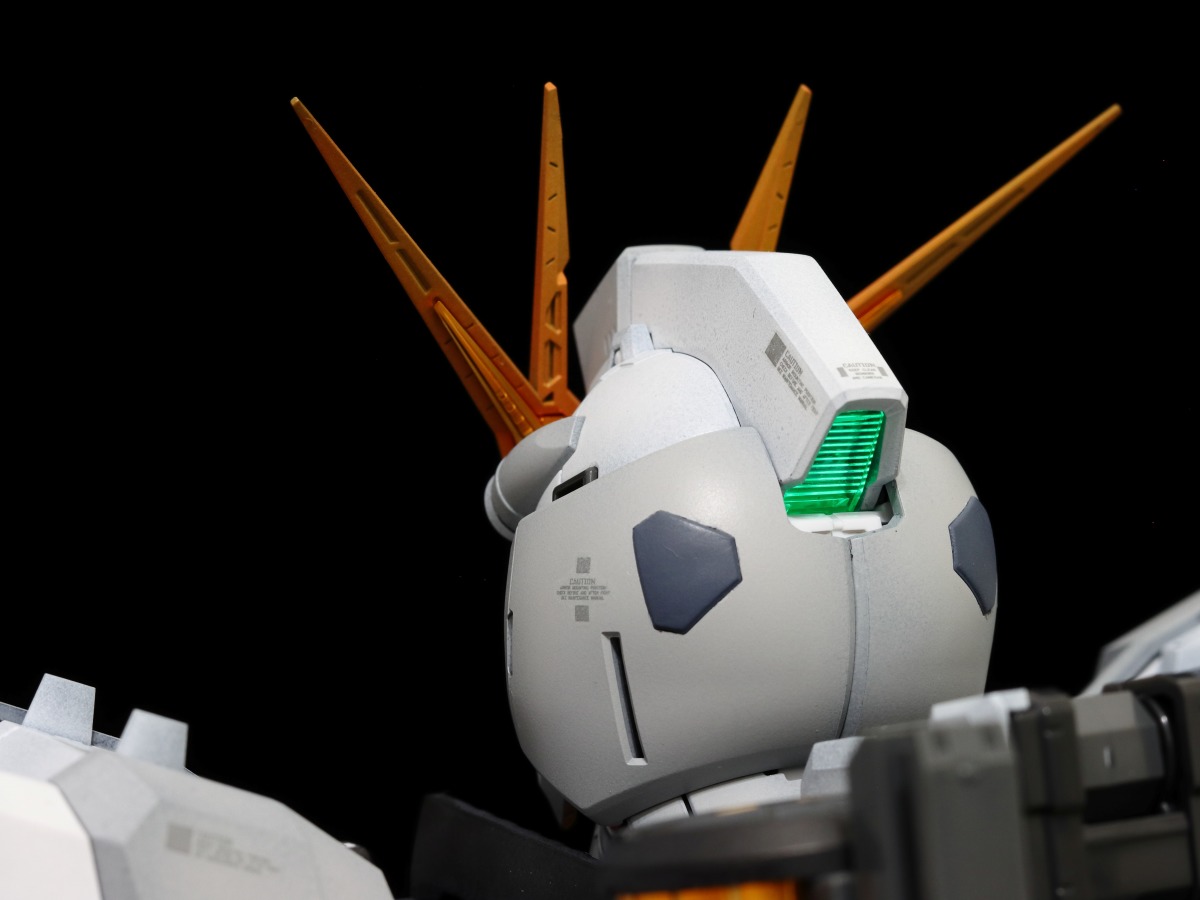
Turning to the rear, the clear part for the monitor on the back of the head, a detail I hadn't paid much attention to before, becomes clearly visible with the light guide.
In short, adding lights greatly enriches the playability, and you can experiment with different combinations.
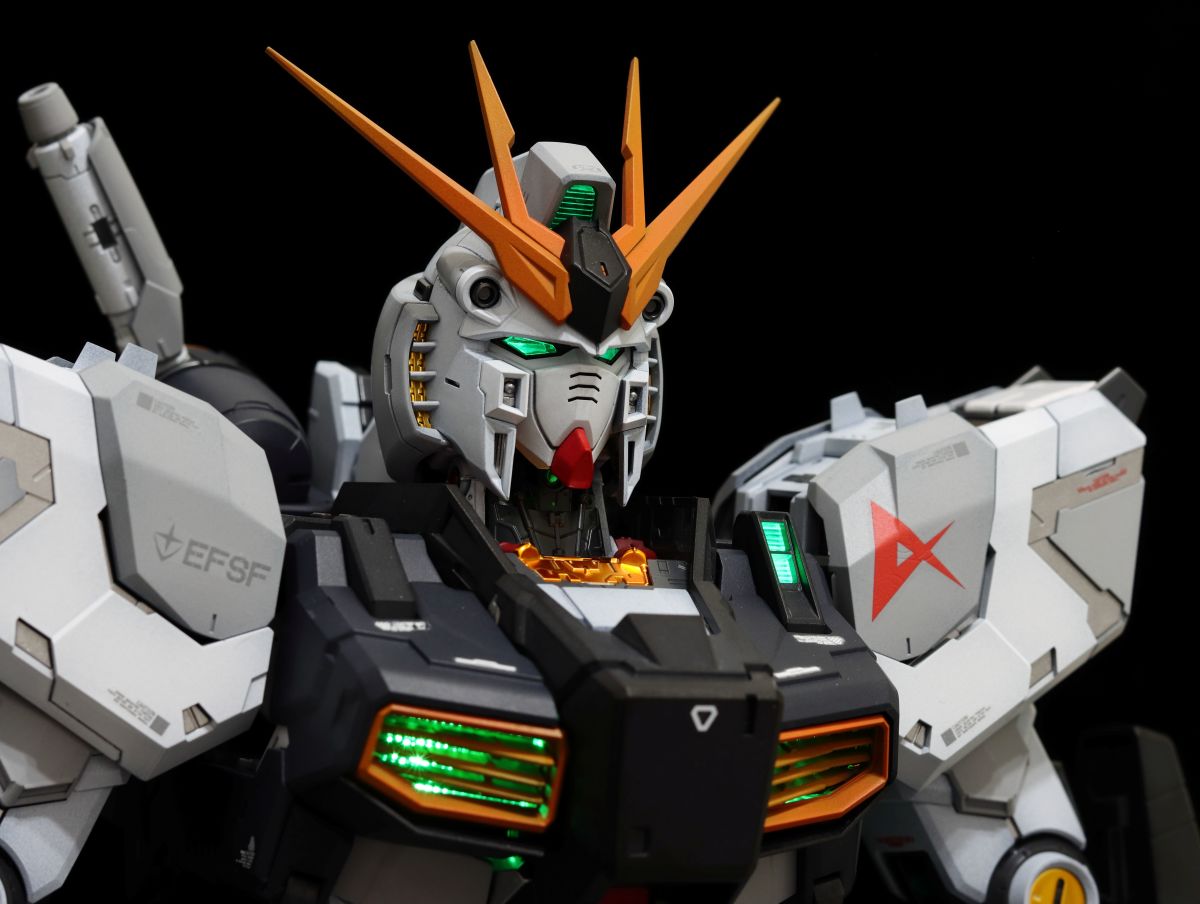
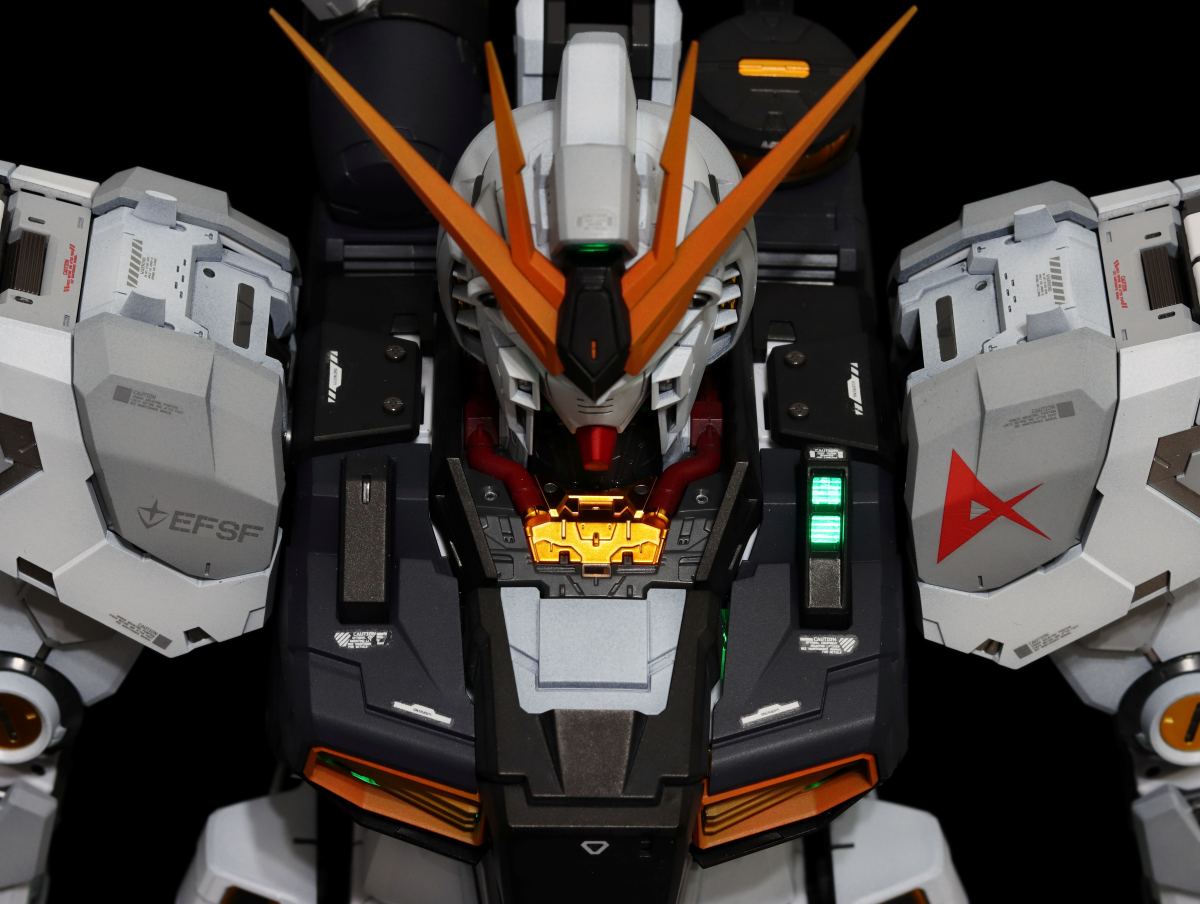
Returning to the details of the armor painting, the striking and wild V-fin on the head was painted with a gradient effect, adding a bit of red to the yellow.
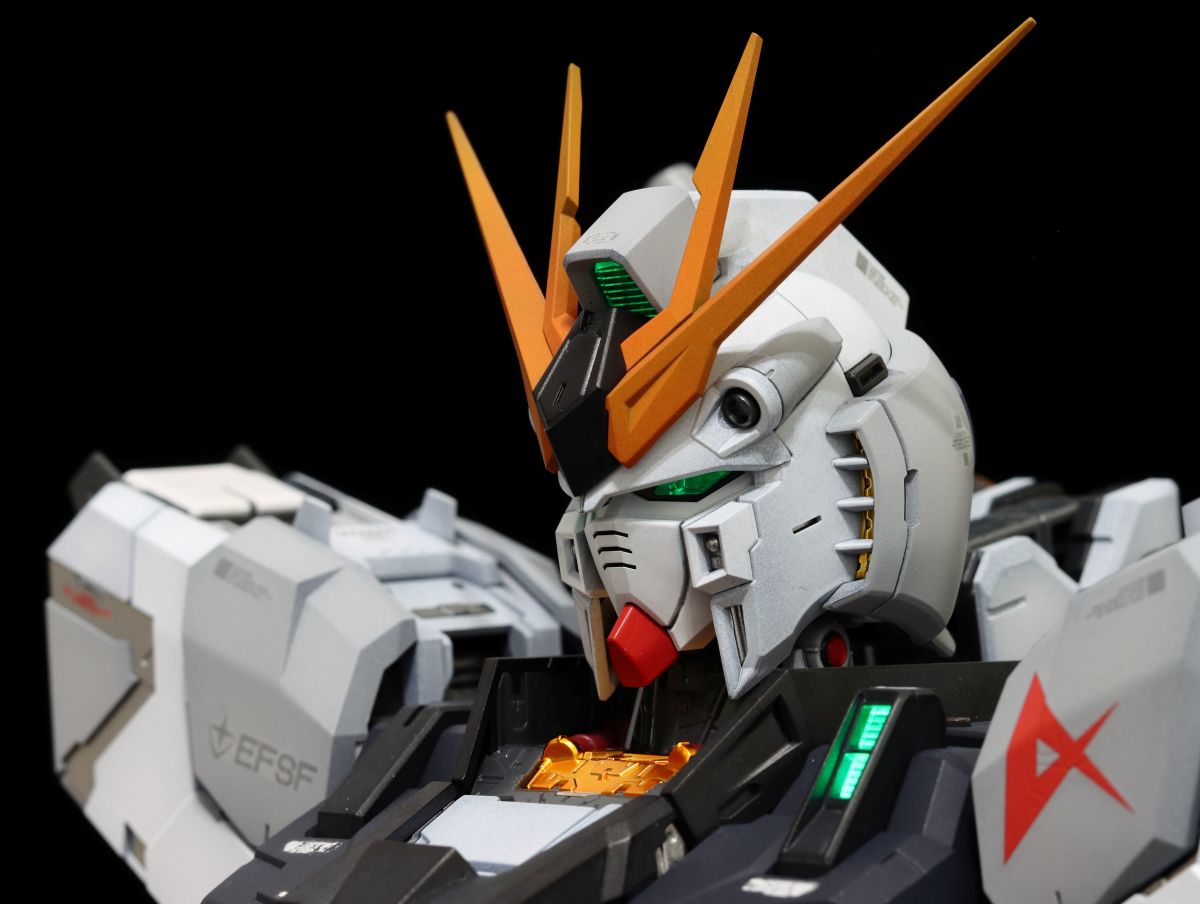
The dark armor on the chest is separated into two different shades. Here, I used a blue-black and a matte metallic black to represent them.
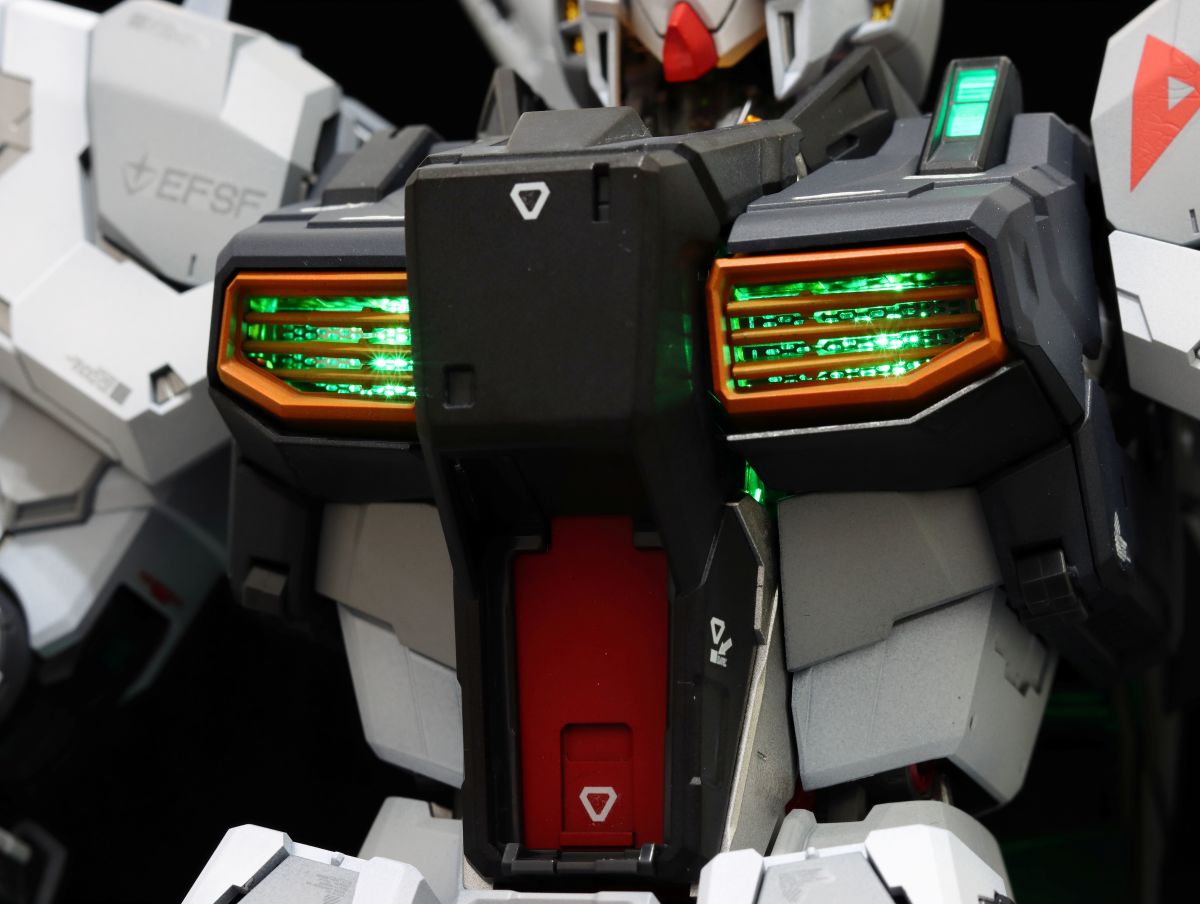
The vents on the chest all have individually articulated louvers. Most of the time, they'll probably be kept open to display the Matrix-code-like lights, so I don't think I'll ever want to close them.
The waist retains a certain degree of articulation even with the outer armor attached. I didn't notice before, but the spherical cockpit actually rotates along with it. Sitting inside would feel quite like a 4DX theater experience.
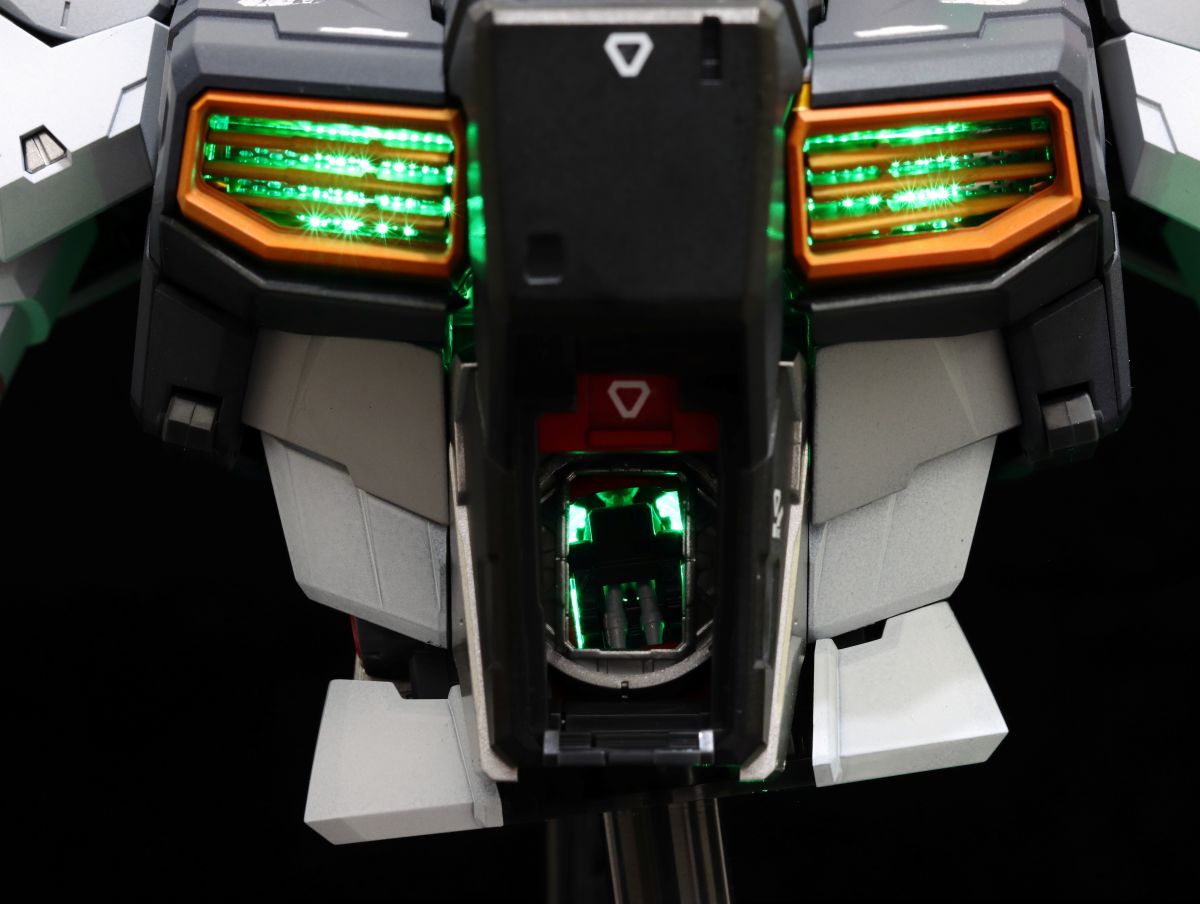
The arms are composed of large outer armor pieces, without excessive detail, giving them a clean and sharp look.
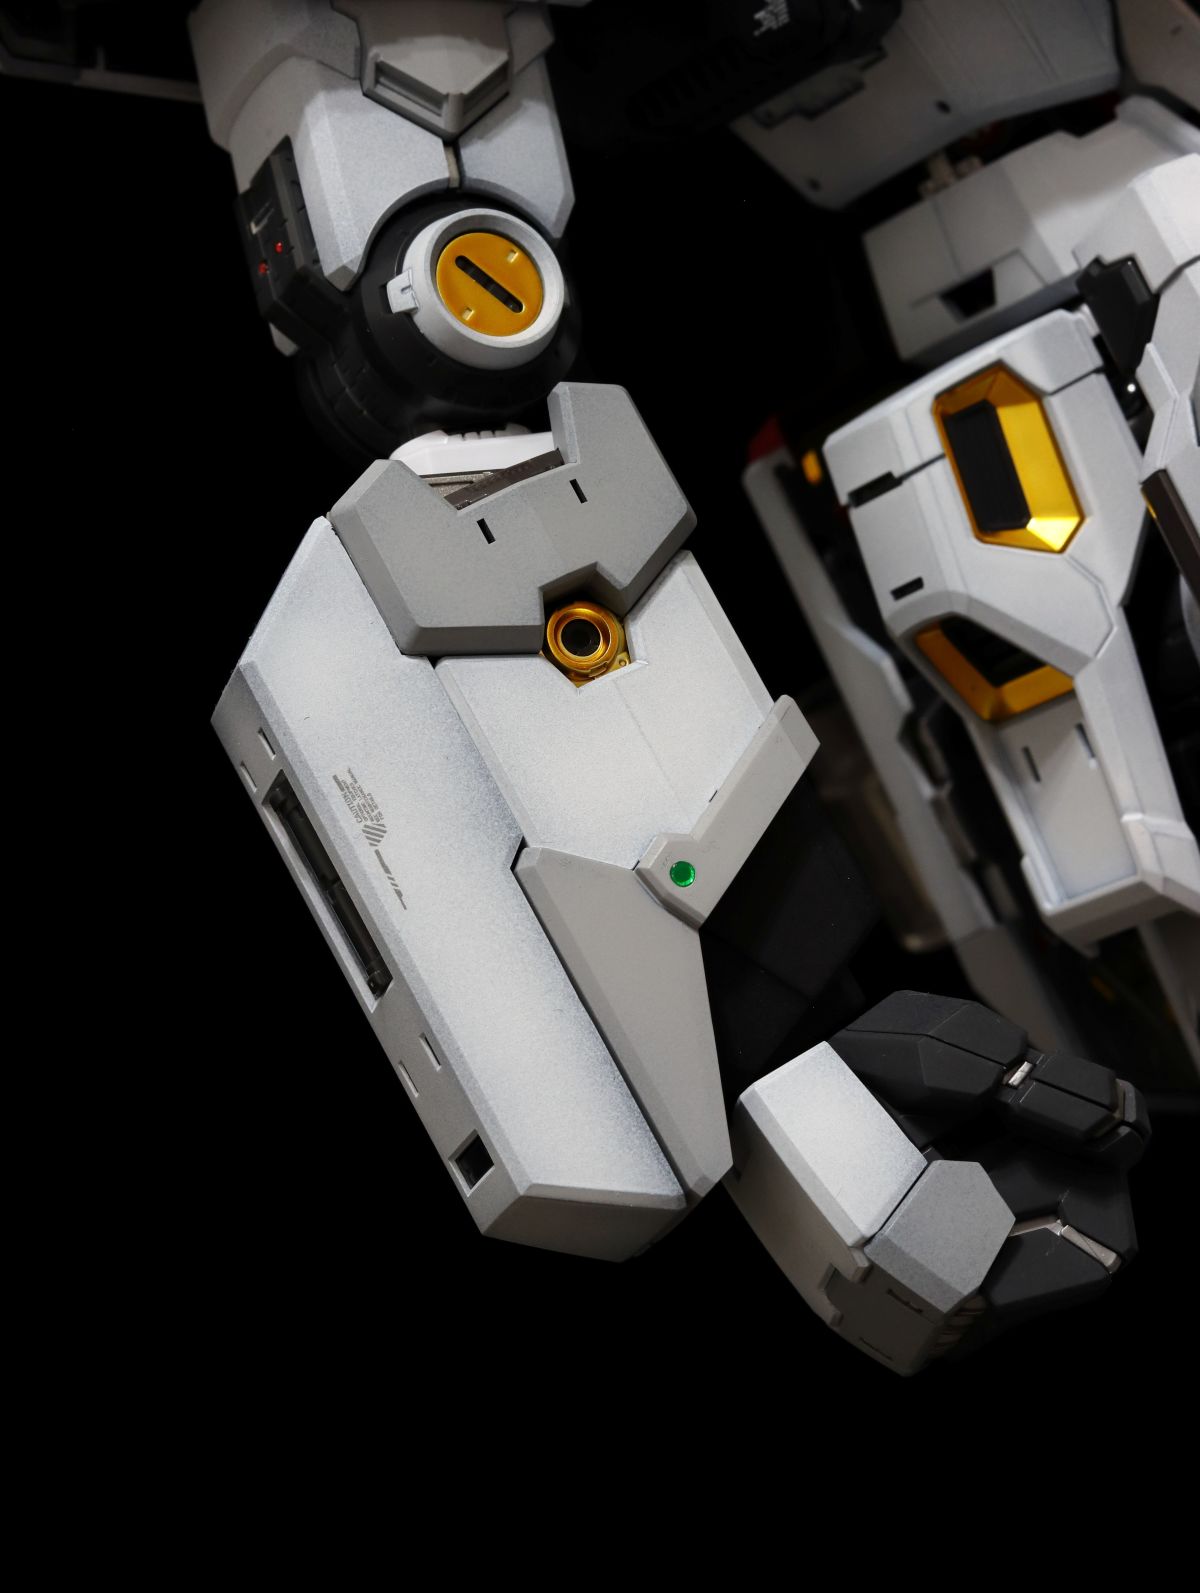
The left arm stores a spare beam saber hilt. As mentioned before, it does not have an interlocking deployment mechanism.
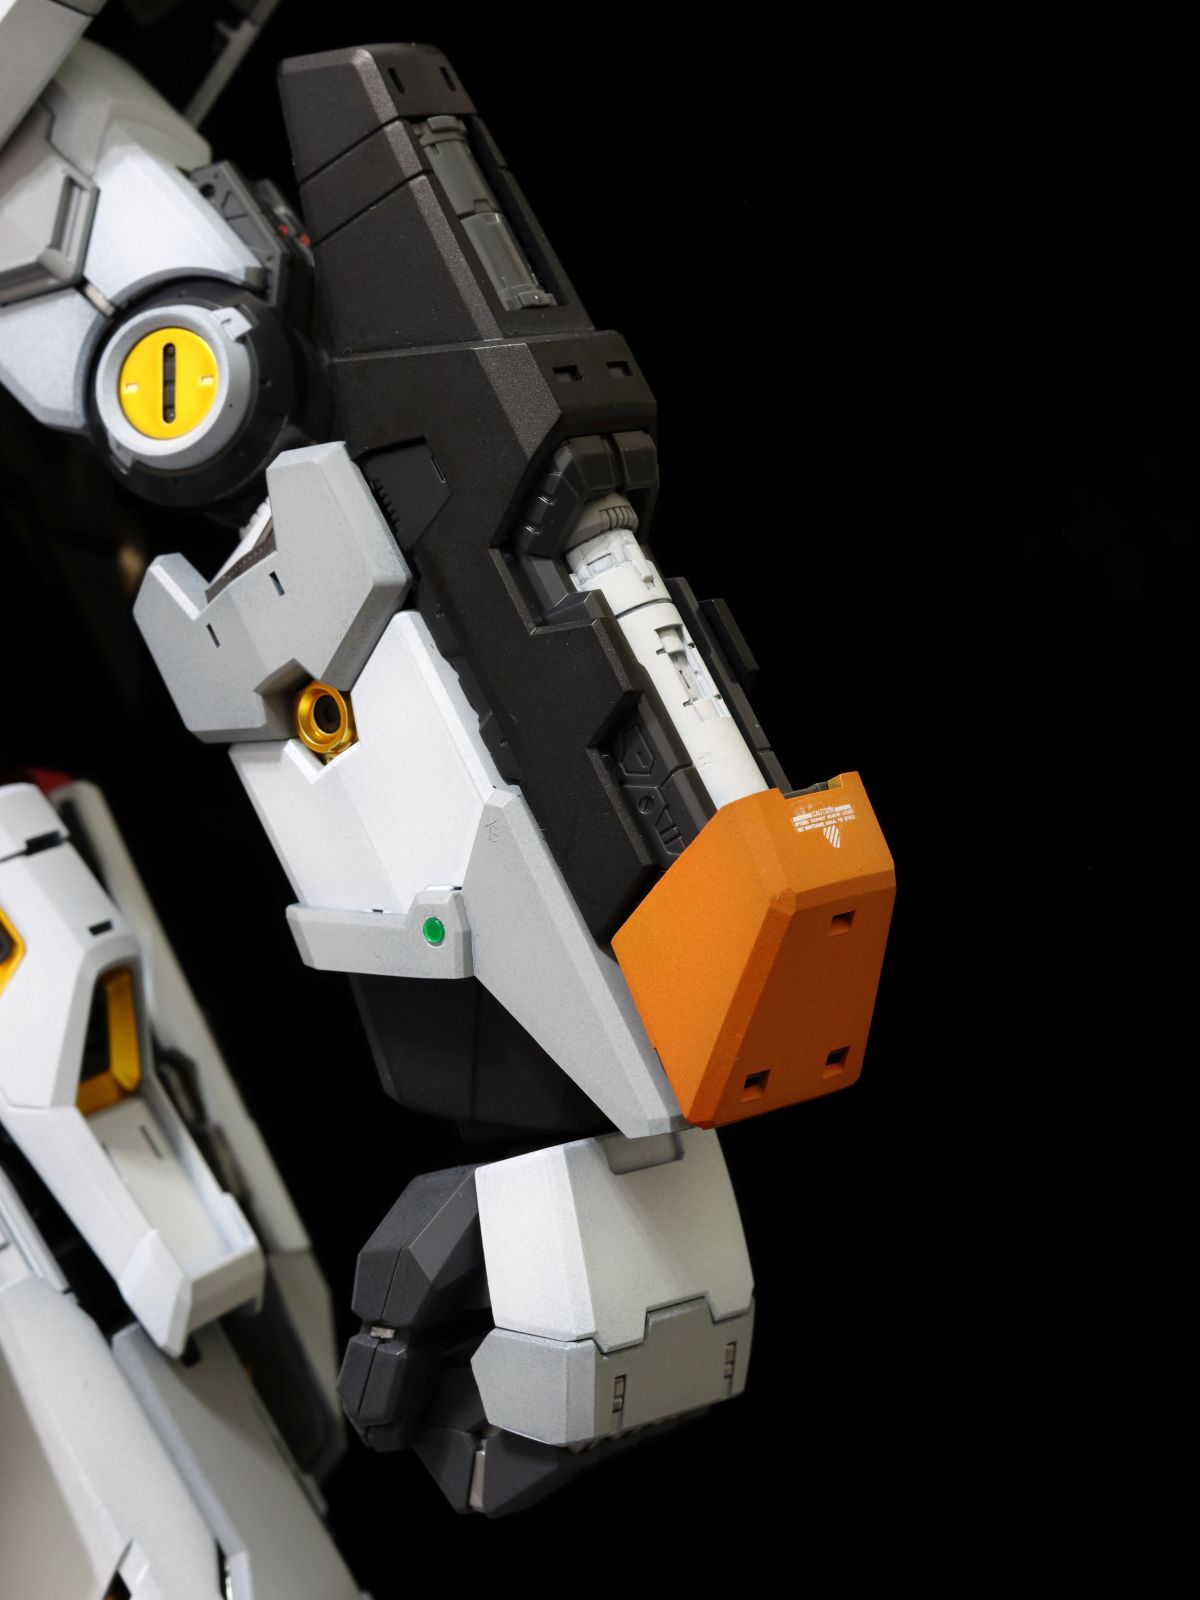
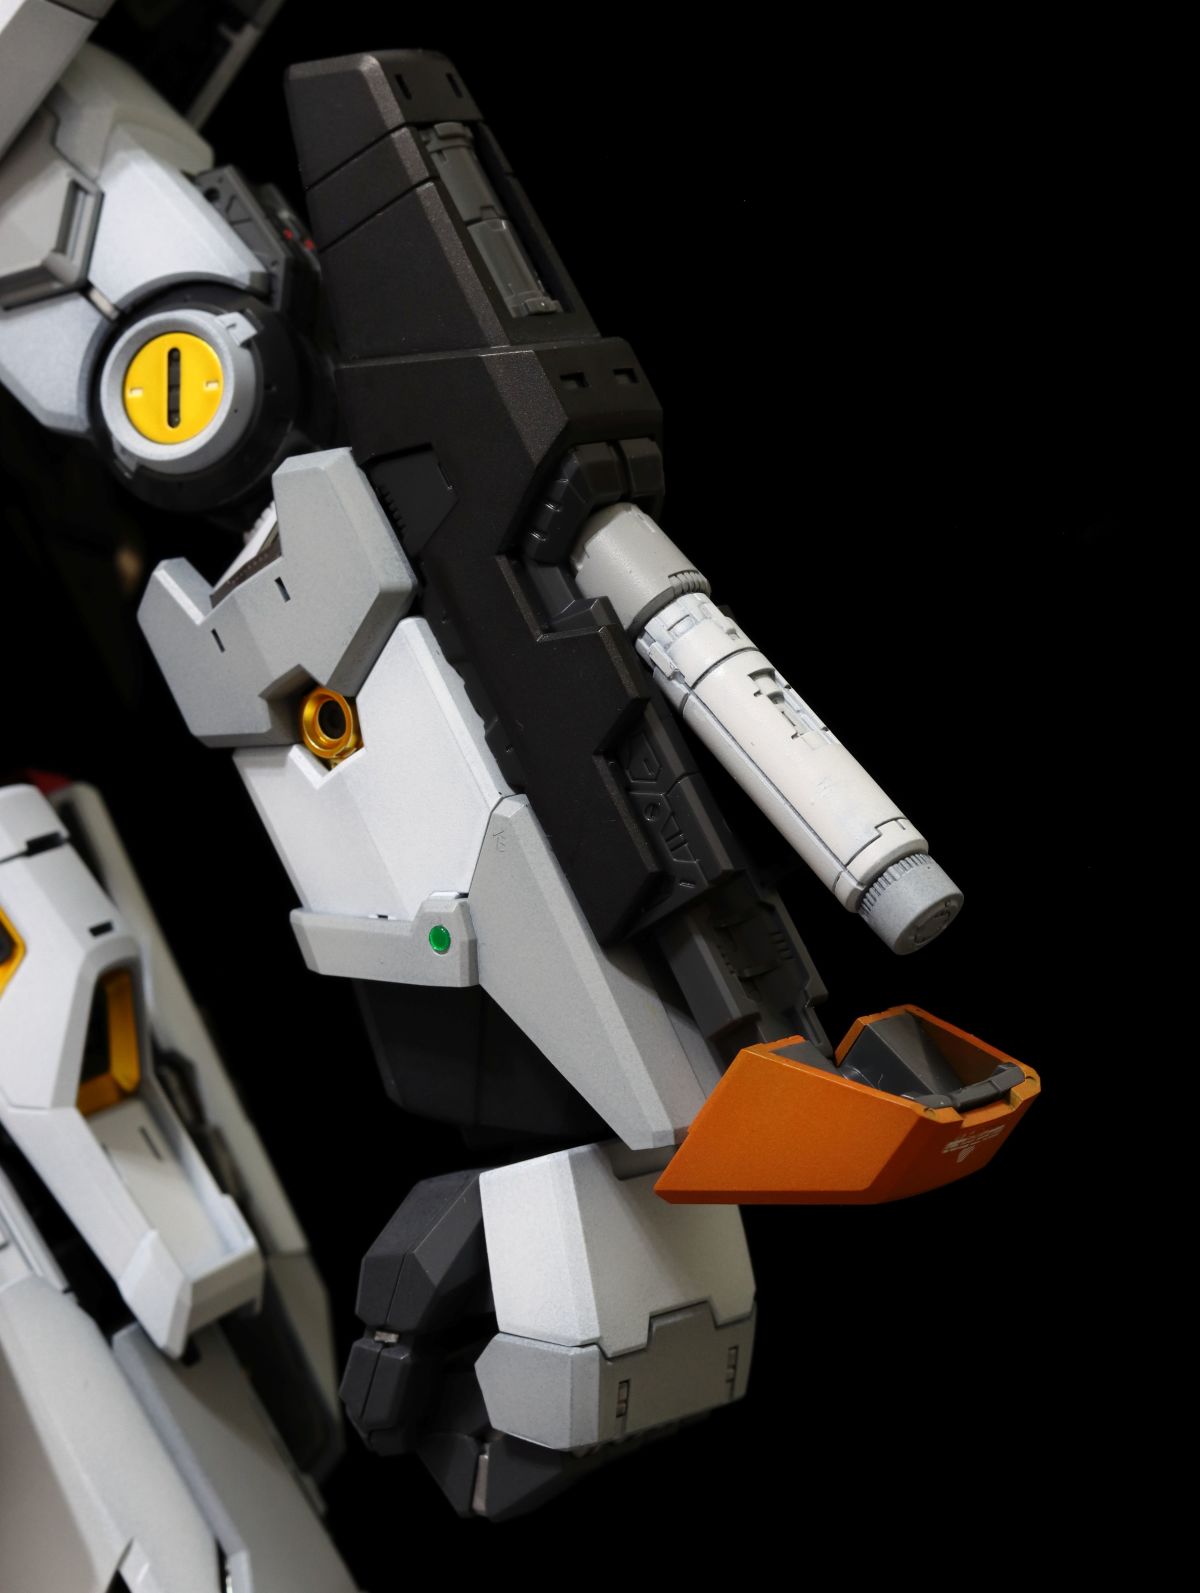
You need to pull down and flip open the orange-yellow armor to take out the hilt.
For the hands, three pairs of fixed-pose hands are provided: open palm, fist, and weapon-holding. They are serviceable but not particularly abundant.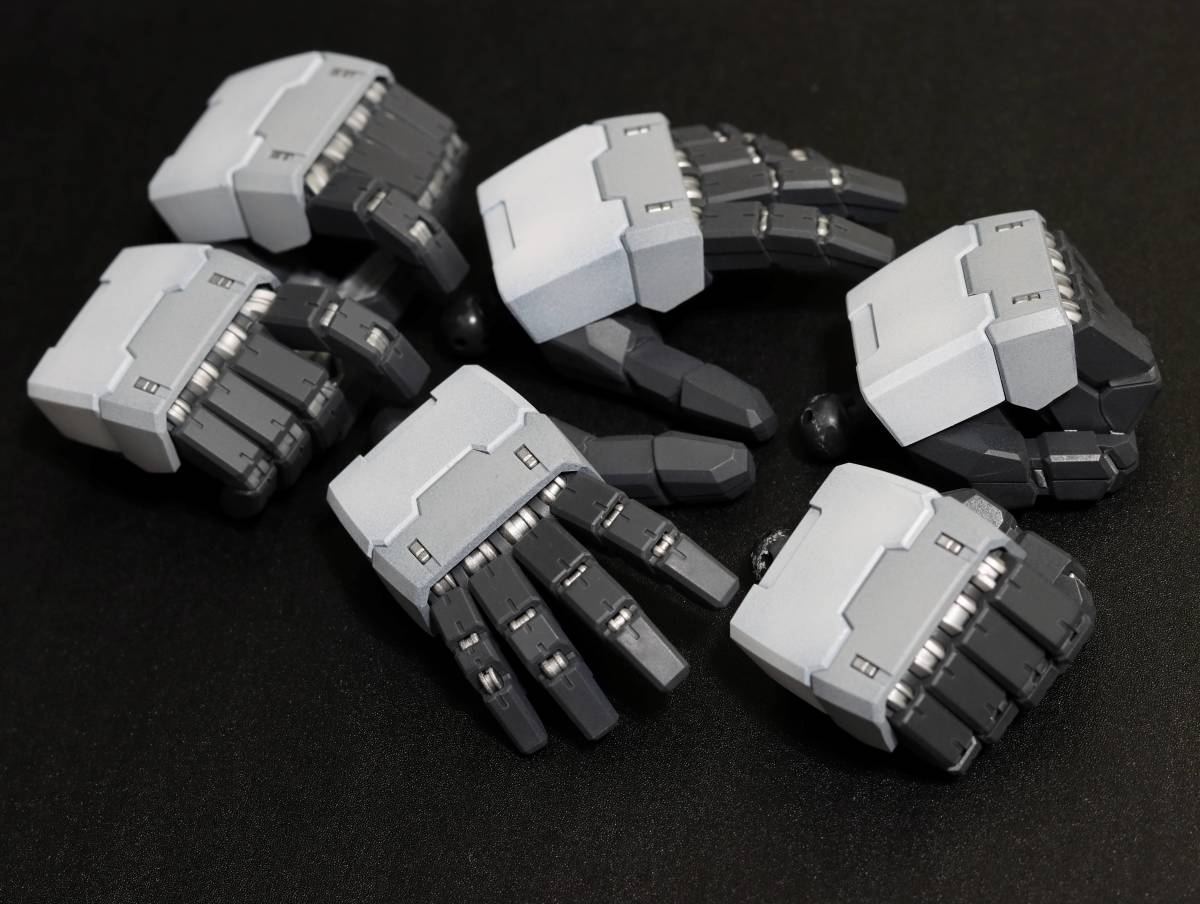
This time, a pair of fully articulated hands is finally included. Although it no longer has the initial sense of awe from experiencing Bandai's "black technology," the overall tightness is moderate and the articulation is good. Casually posing them in different gestures is still quite stress-relieving.
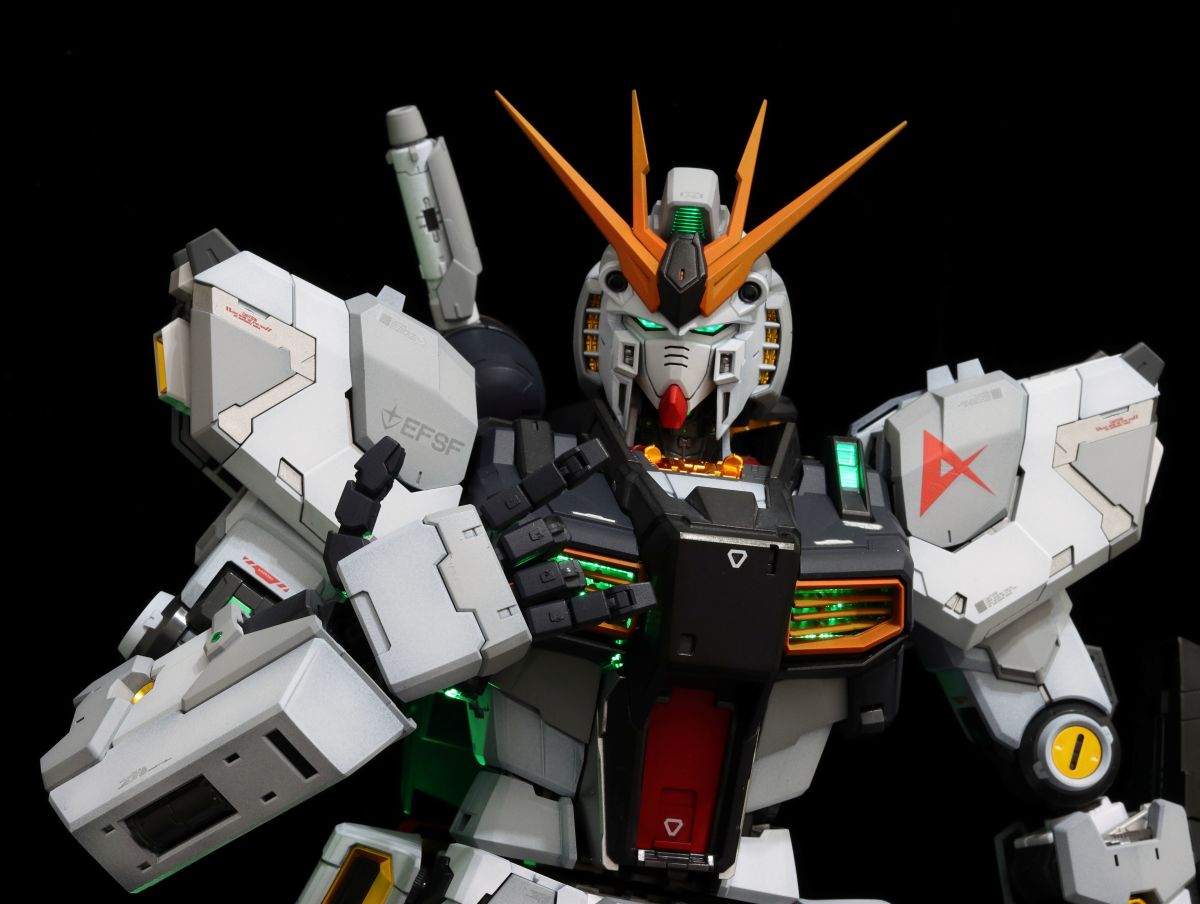
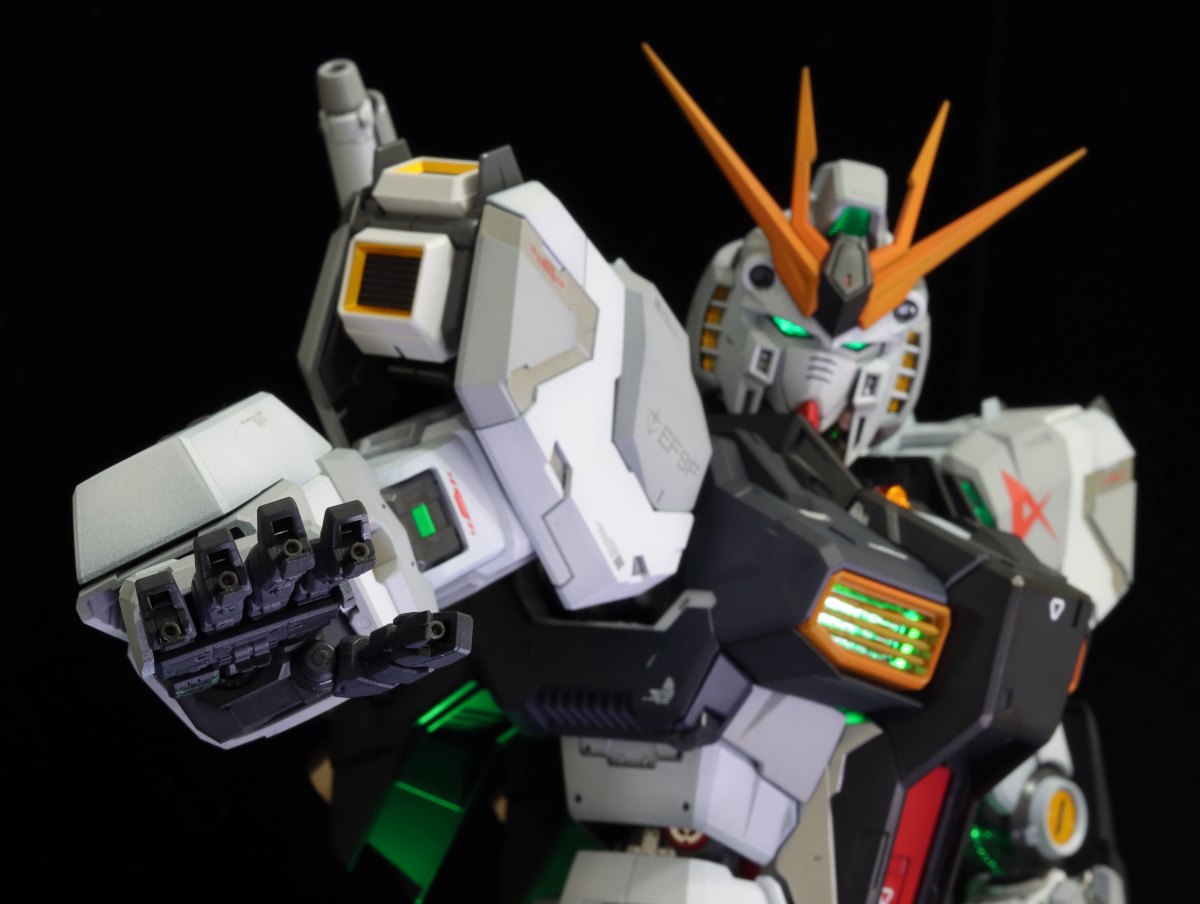
The fingertips can replicate the deployment of the dummy MS balloon fired at the Sazabi in the anime. However, just imagining it feels a bit empty; it would have been much better if a physical balloon model was included.
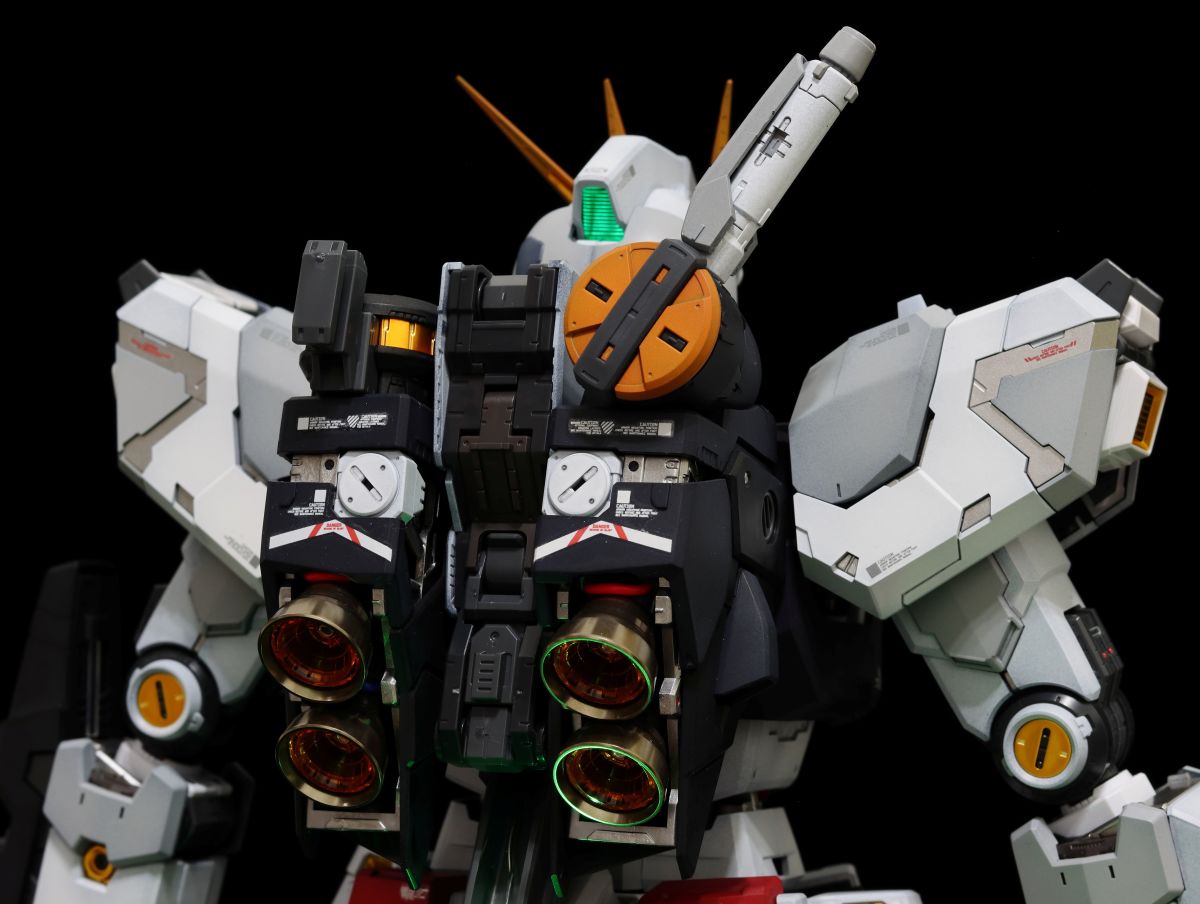
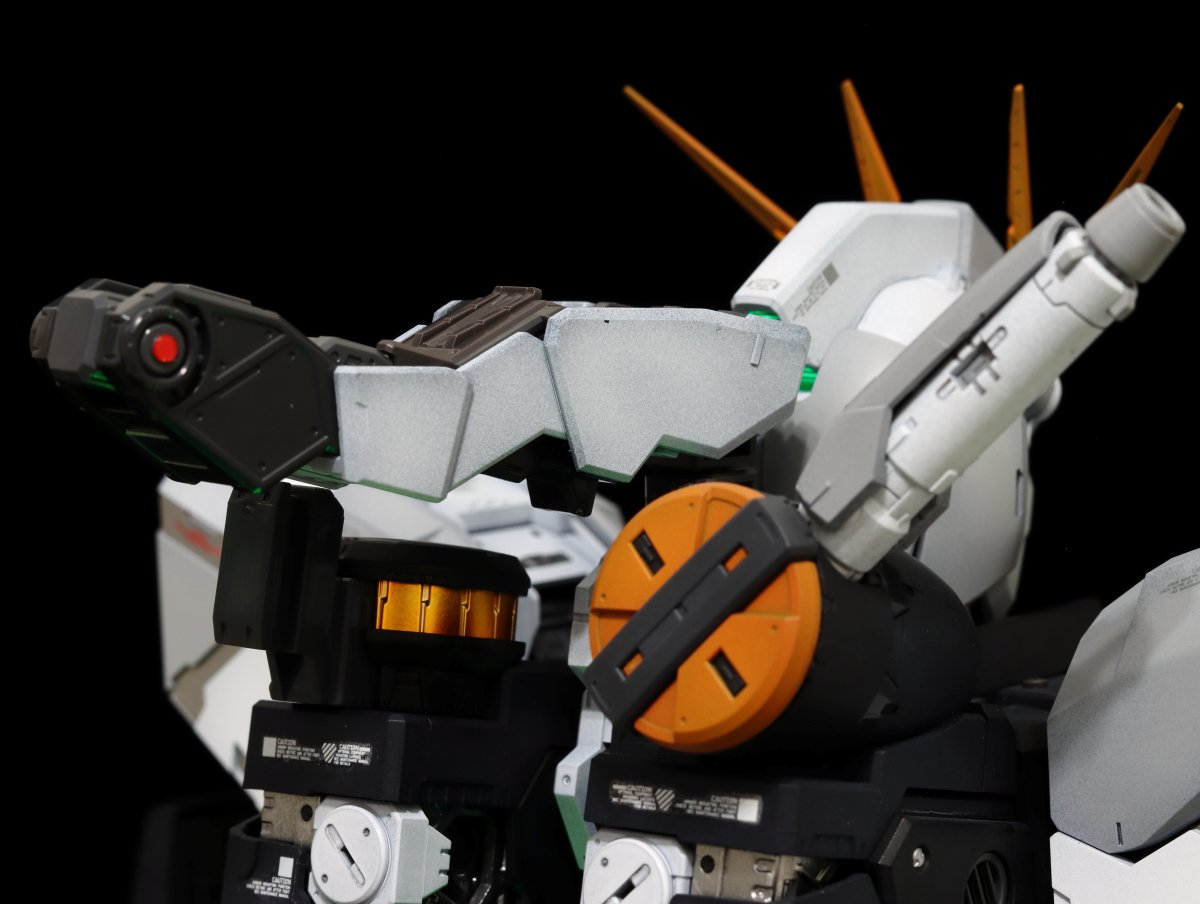
The backpack has a long-handled beam saber mounted diagonally on the right side. However, once the outer armor covers the backpack's originally rich and detailed frame, the visual impact is significantly diminished.
Even though the outer armor has some opening mechanisms that can vaguely reveal some of the inner frame, the visual appeal is still greatly reduced.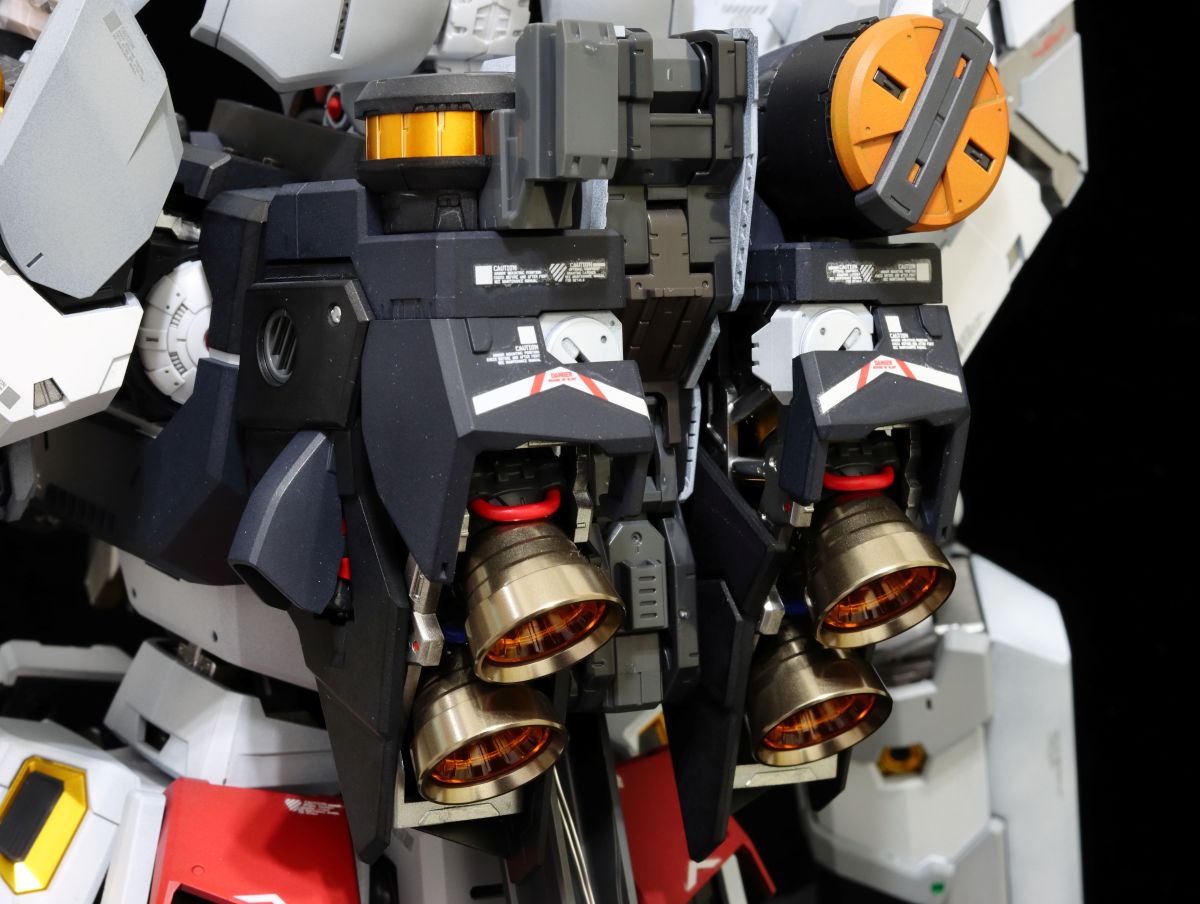
An additional mounting component for the Fin Funnels is provided on the right side, so the six funnels can be mounted on both sides, or you could buy another six and mount them on both sides... (let's not go there).
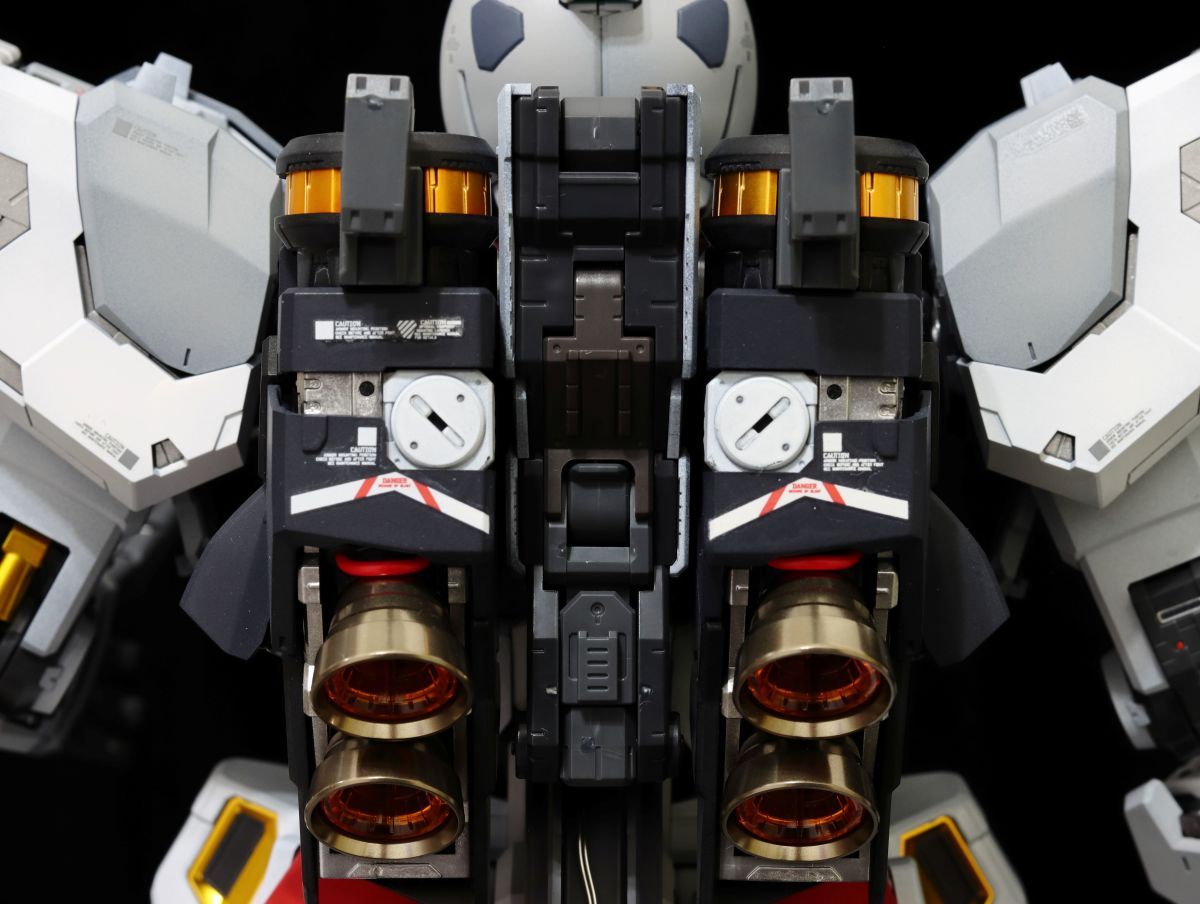
The middle of the backpack is equipped with an auxiliary connector arm for the New Hyper Bazooka, an original mechanism for this PGU. In addition, this connector arm has a latch that also serves to secure the backpack.
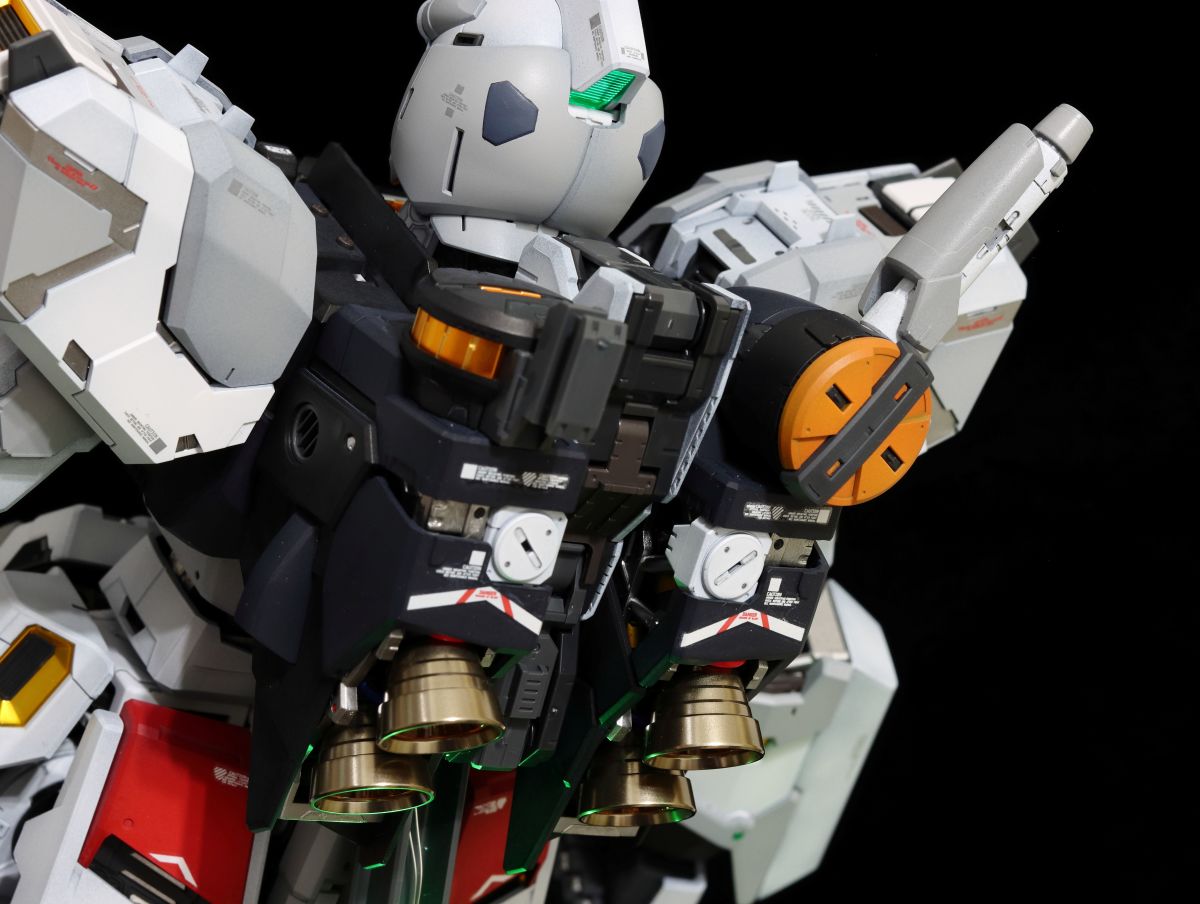
The actual deployed state and play experience will be shared along with the weapons in a future review.
Moving to the lower body, for the white parts, the difference between the two original molded colors of white armor was not very obvious. So, during painting, I chose a more grayish color for one of them.
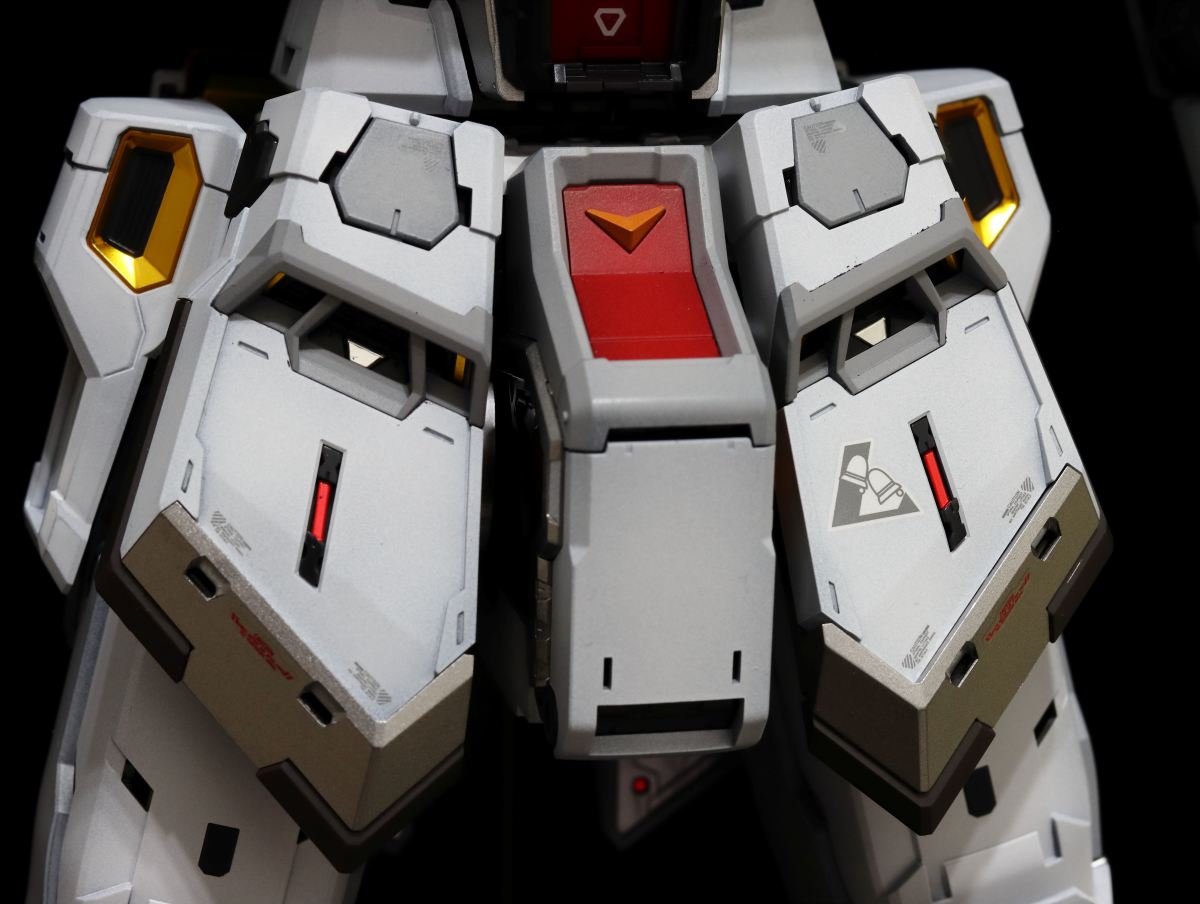
Flipping open the crotch piece reveals the gleaming golden inner frame. As for the skirt armor, there's not much to say; it's clearly designed with sockets for certain heavy equipment.
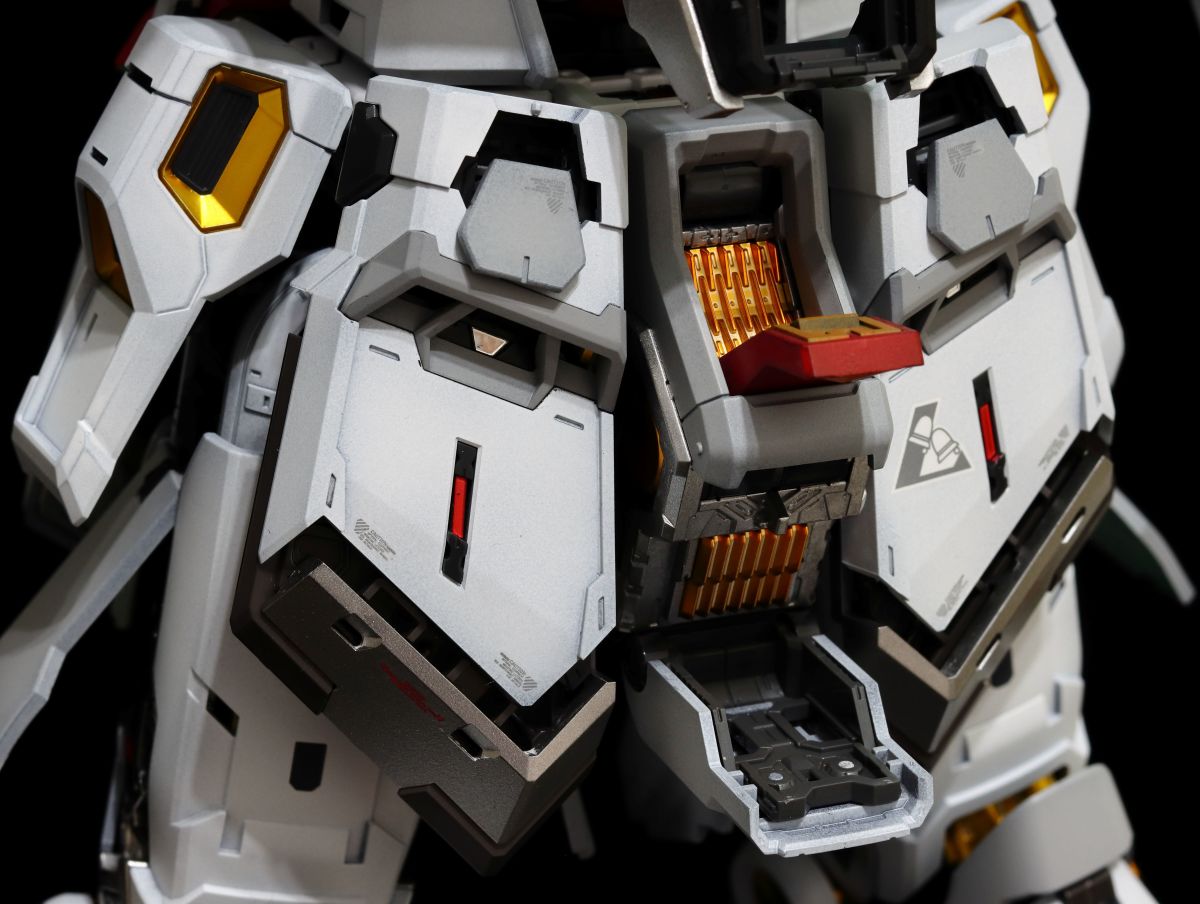
The massive rear skirt armor also has a rather simple style.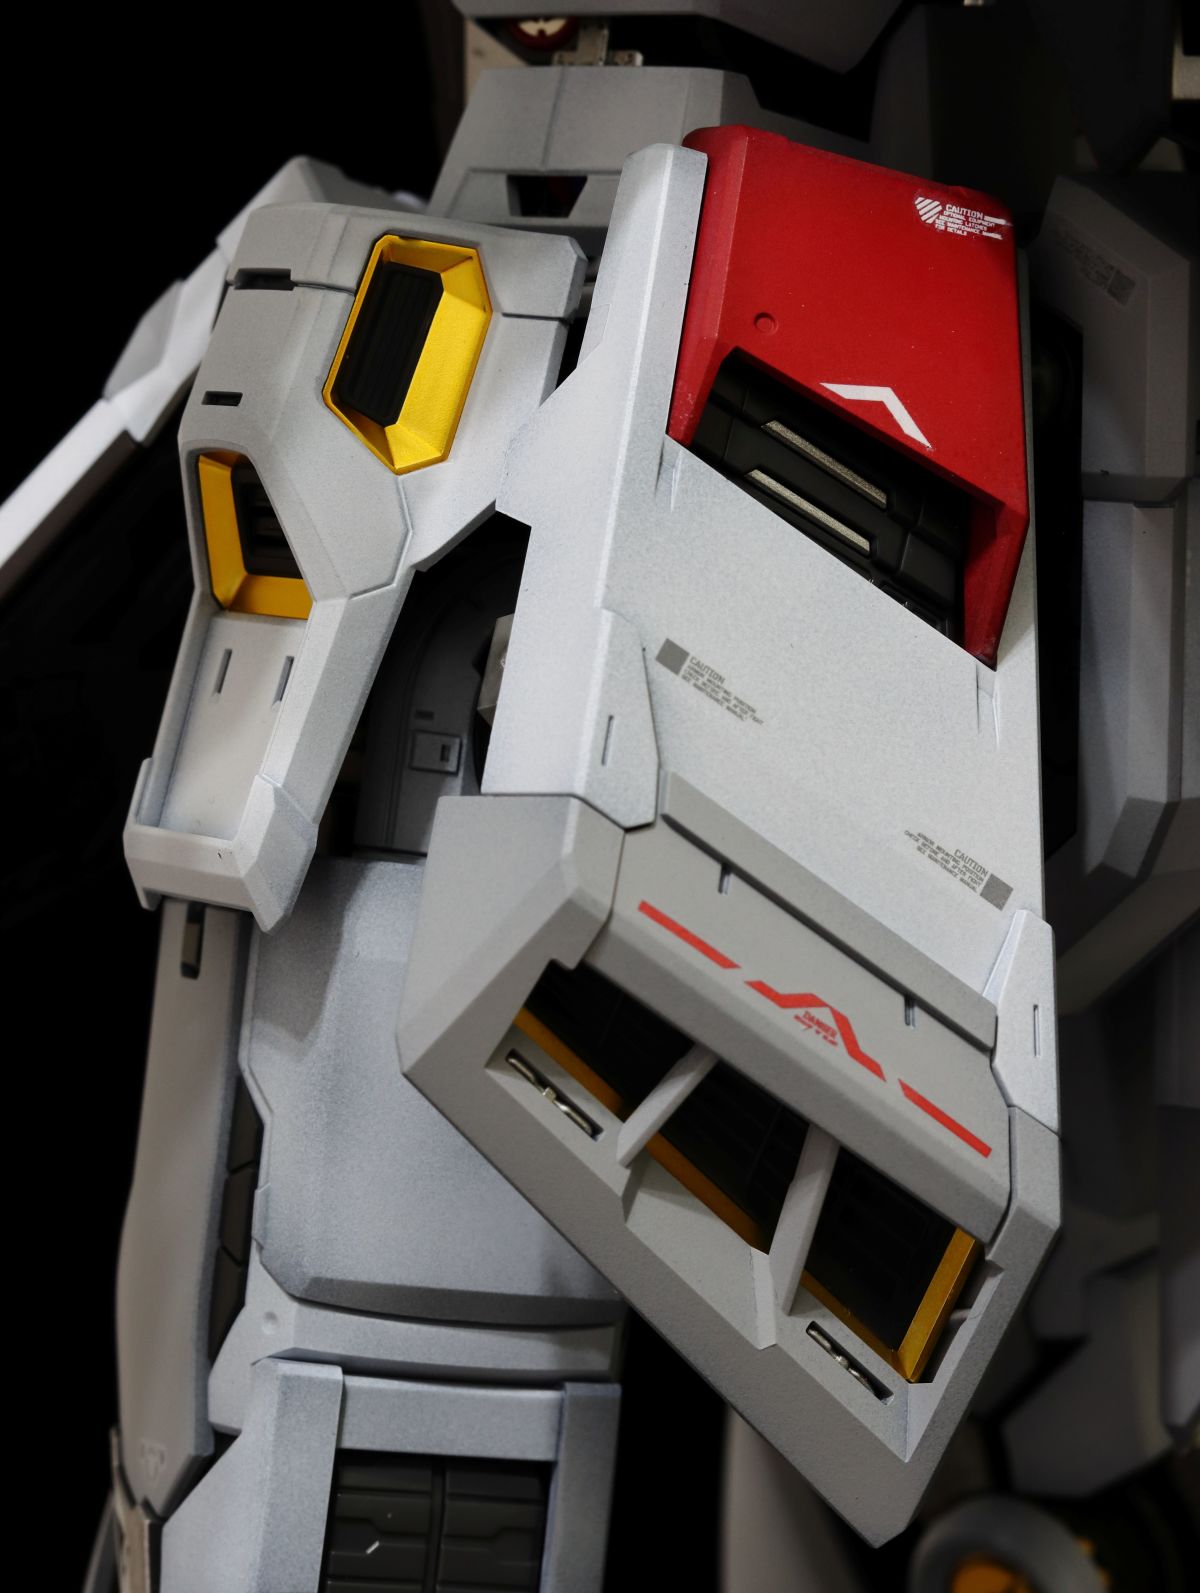
Similar to the backpack, the exposed inner frame doesn't offer much visual interest when opened.
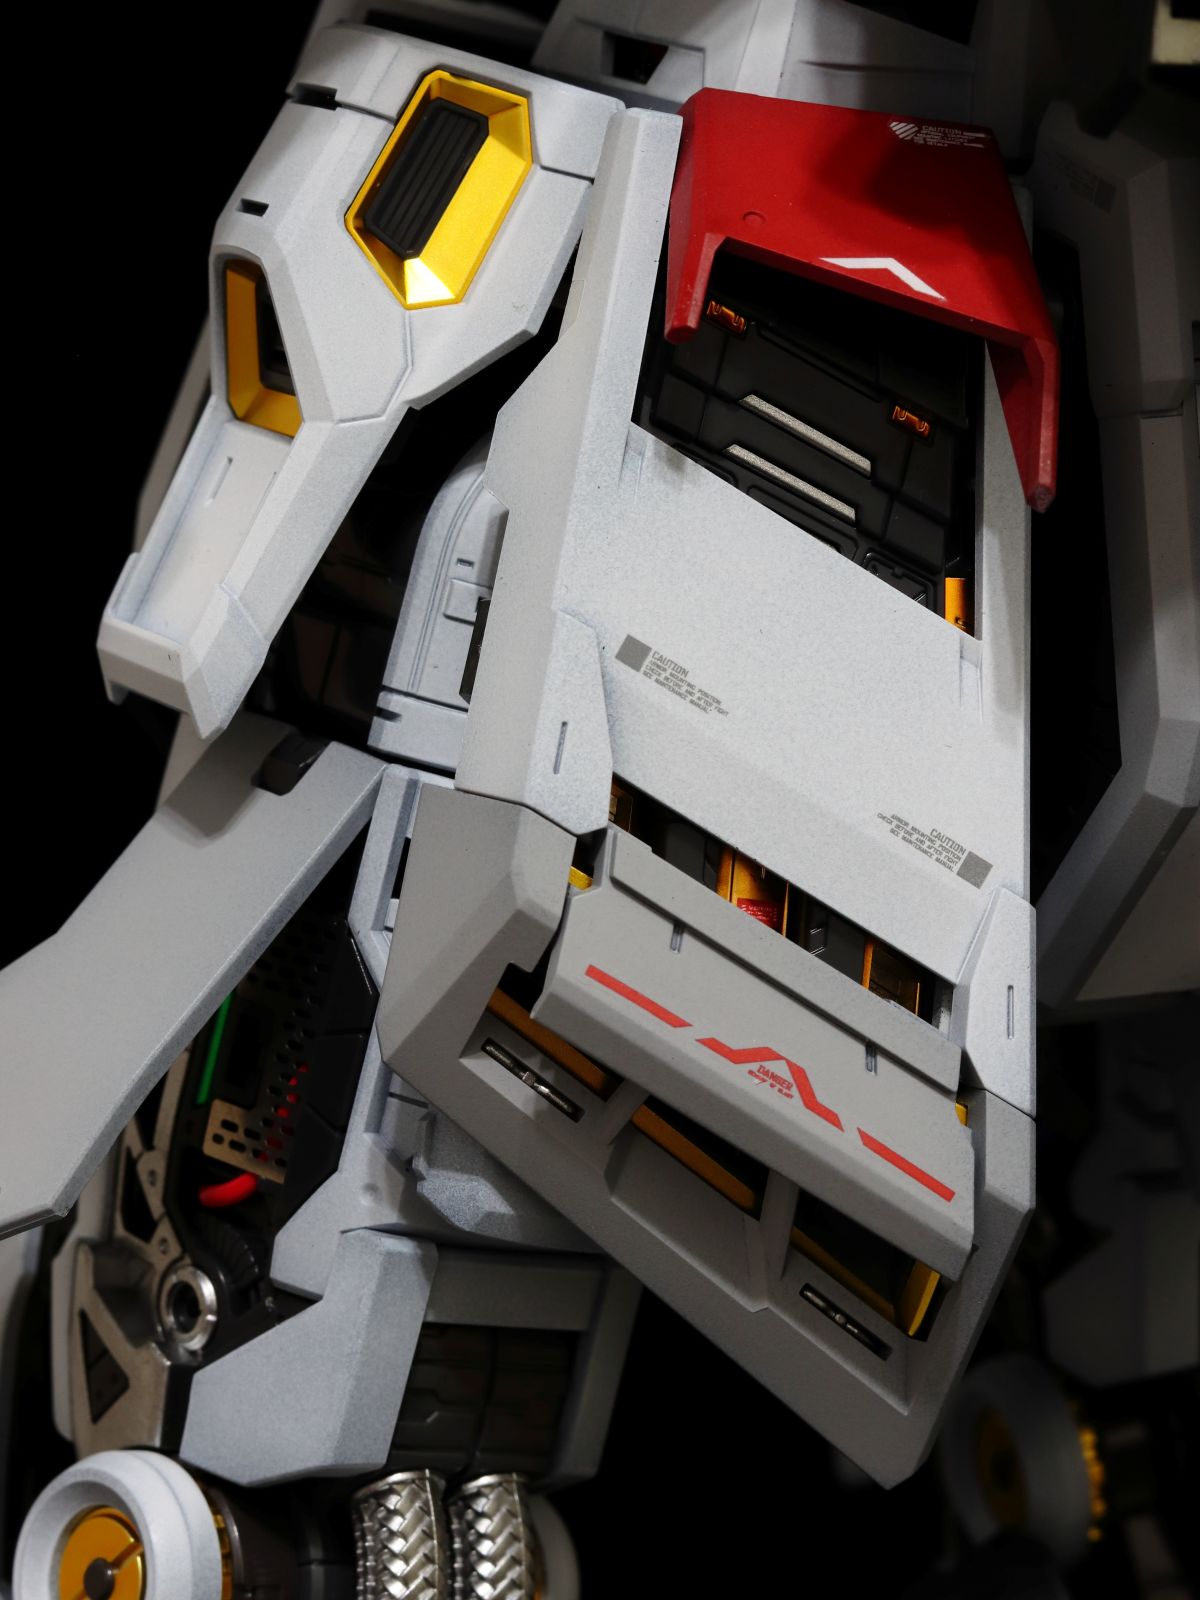
Moving down to these long, slender legs, it means we're nearing the end~
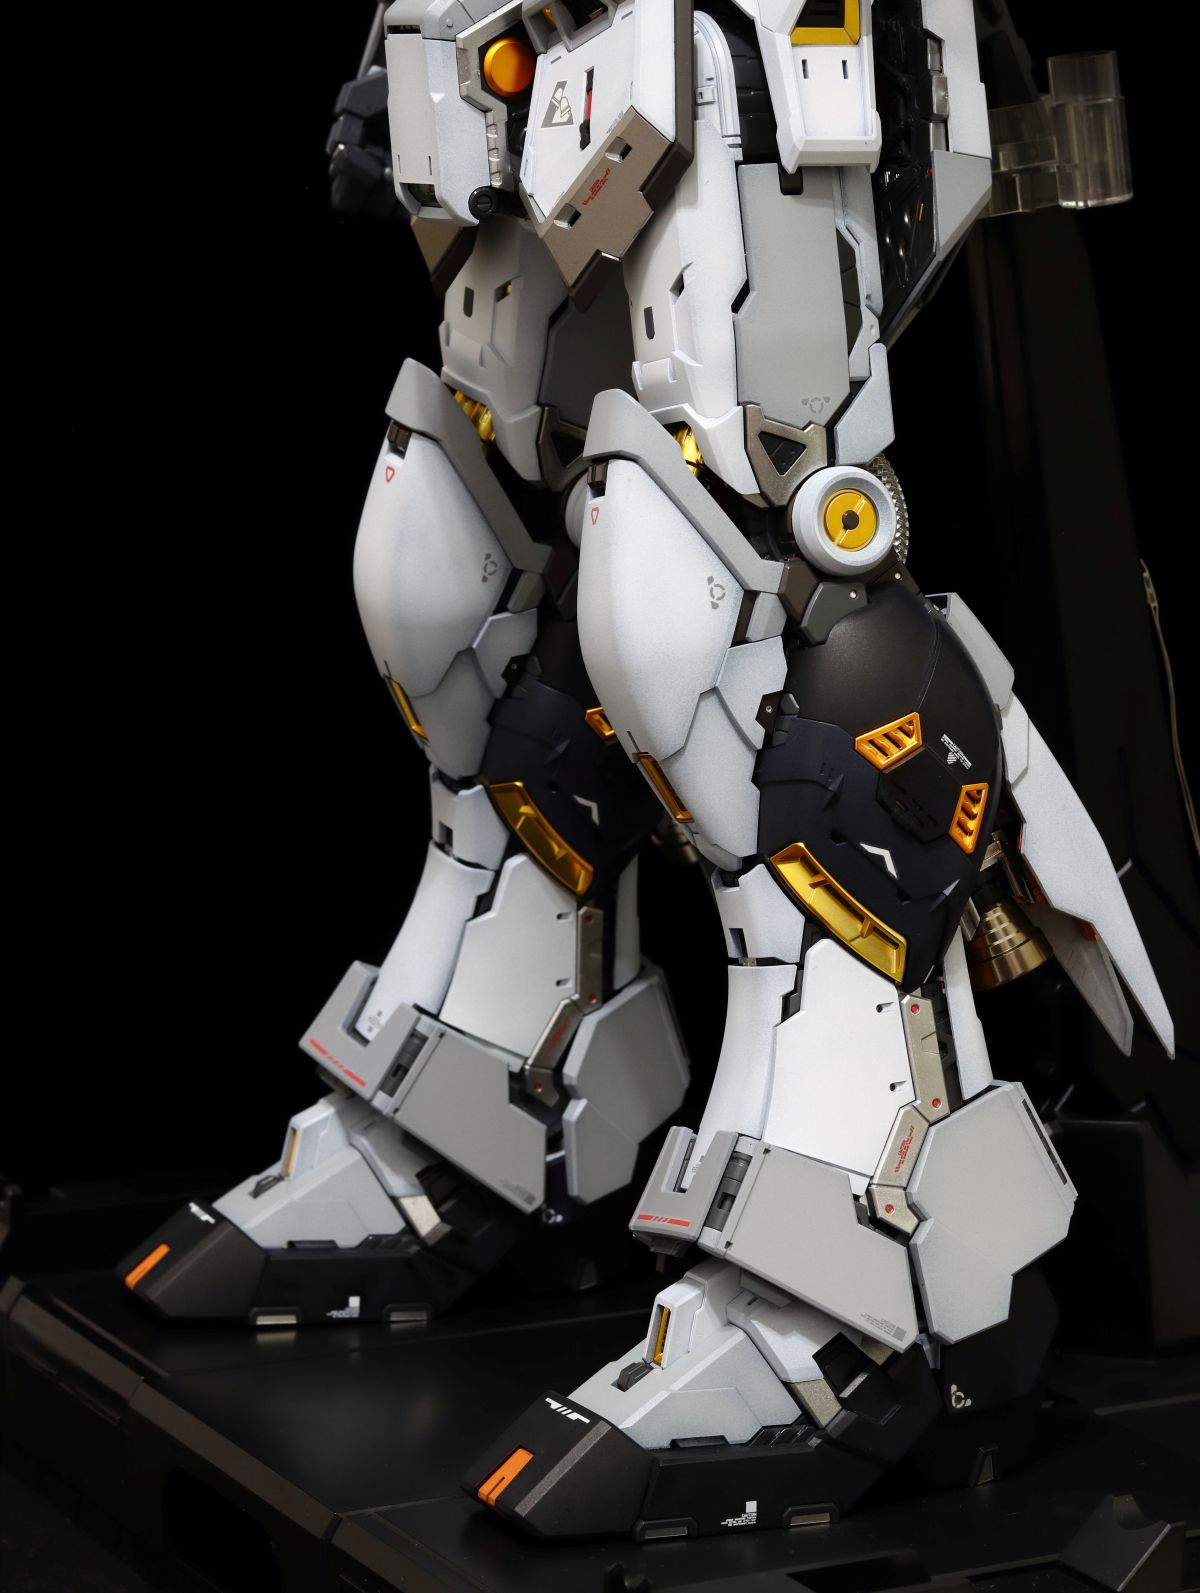
I have to say, the area connecting the knee and the calf is, personally, the second-best-looking part of the entire ν Gundam, second only to the face. The layers of white, gray, blue, black, and gold complement each other, creating a sense of power in the legs while also forming a continuous, streamlined shape with the sharp armor at the back.
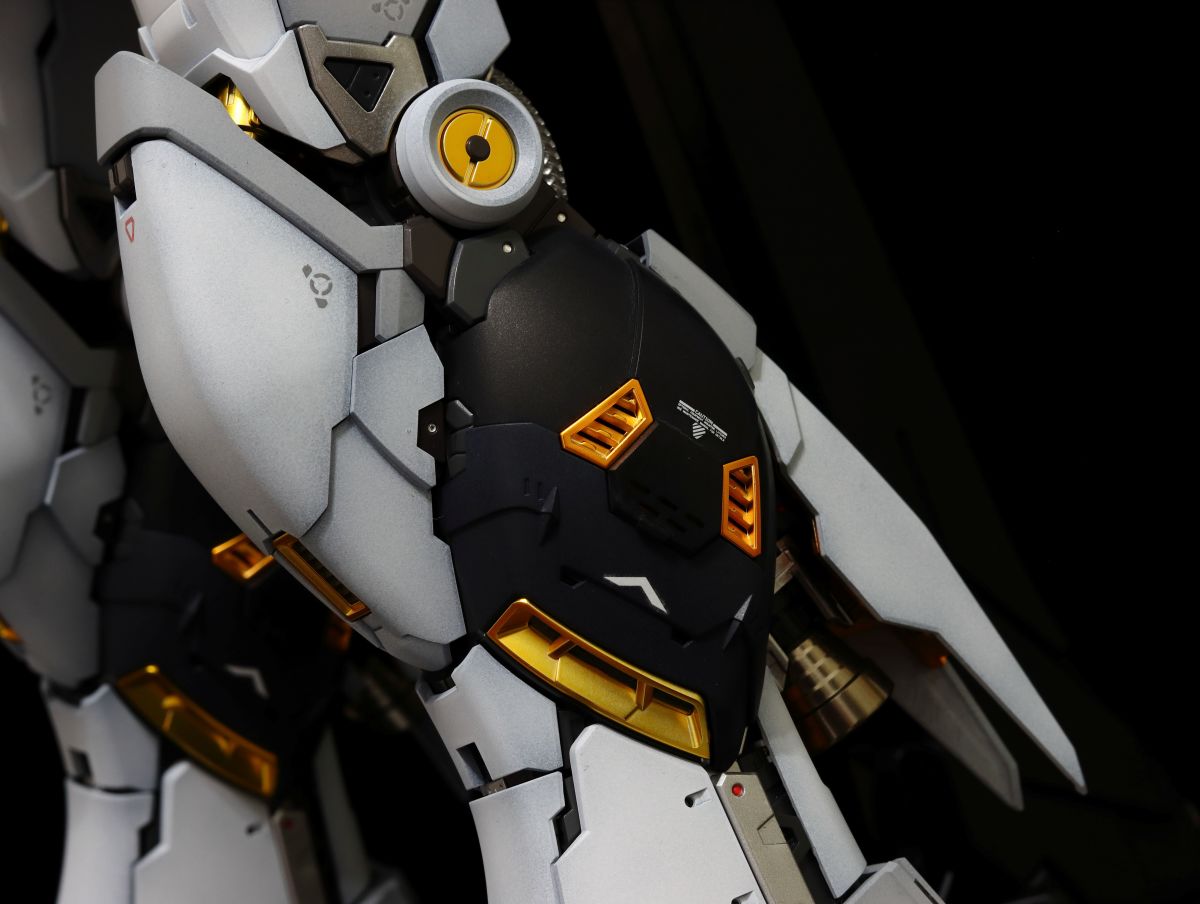
However, this piece of armor on the back of the calf is a bit too plain. There's a very rich golden inner frame underneath; adding some open hatches or color separation might have been better. But this area is an excellent canvas for practicing panel lining.
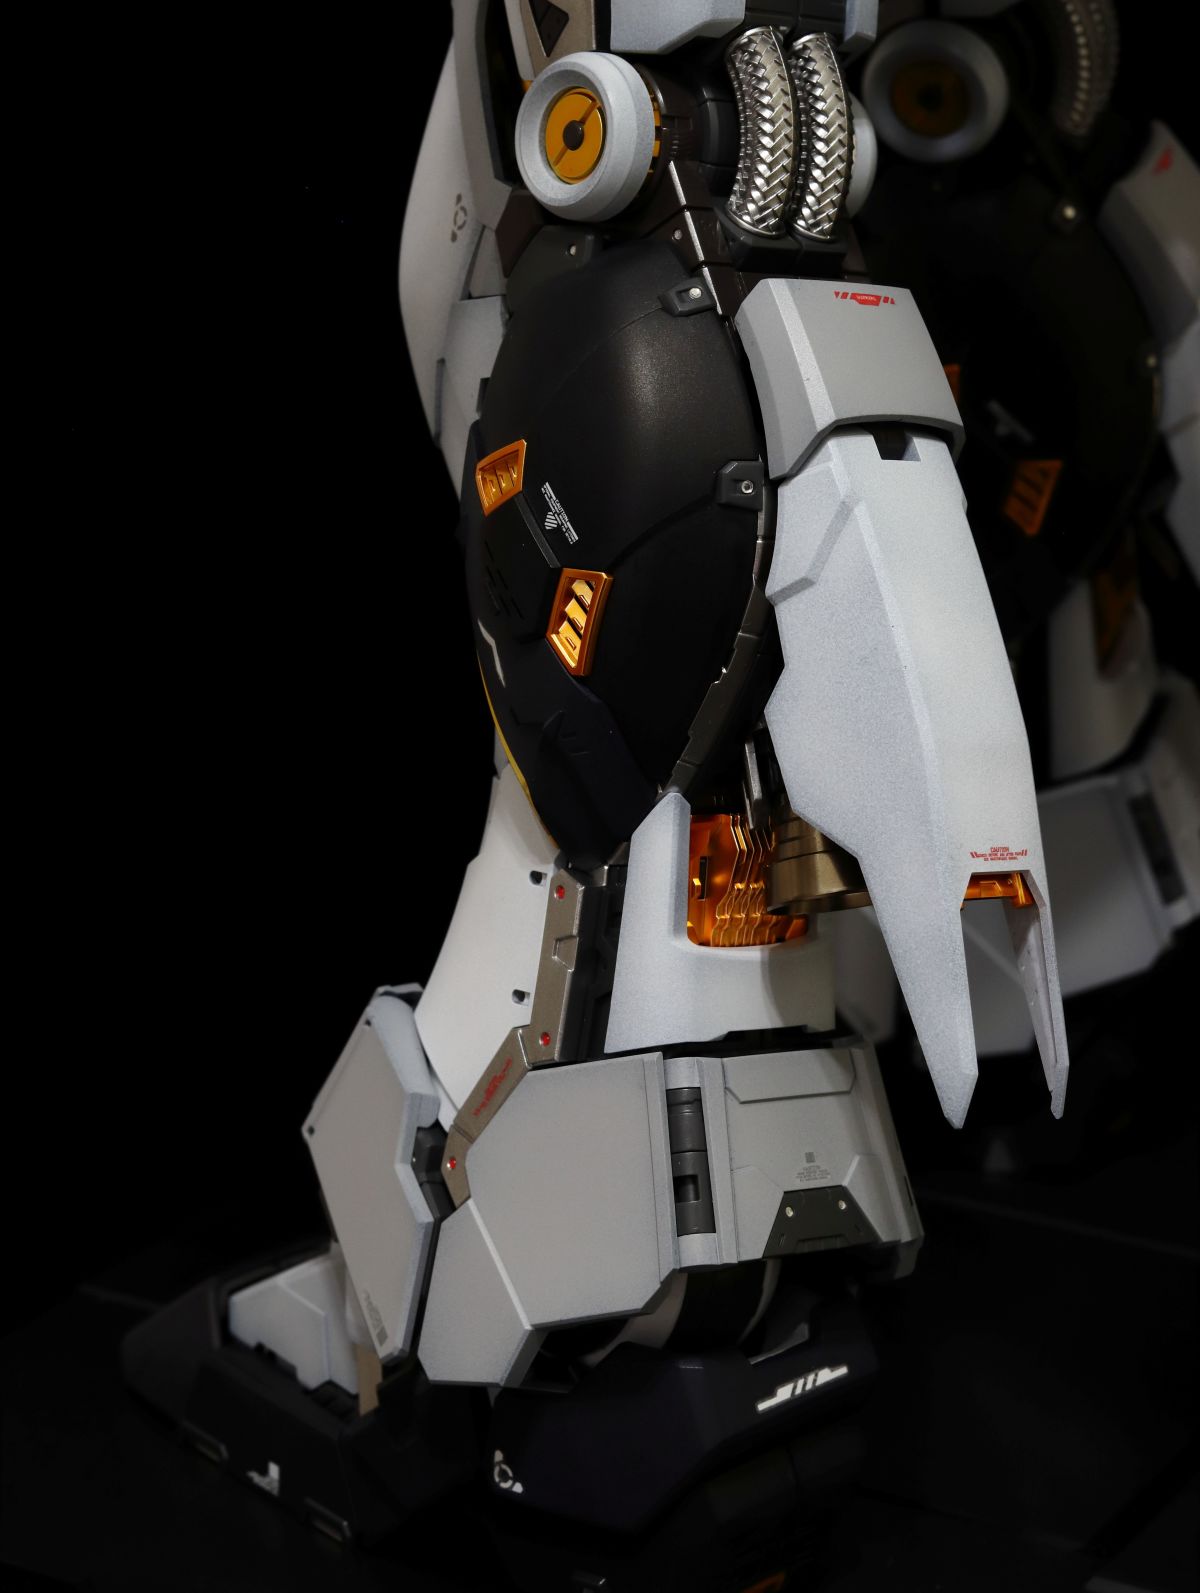
The dark, hoof-like feet sliding across the surface of the asteroid Axis, engaging in close-quarters combat with the Sazabi—that scene remains one of the most iconic moments from "Char's Counterattack" in my heart.
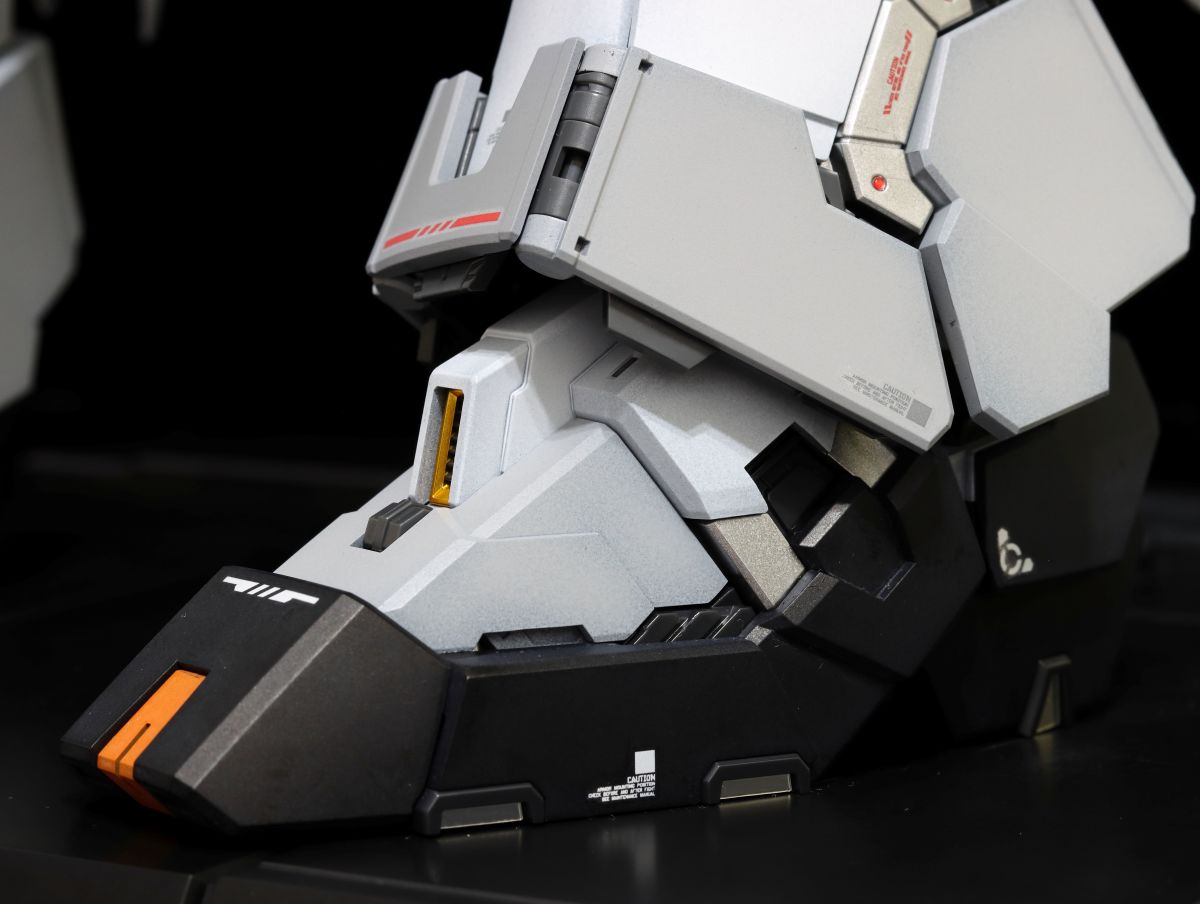
The armor-opening gimmick here is very generous, with over ten deployment mechanisms on one leg alone.
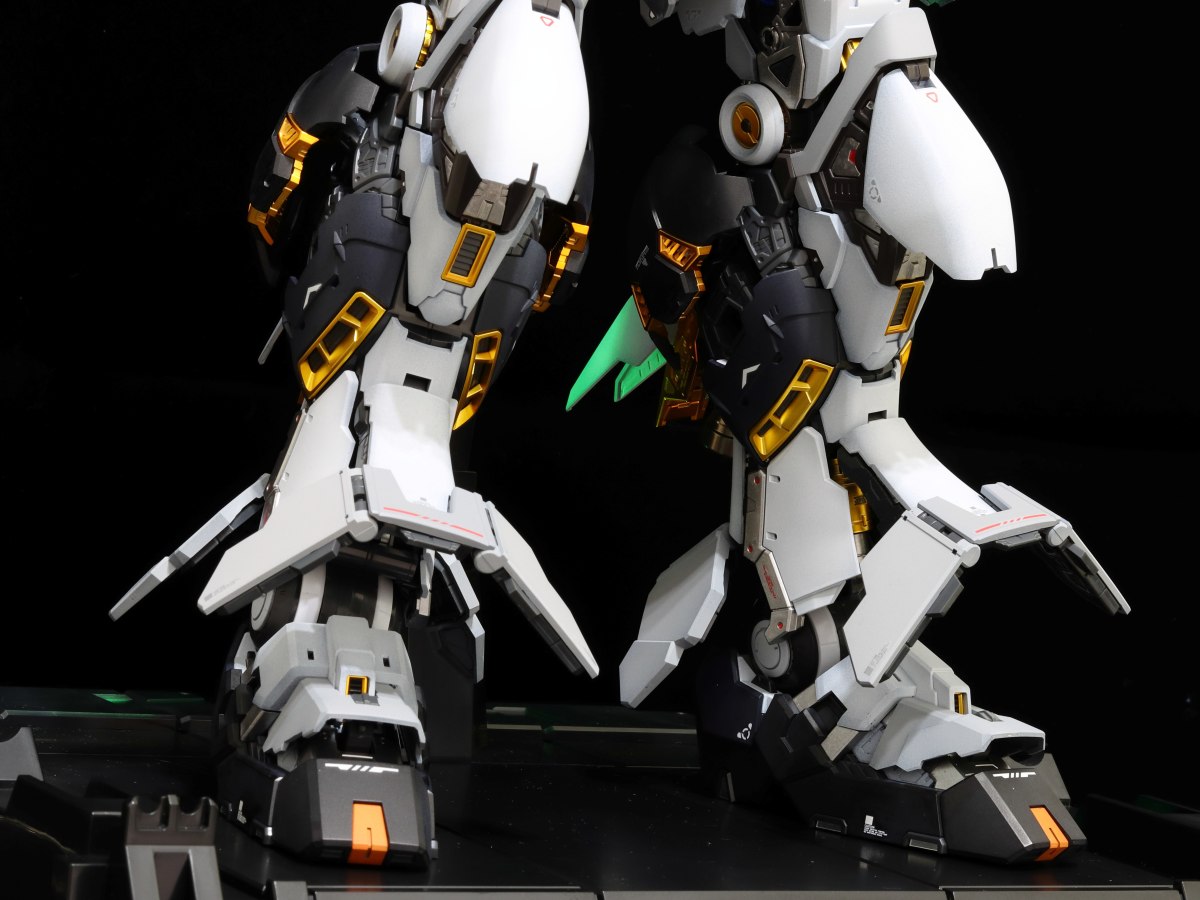
Most of the spectacular inner frame can be seen in full view. However, the paint layer has thickened the parts, making the latches extremely tight. Opening them is somewhat nerve-wracking. I'll probably just keep it in one state from now on and not dare to handle it too often.
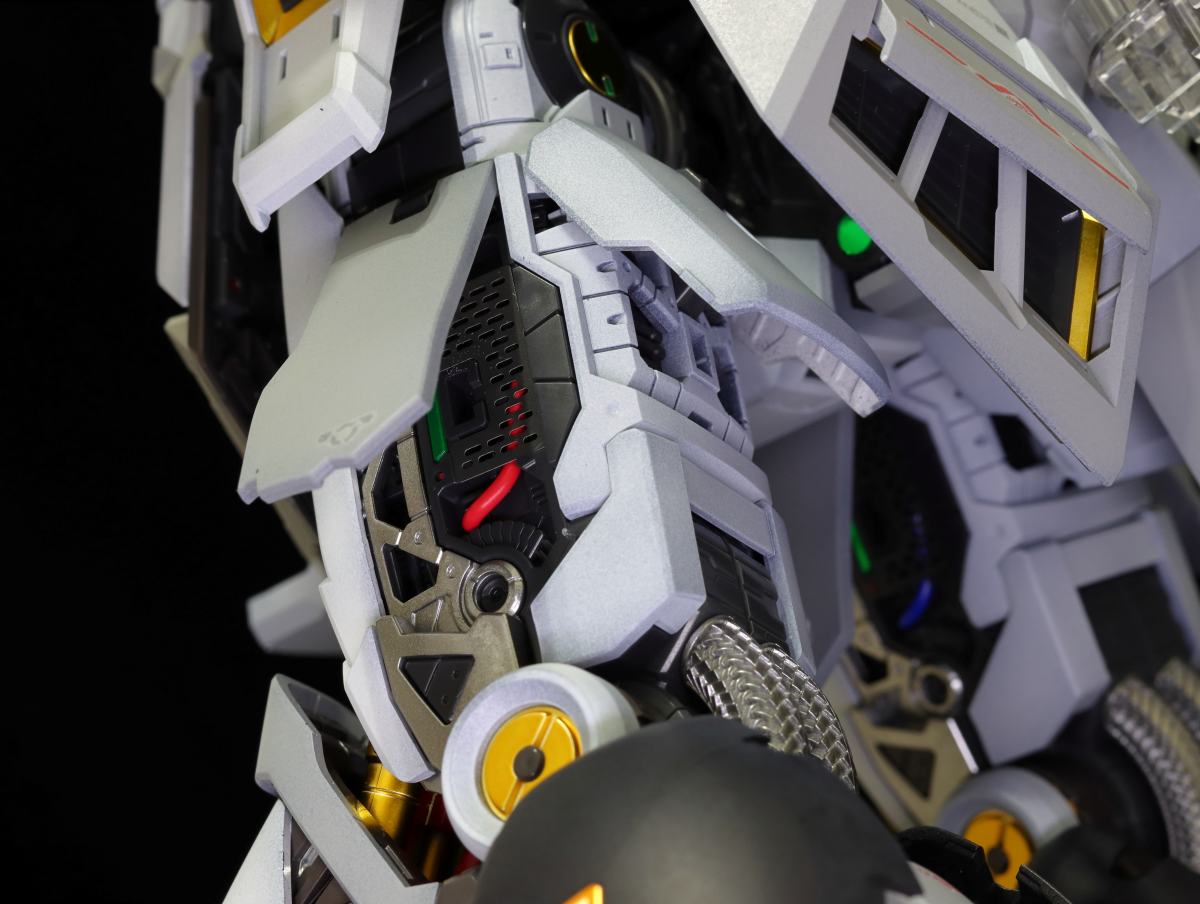
Like a great white goose spreading its wings, the calf armor blossoms to reveal its hidden, shining interior.
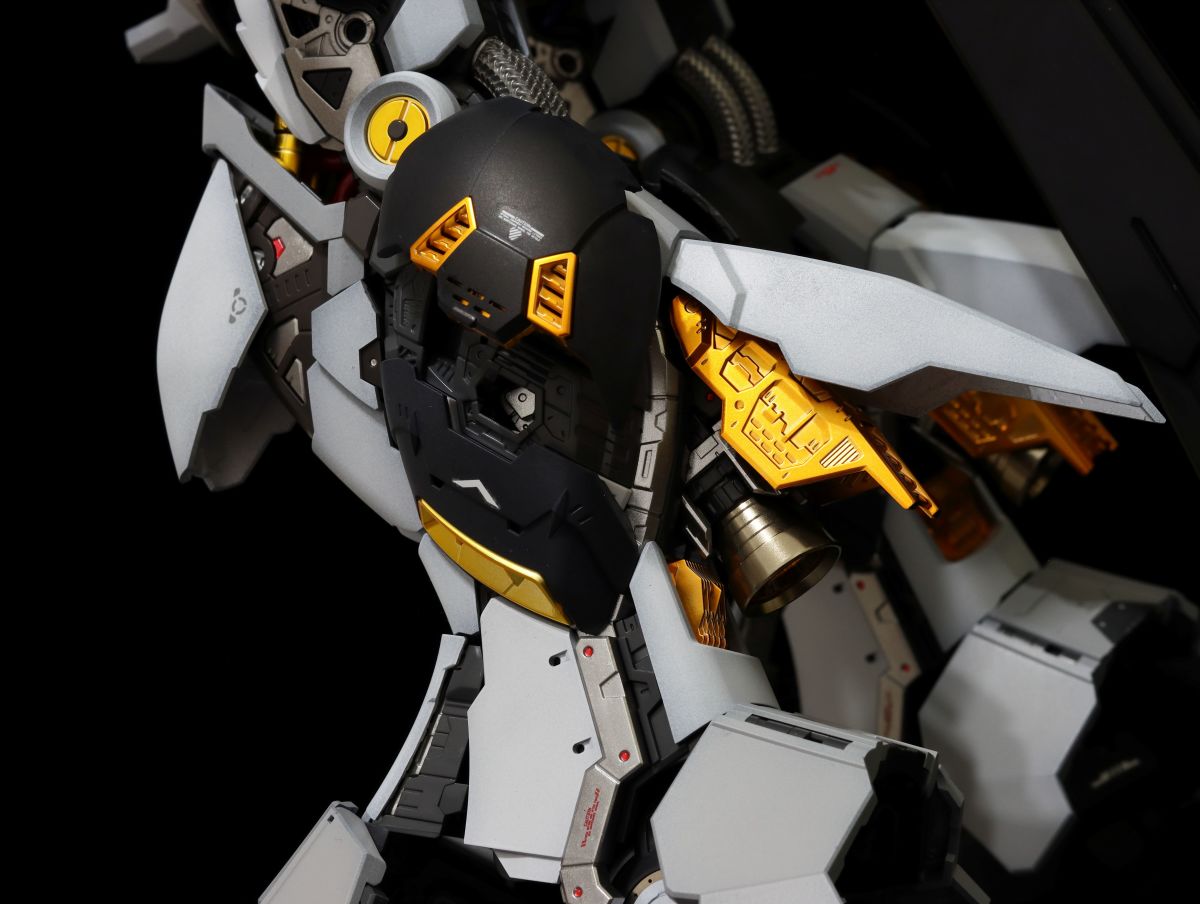
That concludes this brief review of the outer armor. Next, let's showcase the full view of the ν Gundam with its armor deployed.

Like a blooming flower, the breathtaking maintenance mode.

I'm not sure if it's just my imagination, but the head seems to have a subtle hint of the PG RX-178 Mk.II's aesthetic. Additionally, you can see that the interior of the head armor actually hides even more detailed sculpting. A clear armor version is surely just around the corner.
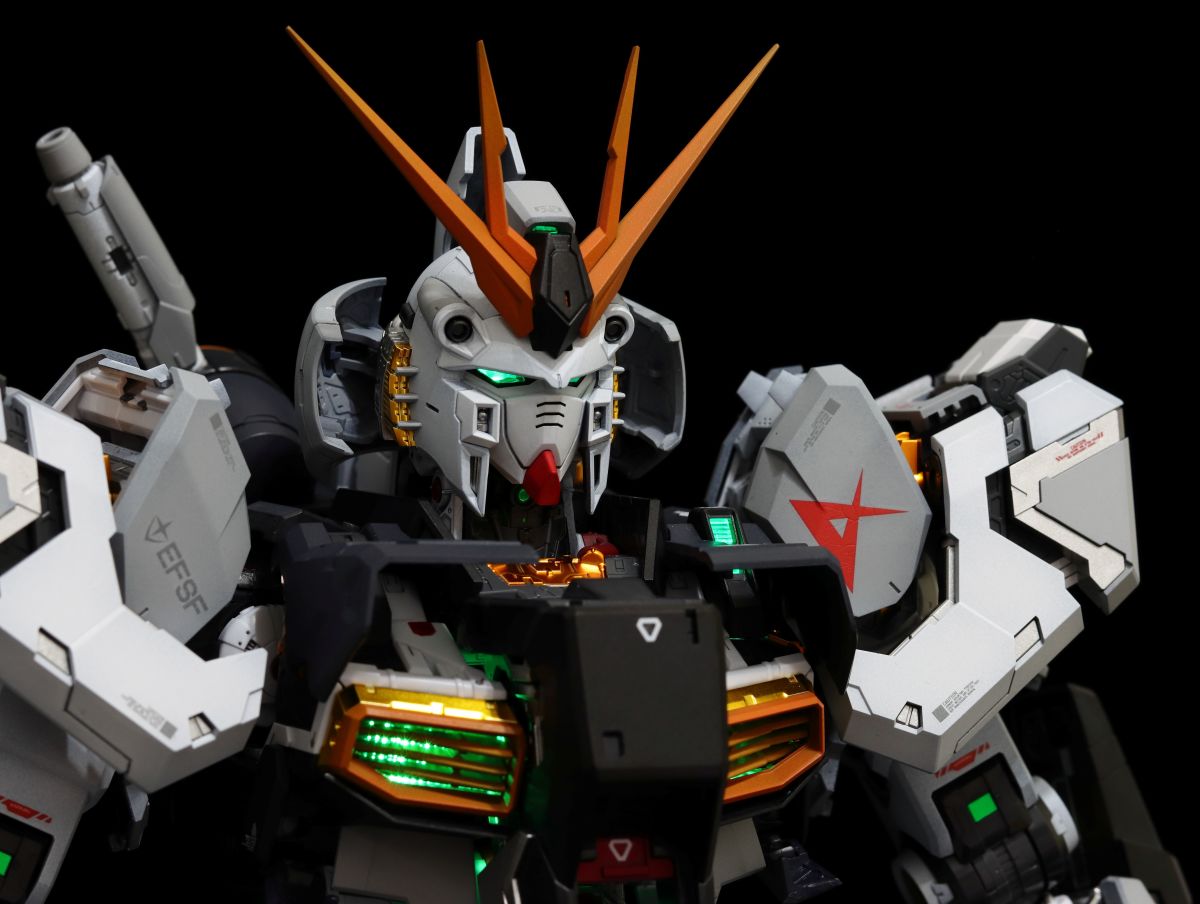
This brings the construction of the PGU ν Gundam main body to a close for now. This was my first time tackling a PG-grade model. Although I chose to only paint the outer armor for future playability (wasn't it because I was lazy?), the workload was still substantial for someone like me who rarely paints Gundam-type models. The process was a continuous journey of exploration and learning from mistakes. I hope the final stage of weapon construction can be completed smoothly and successfully.
As long as you're prepared, the Grim Reaper won't come for you.
Hathaway...