

Happy New Year, everyone!
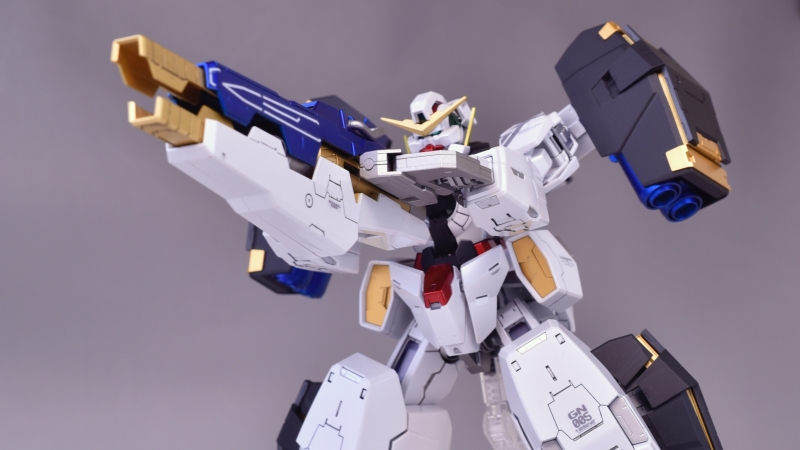
I managed to intermittently complete this Gundam Virtue during the nine-day holiday break. I originally planned to work on Kotobukiya's Megami Device Asra Susanoo, but the delivery was delayed until after the Lunar New Year, so I decided to start on the Gundam Virtue instead.
Since I had ample time for this build, I'm sharing a full build log with all of you. With its armor on, this Gundam Virtue has virtually no articulation, haha! However, once the armor is removed, the articulation is quite good, meeting the standard expected from an MG kit.
Overall, I was deeply captivated by the Full Burst mode depicted on the box art. While its articulation isn't great before the armor purge, it looks incredibly imposing and cool when posed!
Here's the full build log for this project.
▼Video Version
▼For this build, I added some small details to the legs.

▼I used WAVE detailing parts for the embellishments.

▼These option parts are very useful; I bought a bunch of them back then and kept them aside. I rediscovered them during my Lunar New Year cleaning and decided to put them to good use.


▼I simply inserted the option parts into the small holes to enhance the detail.


▼Inner frame completed


▼The head crest features a metallic paint finish.


▼For this build, I primarily used the following colors for painting:
1. For the red sections, I layered primary red to create a metallic red finish.
2. The blue parts were layered with primary blue, then combined with clear black and a flat clear coat to achieve a metallic flat blue. A thin layer of clear black was also applied.
3. The yellow sections primarily utilized two colors: GAIA 122 and GAIA 124.
4. The inner frame parts were painted with GAIA 125.
5. The main color for the outer armor's internal details was GAIA EX-07.
6. For the weapon's silver, I used the discontinued GAIA Realistic Silver. This paint is unique because it contains iron powder. After painting, you can sand it with 600-grit sandpaper to create scuff marks. Then, place the parts in water, and after a few days, take them out without drying them. After some time, you'll discover... the parts have rusted, haha!

▼The image below showcases the weapon's paint scheme.


▼The outer armor parts of this kit featured many intricate internal structural details.


▼For the blue sections, I specifically used a metallic flat blue combined with clear black for painting. I might have sprayed a bit too much black this time, but the final result still achieved the look I was aiming for.


That concludes this build log; I hope you all enjoyed it.
After assembly, with the armor on, it pretty much just stands there like a gate guardian, with virtually no articulation. There are pre-orders for Full Burst mode display stands online; I might consider getting one, after all... the Full Burst mode is truly this kit's main selling point!
For more detailed build steps and painting techniques, you can watch the video. My next project will likely be my very first Megami Device kit!
See you in the next project~ Happy New Year everyone.
▼Action shots with virtually no action, haha!


Also published on my blog
You can view more model kits and toys here. The Model History Outline is updated concurrently.